Picture this: I’m standing in a kitchen that smells like burnt toast, the kind of disaster that makes you question every recipe you’ve ever trusted. I had just tried to make a simple orange dessert, and the result was a soggy, bitter mess that could have been served at a funeral. I was about to throw the oranges away when a friend dared me to turn that mess into something spectacular. I laughed, grabbed my whisk, and the kitchen suddenly felt like a laboratory where I could experiment with flavors.
When the first orange peel hit the pan, the citrus aroma exploded, turning the air into a bright, zesty perfume that made me forget the burnt toast memory. The sound of the syrup bubbling was a comforting, rhythmic hiss, like a calm ocean wave. The heat from the stove kissed my fingers, giving a gentle warmth that felt like a hug from an old friend. The taste of the first bite was a burst of sweet and tart, the orange’s natural sugar dancing with the dark chocolate’s deep bitterness. The texture was a satisfying snap of citrus against a glossy, silky chocolate coating.
What makes this version stand out is that it doesn’t rely on complicated techniques or obscure ingredients. I’ve stripped the process down to its core elements: orange zest, a simple syrup, and high‑quality dark chocolate. The result is a dessert that feels indulgent yet light, perfect for both casual snacking and impressing guests at a dinner party. The method is so straightforward that even a novice can master it, while the flavor profile will leave seasoned chefs nodding in approval. I dare you to taste this and not go back for seconds.
Imagine pulling a tray of these chocolate‑coated orange peels from the fridge, the glossy coating reflecting the kitchen light like tiny moons. The contrast between the bright orange peel and the deep chocolate creates a visual feast that makes you want to dig in before you even see the first bite. Picture the moment the chocolate cracks as you bite, releasing a sweet citrus burst that lingers on your palate. That is the kind of sensory experience that turns a simple dessert into a memorable moment. Stay with me here — this is worth it.
By the end of this article, you’ll wonder how you ever made it any other way. I’ll walk you through every single step, revealing the tricks that elevate a basic recipe into a show‑stopping treat. Let’s dive into the details, and I promise you’ll leave the kitchen feeling like a culinary wizard.
What Makes This Version Stand Out
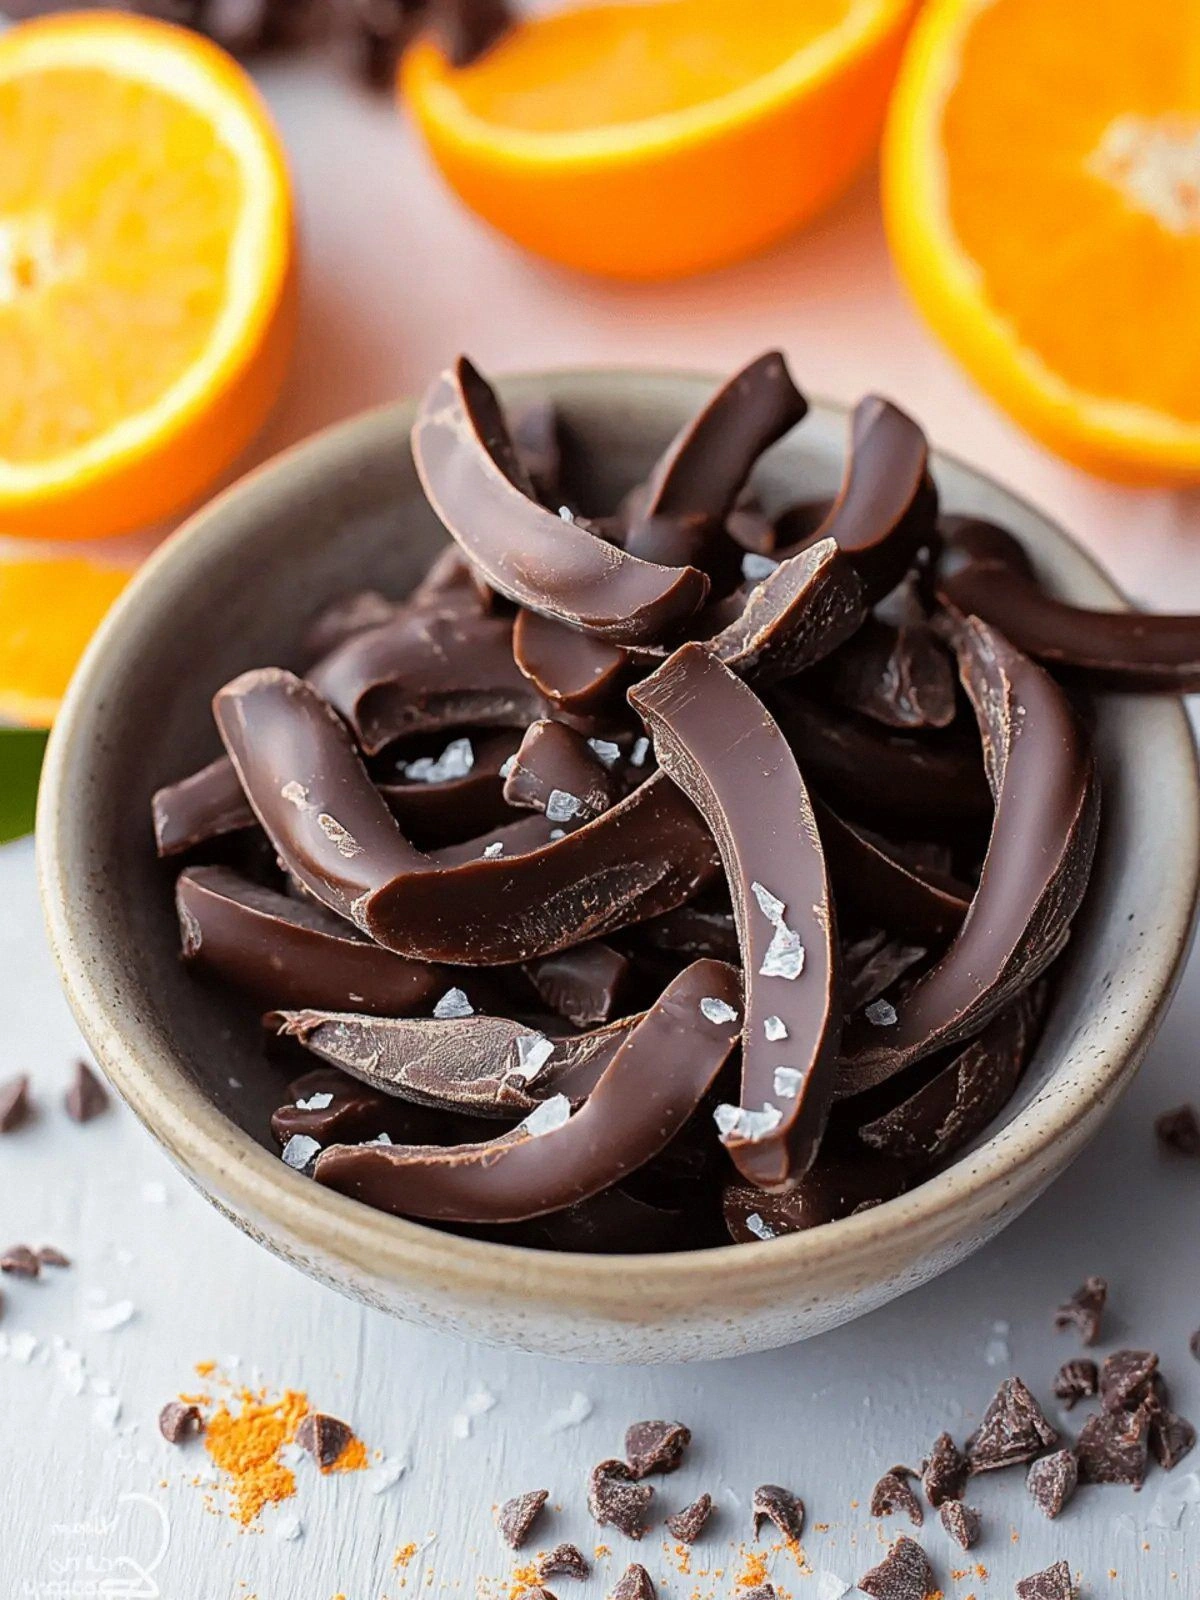
- Flavor: The bright citrus of fresh orange peels is amplified by the deep, bittersweet notes of 70% dark chocolate, creating a balanced sweet‑savory profile that lingers on the tongue.
- Texture: The crisp peel offers a satisfying snap, while the chocolate forms a glossy, silky coating that melts smoothly, delivering a delightful contrast in every bite.
- Simultaneous Simplicity: No fancy equipment, no obscure ingredients—just oranges, water, sugar, and chocolate—yet the result feels sophisticated.
- Ingredient Quality: Using a high‑quality dark chocolate with 70% cocoa ensures a rich flavor that doesn’t overpower the citrus, while the oranges should be organic for the best zest.
- Make‑ahead Potential: Once dipped and set, these treats can be stored in the fridge or freezer, making them a perfect pre‑prepared dessert for busy days.
- Crowd Reaction: Guests often remark that the chocolate coating feels like a secret treasure, and the citrus punch keeps them coming back for more.
- Visual Appeal: The glossy chocolate sheen against the vibrant orange creates an Instagram‑ready presentation that will impress even the most discerning foodie.
Inside the Ingredient List
The Flavor Base
Oranges are the heart of this dessert. Their bright, zesty peel carries a natural sweetness that pairs beautifully with chocolate. If you skip the peels, you lose the essential citrus punch that keeps the chocolate from feeling too heavy. When selecting oranges, look for ones that feel firm and have a bright, fragrant aroma—organic varieties often have a richer zest. A good tip: use a mandoline or a sharp knife to slice the peel into uniform strips for even coating.
The Sweetness Engine
Sugar is the glue that binds the orange peel and chocolate together. It dissolves into a syrup that softens the peel and creates a glossy finish. Removing too much sugar can result in a dry, brittle coating, while too much can make it overly sweet and sticky. If you’re watching your sugar intake, a 50% reduction can work, but you’ll need to add a splash of honey or agave syrup to compensate for the loss of viscosity. Always dissolve the sugar in boiling water before adding the peels.
The Liquid Backbone
Water is the solvent that dissolves the sugar and helps the orange peel soften. It also prevents the sugar from crystallizing on the peel’s surface. Using filtered or bottled water can avoid any mineral taste that might interfere with the citrus notes. If you’re in a hard‑water area, consider using distilled water to keep the flavor pure. The ratio of water to sugar is crucial—too little water will leave the syrup too thick, too much will dilute the orange flavor.
The Velvet Finisher
Dark chocolate is the crowning glory. Its deep, slightly bitter profile balances the sweet orange peel, and the 70% cocoa content ensures a smooth melt without a chocolatey aftertaste. A higher cocoa percentage can make the coating too bitter, while a lower percentage may make it too sweet. When melting chocolate, use a double boiler or a heat‑proof bowl over a pot of simmering water to avoid scorching. A small pinch of sea salt can enhance the chocolate’s richness and bring out the citrus’s brightness.
Everything's prepped? Good. Let's get into the real action.
The Method — Step by Step
- First, wash the oranges thoroughly and pat them dry. Using a vegetable peeler, remove the outer zest, ensuring you keep the white pith to a minimum to avoid bitterness. Slice the zest into thin, even strips, about 1–2 mm thick. This uniformity ensures each piece gets an even coating of chocolate. Keep the strips aside on a clean cutting board.
- In a medium saucepan, combine the water and sugar. Bring the mixture to a gentle boil, stirring until the sugar has completely dissolved. Let the syrup simmer for 2–3 minutes; it should be slightly thickened but still pourable. This step is crucial for the final texture—too thin and the coating will be weak, too thick and it will be sticky. Keep a small bowl of cold water nearby for the next step.
- Add the orange zest strips to the syrup. Reduce the heat to low and let them simmer for 5 minutes, stirring occasionally. The peels should soften just enough to become pliable but still hold their shape. The aroma of orange and sugar will fill the kitchen, creating a mouthwatering prelude. Once the peels are cooked, remove the saucepan from the heat and let it cool for a minute.
- While the peels are cooling, set up a double boiler for the chocolate. Fill a small pot with about an inch of water and bring it to a simmer. Place a heat‑proof bowl on top, making sure it doesn’t touch the water. Break the chocolate into small pieces and add them to the bowl. Stir continuously until the chocolate is completely melted and silky.
- Watch Out: If the chocolate begins to seize or look grainy, immediately remove the bowl from the heat and add a teaspoon of cold water or a splash of heavy cream. This will smooth the mixture back into a glossy finish. The key is to keep the temperature below 45°C to preserve the chocolate’s natural sheen.
- Dip each orange strip into the melted chocolate, using a fork to lift and swirl it around. Let any excess chocolate drip back into the bowl before placing the coated peel onto a parchment‑lined tray. The coating should be thick enough to hold its shape but thin enough to reveal the orange underneath. This step is the moment of truth—watch the chocolate set into a glossy shell.
- Once all strips are coated, let them sit at room temperature for 10–15 minutes, or until the chocolate has fully set. The aroma will intensify, and the chocolate will develop a subtle shine. If you’re in a hurry, you can place the tray in a cold room or a refrigerator for 5 minutes, but be careful not to over‑cool, as the chocolate may become dull.
- Optional: For a touch of sophistication, sprinkle a pinch of flaky sea salt over the set chocolate. The salt’s briny notes cut through the sweetness and highlight the citrus’s brightness. This small addition transforms a simple dessert into a gourmet experience. The salt should be added just before serving to preserve its crunch.
- Store the finished treats in an airtight container at room temperature for up to 3 days, or refrigerate for up to a week. If you refrigerate, let them come to room temperature before serving to restore the chocolate’s glossy finish. For longer storage, place the treats in a freezer‑safe bag and freeze for up to 3 months. Thaw slowly in the refrigerator before serving.
- Serve the chocolate‑coated orange peels on a platter or individually wrapped for a quick, elegant snack. Pair them with a glass of chilled sparkling wine or a bold coffee for a balanced flavor experience. Each bite offers a burst of citrus, followed by the silky melt of chocolate, and a subtle hint of salt if you added it. Enjoy the moment of indulgence, and remember that this dessert is as easy to make as it is delightful.
Insider Tricks for Flawless Results
The Temperature Rule Nobody Follows
Chocolate is a temperamental material that can easily seize if overheated. The trick is to keep the melting temperature under 45°C. Use a kitchen thermometer to monitor the chocolate’s heat; a quick dip of your finger in the bowl should feel warm, not hot. Once the chocolate is fully melted, let it cool slightly before dipping the orange strips. This subtle cooling step prevents the chocolate from becoming too thin and losing its glossy sheen. I’ve seen too many recipes overlook this, resulting in a dull, uneven coating.
Why Your Nose Knows Best
Before you dip the orange strips, give the syrup a quick sniff. If it smells like burnt sugar, you’re over‑cooking it. The right aroma is a sweet, caramelized citrus note that signals the syrup is perfectly balanced. Your nose is a reliable guide—if it feels off, adjust the heat or add a splash of water to thin the syrup. This sensory check is often overlooked but can save you from a bitter dessert.
The 5-Minute Rest That Changes Everything
After dipping, let the chocolate set for a brief 5‑minute rest before moving the tray. This short pause allows the chocolate to firm up slightly, making it easier to handle and preventing the coating from sliding off. A friend once rushed this step and ended up with a tray full of melted chocolate. That 5 minutes saved the day and kept the presentation pristine.
Avoiding the Sugar Crystallization
When making the syrup, add the sugar to boiling water and stir until it dissolves. Avoid stirring the syrup after it reaches a full boil; agitation can cause sugar crystals to form on the surface. If crystals do appear, let the syrup sit for a few minutes to allow them to dissolve naturally. This simple pause keeps the coating smooth and prevents a gritty texture.
Chocolate’s Secret Moisture
Adding a teaspoon of heavy cream to the melted chocolate can enhance its mouthfeel, making it silkier and easier to coat. The cream also helps stabilize the chocolate, preventing it from becoming too thick. If you’re vegan, substitute with a splash of coconut milk for a subtle coconut note that complements the citrus. This tweak is optional but highly recommended for the ultimate silky finish.
Creative Twists and Variations
Citrus Spice Twist
Infuse the syrup with a pinch of ground cinnamon or a few cloves during the simmering stage. The warm spice adds depth and complexity, turning the dessert into a fragrant, autumnal treat. This variation works beautifully when paired with a glass of spiced red wine.
Minty Freshness
Add a handful of fresh mint leaves to the syrup for a refreshing green undertone. The mint’s coolness balances the sweetness and adds an aromatic layer that makes the dessert feel lighter. This is a perfect addition for summer gatherings.
Nutty Crunch
Sprinkle toasted almond slivers over the set chocolate for a crunchy texture and nutty flavor. The almonds add a pleasant bite that contrasts with the smooth chocolate. This version is especially appealing to those who enjoy a bit of protein in their desserts.
Coffee Infusion
Stir a teaspoon of finely ground espresso into the melted chocolate before dipping. The coffee’s bitterness pairs wonderfully with the orange’s brightness, creating a sophisticated flavor profile. This twist is ideal for coffee lovers and pairs well with a dessert wine.
Sea Salt Surprise
Finish the treats with a generous dusting of flaky sea salt right before serving. The briny crunch amplifies the chocolate’s richness and the orange’s zest, turning the dessert into a gourmet experience. The salt also helps balance the sweetness, making each bite more balanced.
Berry Delight
Serve the chocolate‑coated orange peels alongside fresh berries such as raspberries or blueberries. The berries’ tartness complements the citrus and chocolate, creating a harmonious medley of flavors. This pairing is a crowd‑pleaser for brunch or a light dessert.
Storing and Bringing It Back to Life
Fridge Storage
Place the finished treats in an airtight container and store them in the refrigerator for up to three days. The cool environment keeps the chocolate firm while preserving the citrus flavor. When you’re ready to serve, let the pieces sit at room temperature for a few minutes to restore the chocolate’s glossy finish.
Freezer Friendly
For longer storage, wrap each coated orange peel individually in parchment paper and place them in a freezer‑safe bag. Freeze for up to three months. Thaw in the refrigerator overnight, then bring to room temperature before serving to maintain the texture and sheen.
Best Reheating Method
If the chocolate has become too hard after refrigeration, gently warm the treats in a microwave on 30‑second intervals, checking frequently. Alternatively, place the tray in a warm oven (about 60°C) for a minute or two. Adding a tiny splash of water before reheating creates steam that helps the chocolate soften without losing its shine.