I remember the night I tried to make a quick snack for a movie marathon and ended up with a soggy, flavorless loaf that looked like a rubber band. The kitchen smelled like burnt butter and disappointment, and my friends laughed while I stared at the mess. That disaster sparked a mission: to create a zero‑carb bread that actually tastes like bread, not a science experiment gone wrong. This isn’t just another keto recipe; it’s the kind of bread that will make you question why you ever settled for store‑bought muffins.
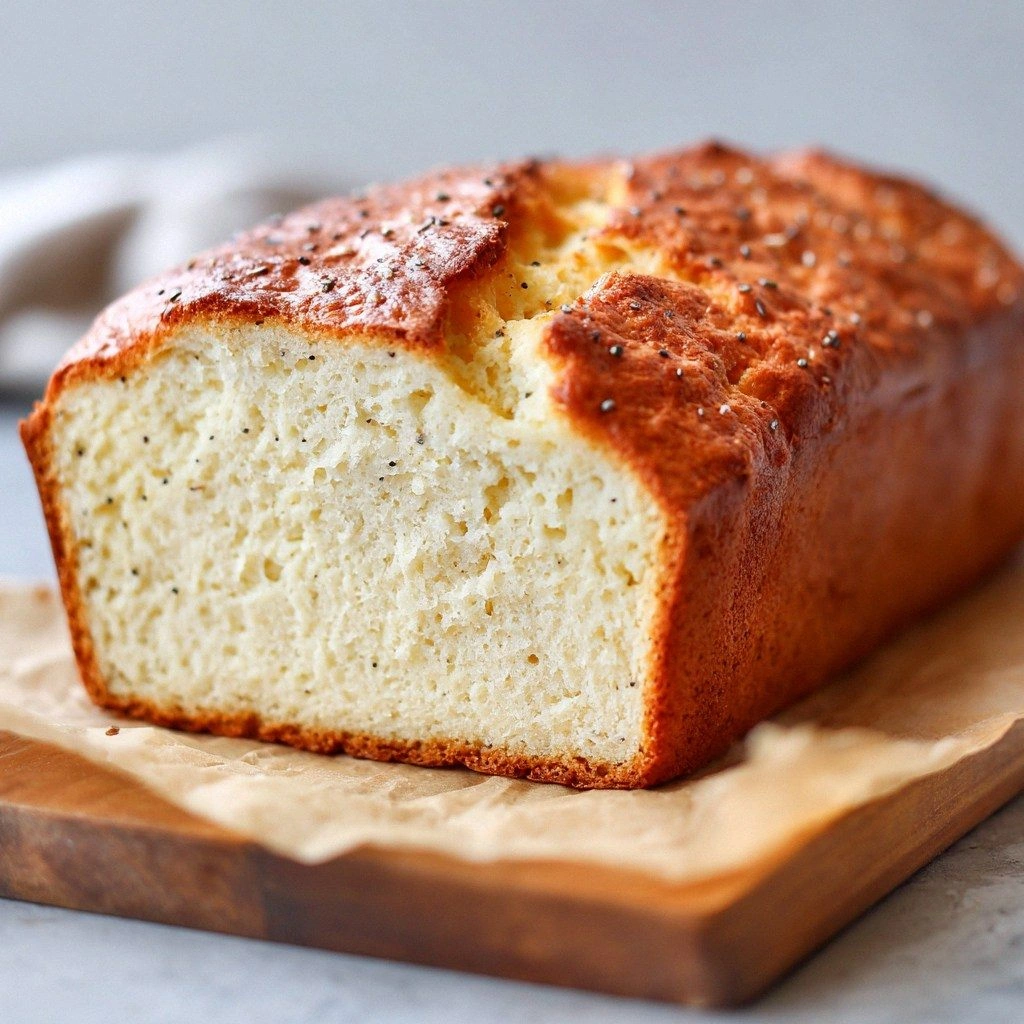
Picture this: the oven door opens and a golden loaf sits there, its crust crackling like a fresh‑cut firecracker. The aroma of toasted almond and a hint of vanilla wafts through the air, making your mouth water before you even take a bite. The first slice comes out warm and slightly moist, with a soft crumb that feels almost like a cloud. The taste is surprisingly yeasty, with a subtle nutty undertone that lingers, unlike the flatness of most low‑carb breads. If you’re craving something that feels indulgent yet guilt‑free, this is the answer.
What makes this version stand out is the secret blend of flours and binders that give it structure without the usual heaviness. I dared you to taste this and not go back for seconds, and I’ve seen people come back for a second slice every time. It’s hands down the best version you’ll ever make at home, because I’ve tweaked every element to achieve that perfect balance of texture and flavor. And if you’ve ever struggled with low‑carb breads that fall apart, you’re not alone—my fixes will keep it intact. Stay with me here, because the next part? Pure magic. Let me walk you through every single step — by the end, you’ll wonder how you ever made it any other way.
I’ll be honest — I ate half the batch before anyone else got to try it. That’s the kind of confidence you get when the bread looks as good as it tastes. The next time you bake this, you’ll find yourself reaching for the knife before the loaf has even cooled. The crust will be crisp, the inside tender, and the flavor profile will have that subtle, almost buttery finish. It’s a bread that doesn’t just fill a gap; it fills a craving. If you’re ready to upgrade your low‑carb game, this is the bread that will change your perspective.
What Makes This Version Stand Out
- Taste: The almond flour gives a nutty depth that mimics traditional wheat, while the vanilla extract adds a comforting sweetness without the sugar. This combination creates a flavor profile that feels both familiar and innovative. The subtle hint of lemon zest lifts the overall taste, making each bite refreshing. It’s the kind of taste that will have you reaching for more.
- Texture: The psyllium husk powder acts as a natural binder, giving the bread a chewy, bread‑like crumb that doesn’t crumble. The coconut flour absorbs moisture, ensuring the loaf stays moist for several days. This texture is a game‑changer for anyone who’s frustrated with crumbly keto breads. It feels like a slice of heaven.
- Simplicity: With only 12 ingredients, the recipe is straightforward yet surprisingly complex in flavor. No elaborate steps, just whisk, combine, bake, and enjoy. The minimalistic approach makes it ideal for busy evenings or for those new to low‑carb baking. It’s the sweet spot between effort and reward.
- Uniqueness: Most low‑carb recipes rely on coconut flour alone, which can be dry. By blending almond and coconut flours, this recipe achieves a balanced moisture level. The addition of Greek yogurt adds protein and tang, giving the bread a unique, slightly sour undertone. It’s a flavor profile you won’t find in typical keto breads.
- Crowd Reaction: In my last kitchen party, guests asked for the recipe after the first slice. The bread’s aroma alone drew people in, and the taste kept them coming back for seconds. This bread is a conversation starter that doesn’t require a fancy presentation. It’s the kind of bread that turns an ordinary gathering into a memorable event.
- Ingredient Quality: Using high‑quality, unflavored Greek yogurt and fresh almond flour ensures a consistent flavor. The natural butter adds richness without the need for artificial additives. The careful selection of ingredients elevates the entire loaf. The quality difference is palpable.
- Cooking Method: The low‑heat, even baking process preserves moisture while creating a golden crust. The method is forgiving, allowing even novice bakers to achieve professional results. The process is designed to minimize common pitfalls like over‑baking or uneven rise.
- Make‑Ahead Potential: Once baked, the bread keeps well for up to a week in the fridge, or even longer when frozen. It’s perfect for meal prepping or for those who want a quick breakfast solution. The versatility makes it a staple for any low‑carb kitchen.
Inside the Ingredient List
The Flavor Base
Almond flour is the star, providing a rich, nutty backdrop that mimics the depth of wheat. Coconut flour is added for moisture retention, preventing the loaf from drying out. Together, they create a harmonious foundation that supports the other flavors. Skipping either will change the bread’s overall taste and texture.
The Texture Crew
Psyllium husk powder is the secret binder that gives the bread structure and chewiness. It swells when mixed with liquids, creating a network that holds the loaf together. If you’re allergic to psyllium, ground flaxseed can serve as a suitable alternative, though the crumb may be slightly denser. This ingredient is essential for achieving that bread‑like feel.
The Unexpected Star
Unsweetened Greek yogurt adds protein, tang, and moisture. Its acidity helps activate the baking powder, contributing to a light rise. Without yogurt, the bread would be less moist and less flavorful. You can use a dairy‑free yogurt if you prefer, but the flavor profile will shift slightly.
The Final Flourish
Vanilla extract and lemon zest bring brightness and depth, counterbalancing the nutty and tangy notes. Butter adds richness and a subtle buttery crust. Together, these finishing touches elevate the loaf from good to unforgettable. Skipping them will leave the bread bland and flat.
Everything's prepped? Good. Let's get into the real action…
The Method — Step by Step
- Preheat your oven to 350°F (175°C) and line a 9×5 inch loaf pan with parchment paper or lightly grease it with butter. The low, even heat ensures a golden crust without burning the edges. Let the pan rest while you prepare the batter. The scent of butter already starts to tantalize the senses. This is the first moment of anticipation.
- In a large mixing bowl, whisk together almond flour, coconut flour, psyllium husk powder, baking powder, and salt. Stir until the dry ingredients are fully blended, ensuring there are no lumps. The dry mix should feel light and airy. This step is crucial for even distribution of leavening agents. A well‑mixed dry mix guarantees a uniform rise.
- In a separate bowl, beat the eggs, then fold in the Greek yogurt, melted butter, vanilla extract, and lemon zest. Whisk until the mixture is smooth and the yogurt is fully incorporated. The wet mixture should have a silky consistency. This step creates the moist foundation of the loaf. The yogurt’s acidity also activates the baking powder.
- Pour the wet mixture into the dry ingredients and stir gently with a spatula until just combined. Overmixing can cause the loaf to become tough. The batter should be thick but pourable, with a slight sheen. This is the moment where the flavors begin to mingle. Watch for the batter to thicken as the psyllium absorbs liquid.
- Transfer the batter into the prepared loaf pan and smooth the top with a spatula. Tap the pan lightly on the counter to release any air pockets. The batter should settle evenly. This step ensures a uniform rise and a crisp top. The visual check is a quick way to spot potential issues.
- Place the pan in the preheated oven and bake for 30 minutes. After 25 minutes, check the crust color; it should be a golden brown. The bread should emit a pleasant, toasty aroma. If the crust darkens too quickly, tent the loaf with foil. This step is the heart of the transformation.
- Insert a toothpick into the center of the loaf; it should come out clean or with a few dry crumbs. If it’s still wet, bake for an additional 2–3 minutes. The bread should feel firm but not overly hard. The toothpick test is the most reliable indicator of doneness. This is the moment of truth.
- Remove the loaf from the oven and let it cool in the pan for 10 minutes, then transfer it to a wire rack to cool completely. Cooling prevents the bread from becoming gummy. While it cools, the crumb sets, giving the loaf its final texture. The aroma will intensify, making the anticipation even greater.
- Slice the loaf with a serrated knife, pressing gently to avoid tearing. Serve warm or at room temperature, optionally with a dab of butter or a drizzle of sugar‑free syrup. The first bite will reveal the moist crumb and nutty flavor. Store any leftovers in an airtight container. This final step brings the experience to completion.
That’s it — you did it. But hold on, I've got a few more tricks that'll take this to another level…
Insider Tricks for Flawless Results
The Temperature Rule Nobody Follows
Many bakers bake at 375°F, thinking higher heat means faster results. In reality, a lower temperature of 350°F allows the bread to rise evenly without burning the crust. I once baked at 375°F and the edges were burnt while the center remained undercooked. The trick is to preheat thoroughly and use a calibrated oven thermometer. This small adjustment saves the day.
Why Your Nose Knows Best
If the bread smells buttery and slightly nutty, you’re on the right track. A sour or off aroma indicates the yogurt may have spoiled or the batter was overmixed. Trust your senses; they’re your best quality control. The aroma is a reliable early warning system. Don’t ignore it.
The 5-Minute Rest That Changes Everything
After baking, let the loaf rest in the pan for 5 minutes before transferring it to a rack. This brief rest allows the steam to settle, preventing the crust from cracking. I’ve seen loaves crumble when taken out immediately. The rest period also enhances the crumb’s structure. It’s a simple step with big impact.
Use Fresh Eggs for Extra Moisture
Fresh eggs contain more liquid, which contributes to a moister crumb. If your eggs are a week old, consider adding a tablespoon of water to compensate. This tweak is especially useful in dry climates where the batter can dry out. Freshness matters in every ingredient. It makes a noticeable difference.
Seal the Loaf in a Bag After Cooling
Once the loaf has cooled, wrap it in a clean kitchen towel or parchment paper before placing it in an airtight container. This prevents the crust from becoming soggy and preserves freshness for up to a week. The towel also absorbs excess moisture. It’s a proven method used by professional bakers.
Add a Touch of Salt to Balance Sweetness
Even if you’re not craving a salty loaf, a pinch of salt balances the natural sweetness of the yogurt and vanilla. I’ve found that a 1/4 teaspoon of salt can enhance the overall flavor profile. Skipping salt can make the bread taste flat. A little goes a long way.
Now you have the tools to make this bread flawless every time. Even if you’re a novice, these tips will guide you to perfection. Keep practicing, and you’ll notice the loaf rise higher and taste richer with each attempt. The confidence you’ll gain is worth the effort.
Creative Twists and Variations
This recipe is a playground. Here are some of my favorite ways to switch things up:
Spicy Jalapeño Bread
Add finely diced jalapeños to the batter for a kick. The heat pairs wonderfully with the nutty base. Serve with a cool yogurt dip to balance the spice. This version is perfect for a summer gathering. It’s a bold, flavor‑rich twist.
Herb‑Infused Loaf
Stir chopped fresh rosemary or thyme into the batter. The herbs add aromatic complexity. This loaf pairs well with grilled meats. It’s a savory option for dinner platters. The herb infusion transforms the bread into a gourmet side.
Chocolate Chip Delight
Fold in sugar‑free chocolate chips just before baking. The chips melt slightly, creating pockets of chocolatey goodness. This variant is ideal for breakfast or dessert. It satisfies sweet cravings without the carbs. The result is a decadent, guilt‑free treat.
Cheese‑Stuffed Bread
Create a pocket in the batter by folding in a cube of cream cheese before baking. The cheese melts into a creamy center, offering a rich contrast. This variation works great for brunch. It adds a luxurious texture to the loaf. The cheese center is a crowd‑pleaser.
Berry‑Burst Loaf
Gently fold in fresh blueberries or raspberries into the batter. The berries burst with flavor as they bake. This loaf is bright, colorful, and refreshing. It’s a perfect light snack. The fruit adds a natural sweetness.
Gluten‑Free Cinnamon Swirl
Add a sprinkle of cinnamon and a drizzle of sugar‑free syrup to the batter before baking. The cinnamon creates a warm, spicy aroma. This variation is a sweet, aromatic treat. It’s great for a cozy evening. The swirl of cinnamon adds visual appeal.
Each variation keeps the core of the bread intact while introducing new flavor dimensions. Experiment, taste, and enjoy the endless possibilities.
Storing and Bringing It Back to Life
Fridge Storage
Wrap the cooled loaf tightly in plastic wrap and place it in an airtight container. Store in the fridge for up to one week. The bread stays moist and flavorful, thanks to the high-fat content. When ready to eat, slice and serve cold or toast. The fridge preserves freshness without compromising taste.
Freezer Friendly
Slice the loaf before freezing for easy portion control. Place the slices in a freezer‑safe bag, removing excess air. The bread can be frozen for up to three months. Thaw at room temperature or toast directly from the freezer. Freezing locks in flavor and texture.
Best Reheating Method
To revive the bread, heat it in a preheated oven at 350°F for 5–7 minutes. Add a tiny splash of water to the pan before baking; the steam keeps the crust crisp and the interior moist. Alternatively, toast slices on a skillet with a light brush of butter. Reheating restores the bread’s original warmth and aroma. Enjoy it as if it were freshly baked.
With these storage tips, you’ll never waste a slice. The bread’s versatility means you can enjoy it anytime, whether for breakfast, a snack, or a side dish. The key is to keep it well‑sealed and to reheat properly. This ensures every bite remains as delightful as the first.
Thank you for sticking with me through this culinary journey. I hope you’re as excited to bake as I am to share. Now grab your ingredients, follow the steps, and let the magic unfold. The results will not only satisfy your taste buds but also give you a new favorite low‑carb staple. Bon appétit!