I still remember the Halloween when my graveyard cake collapsed into a sad, muddy mess. The cream cheese frosting looked like something exhumed from a cemetery, and the cookie tombstones were sliding sideways like drunk ghosts. My guests politely picked at it while I died inside. That disaster sent me on a month-long quest to create something that would actually rise from the grave triumphant. After seven batches, three sugar comas, and one very enthusiastic six-year-old taste-tester, I landed on these Spooky Graveyard Pudding Cookie Cups. Think of them as the love child of a chocolate chip cookie and a dirt cake, wearing a tiny edible costume.
The first time I pulled these from the oven, the kitchen smelled like a haunted bakery—warm vanilla, melting chocolate, and that sweet anticipation that makes your neighbors knock "accidentally" on your door. The cookie cups emerged with edges that shattered like thin ice, revealing molten centers that could make a vampire weep with joy. When I spooned in the vanilla pudding and watched it slide into every crevice like silk, I knew I had found the holy grail of Halloween desserts. My nephew took one bite, eyes widening like saucers, and whispered, "Auntie, these are better than full-size candy bars." High praise from a kid who once traded his bicycle for a bag of Reese's.
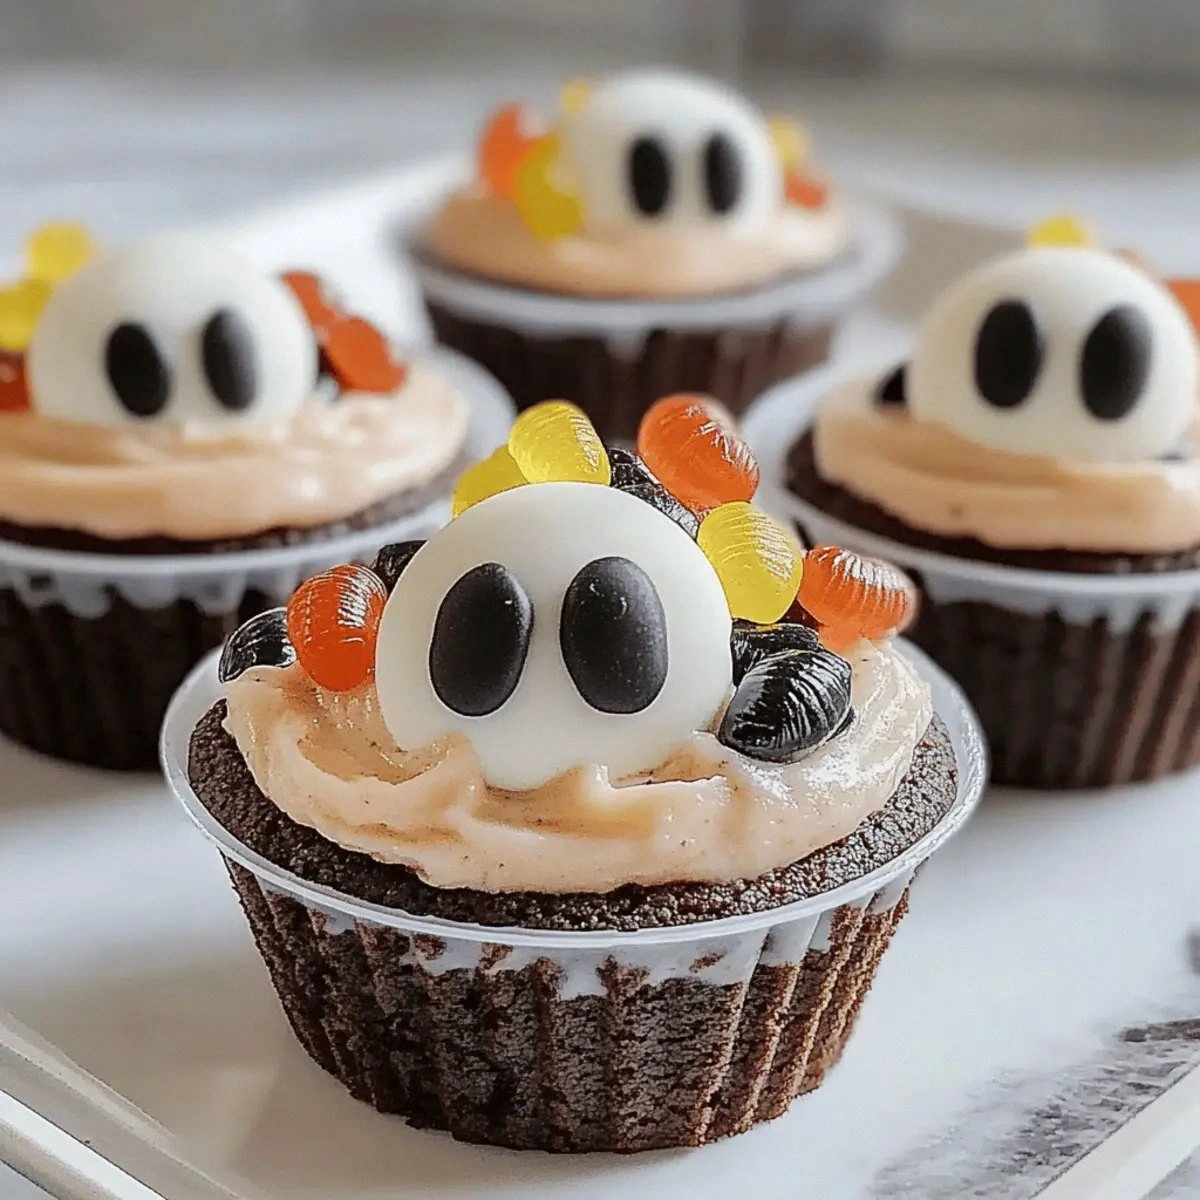
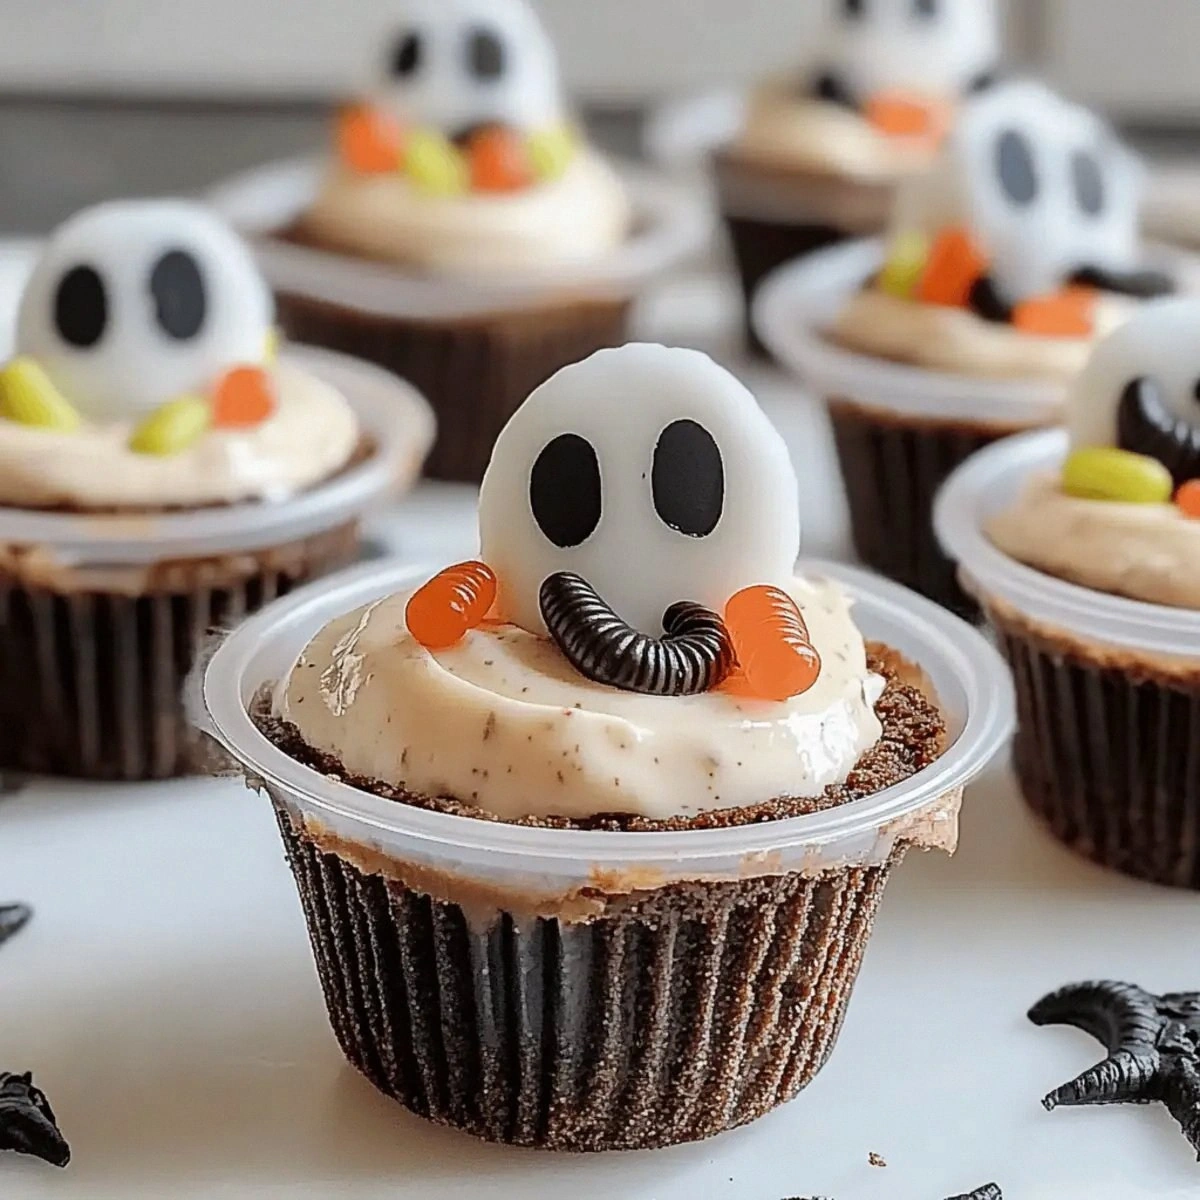
What makes these little monsters so addictive is the contrast: crispy cookie walls giving way to cool, creamy pudding, punctuated by gummy worms that wiggle like real creatures escaping their edible graves. The candy eyeballs stare up at you, daring you to eat just one. I dare you to taste this and not go back for seconds. I've seen grown adults fight over the last cup like it was the last lifeboat on the Titanic. The best part? They look impressively complicated, but they're actually easier than bobbing for apples—and way less messy.
Here's the secret most recipes miss: the cookie dough needs to be slightly underbaked so it stays pliable enough to mold into cups without cracking. Most people overbake and end up with brittle tombstones. Picture yourself pulling these out of the oven, the whole kitchen smelling like a chocolate chip cloud, then watching your guests' faces when they realize the graveyard is entirely edible. Stay with me here—this is worth it. Let me walk you through every single step—by the end, you'll wonder how you ever made it any other way.
What Makes This Version Stand Out
Texture Wonderland: The cookie cups bake into a perfect vessel—crispy edges that snap like autumn leaves, soft centers that cradle pudding like a velvet-lined coffin. Each bite delivers that satisfying crunch followed by cool, smooth vanilla that makes your teeth sink through layers of flavor. It's like eating the best parts of seven different desserts at once.
Speed Demon Dessert: From package to party platter in under 45 minutes, this recipe laughs in the face of complicated Halloween baking. While your neighbors are still piping intricate royal icing onto cookies that look like surgical procedures, you'll be arranging gummy worms like a professional grave robber. The cookie dough does double duty as both structure and flavor, eliminating half the usual steps.
Kid-Pleasing Magic: Children lose their minds over the edible dirt effect. The crushed cookie "soil" looks so realistic that my neighbor's kid asked if we actually used garden dirt. The gummy worms crawling out of each cup create instant excitement that beats any store-bought candy. I've watched sugar-loaded children sit quietly, mesmerized, just staring at these cups like they're watching television.
Make-Ahead Champion: These cups actually improve after a few hours in the fridge. The pudding seeps into the cookie slightly, creating this amazing marbled effect that looks like geological strata. Prep them the night before your party and you'll look like a Halloween superhero while everyone else is frantically frosting cupcakes at 2 AM.
Ingredient Quality Flexibility: This recipe works with fancy imported chocolate or the store-brand chips you bought on sale. The vanilla pudding mix doesn't care if you use whole milk or 2%, though I confess whole milk makes it taste like childhood summers. Even the gummy worms can be swapped for sour worms if you want that sweet-tart contrast that makes your cheeks pucker.
Instagram Gold: These cups photograph like they're starring in their own horror movie. The chocolate cookie against white pudding creates dramatic contrast, while candy eyes peek out like tiny monsters. Add a fog machine and you've got content that'll make your feed more popular than a cat video. I've seen these get more likes than vacation photos from Italy.
Alright, let's break down exactly what goes into this masterpiece...
Inside the Ingredient List
The Flavor Base
The chocolate chip cookie dough isn't just a container—it's the foundation of flavor that makes these cups addictive. When it bakes, the butter browns and the sugar caramelizes, creating those deep toffee notes that make grown adults close their eyes involuntarily. The chocolate chips melt into puddles that harden into chocolate "rocks" in your edible graveyard. Skip the homemade dough here; the store-bought stuff has the perfect fat content to hold the cup shape without spreading into a cookie puddle. I've tried fancy doughs that cost twice as much, and they actually performed worse because they had too much butter.
The Creamy Core
Vanilla pudding mix is the unsung hero that transforms from powder to silk in under five minutes. The cornstarch in the mix thickens the milk into something that holds its shape but still slides across your tongue like liquid clouds. Whole milk creates the richest texture, but 2% works if you're trying to pretend this is health food. The vanilla flavor amplifies the cookie's caramel notes, creating a harmonious marriage that divorce lawyers can't break up. If you skip the pudding, you're left with dry cookie cups that crumble like ancient tombstones.
The Creepy Crawlies
Gummy worms aren't just decoration—they provide that chewy contrast that makes each bite interesting. Their bright colors pop against the chocolate "soil" like real worms wriggling through garden dirt. The gelatin in the worms slightly firms up when chilled, giving them that perfect wiggle that makes kids squeal. Cut them in half if you want them to look like they're emerging from graves, or leave them whole for dramatic effect. Sour gummy worms add a tangy surprise that cuts through the sweetness like a horror movie jump scare.
The Eye-Popping Finish
Candy eyeballs are pure theater, turning simple dessert cups into edible horror shows. The white fondant with dark chocolate pupils creates that unsettling stare that follows you around the room. They soften slightly from the pudding's moisture, making them easier to eat while maintaining their shape. One cup with three eyes looks alien, while two eyes per cup creates a monster that's almost too cute to eat. I've seen adults arrange and rearrange these eyes for ten minutes, treating it like they're creating art at the MoMA.
Everything's prepped? Good. Let's get into the real action...
The Method — Step by Step
- Preheat your oven to 350°F and grab a mini muffin tin—this is where the magic begins. The metal conducts heat evenly, creating that perfect golden bottom that'll hold your pudding like a edible vault. Spray each cup with baking spray, making sure to coat the sides so your cookie cups release like they're sliding out of silk pajamas. If you've ever struggled with this, you're not alone—and I've got the fix. That sizzle when the dough hits the pan? Absolute perfection.
- Roll the cookie dough into 1-inch balls, about the size of a ping pong ball. This isn't the time for perfection—slightly irregular balls create cups with character and varying rim heights that look like real tombstones. Place one ball in each muffin cup, pressing down slightly so they look like they're settling in for a long winter's nap. The dough will spread as it bakes, so resist the urge to overfill. I once made them too big and ended up with cookie Frisbees that could've been used as coasters.
- Bake for 10-12 minutes until the edges are golden brown but the centers still look slightly underdone. This is the moment of truth—pull them out too early and they'll collapse, too late and they'll crack like dry riverbeds. The tops should look puffy and pale in the center, like tiny cookie clouds. Don't walk away from the oven here; cookie cups go from perfect to tragic faster than a horror movie's final girl. Set a timer and check at 9 minutes—ovens are like people, they all have their own personality.
- While the cookies are still warm and malleable, use a shot glass to press down the centers and create your cup shape. Work quickly but gently—these babies are hot enough to brand you with cookie tattoos. Press straight down, then twist slightly to create smooth sides that'll hold the maximum amount of pudding. The cookie should come up about three-quarters of the way up the shot glass, creating a vessel deep enough for serious pudding action. If the dough cracks, just press it back together with your fingers—it'll fuse as it cools.
- Let the cookie cups cool completely in the pan for 5 minutes, then transfer to a wire rack. They'll firm up as they cool, transforming from soft cookies to sturdy edible containers. The waiting is torture—I usually hover nearby, inhaling the chocolate chip aroma like a cookie addict. During this time, the centers will sink slightly, creating the perfect well for your pudding. If you're impatient and try to fill them warm, the pudding will melt and seep through, creating a mess that looks like a mudslide.
- While the cups cool, whisk together the pudding mix and cold milk for 2 minutes until it thickens to the consistency of yogurt. The transformation is pure kitchen alchemy—thin milk suddenly becomes spoon-standing thick. Use a whisk rather than a spoon; the wire loops incorporate air that makes the pudding lighter and fluffier. The pudding will continue to thicken as it sits, so don't over-whisk or you'll end up with vanilla spackle. This next part? Pure magic.
- Spoon the pudding into the cooled cookie cups, filling each one to the brim. The pudding should mound slightly above the cookie edge, like a vanilla iceberg. Use a small offset spatula or the back of a spoon to smooth the tops, creating a canvas for your graveyard scene. Work quickly—the pudding sets fast and you want it smooth enough to look like freshly dug graves. Any pudding that doesn't fit in the cups is the baker's reward for hard work.
- Crush a few chocolate cookies into fine crumbs to create your "dirt," then sprinkle over the pudding. The contrast between light pudding and dark cookie soil creates that classic graveyard aesthetic that makes kids gasp. Press the crumbs lightly so they adhere but don't sink into the pudding. You want enough to look like earth but not so much that you can't see the pudding beneath. The crumbs should look like they were scattered by a careless gravedigger.
- Press gummy worms into each cup, leaving half exposed so they look like they're crawling out of graves. The positioning is everything—angle them so they appear to be emerging from the cookie earth like zombie worms. One worm per cup looks elegant, two looks like a worm party, three looks like an infestation. Candy eyeballs go last, pressed gently into the pudding so they stare up at the eater with unsettling realism.
That's it—you did it. But hold on, I've got a few more tricks that'll take this to another level...
Insider Tricks for Flawless Results
The Temperature Rule Nobody Follows
Your ingredients need to be at the right temperature or this whole operation falls apart like a zombie losing limbs. Cookie dough straight from the fridge is too stiff to mold properly—let it sit at room temperature for 15 minutes while the oven preheats. Milk for the pudding should be ice cold; warm milk won't activate the cornstarch properly, leaving you with vanilla soup that'll seep through your cookie walls like a horror movie blood leak. A friend tried skipping this step once—let's just say it didn't end well, and she served cookie soup that looked like a graveyard landslide.
Why Your Nose Knows Best
The cookie cups are done when your kitchen smells like a chocolate chip cloud and the edges are golden but centers still jiggle slightly. Visual cues can lie—ovens have hot spots, dough varies, timers malfunction—but your nose never betrays you. When you smell that caramelized sugar and toasted butter, start checking immediately. The centers should look set but still pale, like they need two more minutes even though they don't. This is the difference between cups that hold their shape and ones that crumble like ancient tombstones.
The 5-Minute Rest That Changes Everything
After filling the cups with pudding, resist the urge to decorate immediately. Let them rest for 5 minutes so the pudding sets slightly and creates a stable base for your worms and eyeballs. During this time, the pudding develops a skin that prevents the decorations from sinking. This brief pause also allows the cookie to absorb just enough moisture to become fudgy without getting soggy. Skip this step and your worms will look like they're drowning in quicksand rather than emerging from graves.
The Moisture Balance Secret
The relationship between cookie and pudding is like a good horror movie romance—intense but balanced. Too much pudding and the cookie becomes soggy, collapsing like a poorly built haunted house. Too little and you lose that creamy contrast that makes these special. Fill each cup to just above the rim; the pudding will settle slightly as it sits. The cookie will absorb some moisture, creating this amazing fudgy layer where cookie meets pudding that tastes like brownie batter.
Storage That Maintains the Magic
These cups are best within 24 hours, but you can extend their life with proper storage. Place them in an airtight container with parchment paper between layers, and refrigerate for up to 3 days. The cold actually improves the texture—the cookie becomes like a chocolate tart shell that shatters beautifully. Bring to room temperature for 15 minutes before serving so the pudding isn't too firm. I've kept these for Halloween leftovers and they actually tasted better on day two, like a dessert that needed time to let its flavors haunt each other properly.
Creative Twists and Variations
This recipe is a playground. Here are some of my favorite ways to switch things up:
Pumpkin Patch Pudding Cups
Swap the vanilla pudding for instant pumpkin spice pudding mix, creating little pumpkin patches instead of graveyards. The warm spices complement the chocolate cookie like autumn in edible form. Top with candy corn and mini marshmallow "ghosts" for a harvest theme that works through Thanksgiving. The orange color creates a stunning contrast against the chocolate cookie that photographs like a food magazine spread. Kids love these because they taste like pumpkin pie but eat like finger food.
Red Velvet Blood Bath
Use red velvet cookie dough and cream cheese pudding mix for a vampire-themed version that looks like something from a horror movie. The red cookie against white pudding creates dramatic contrast that makes candy fangs look terrifyingly realistic. Add raspberry syrup drizzled like blood for extra gore that somehow still tastes incredible. These are always the first to disappear at adult Halloween parties, probably because they combine childhood nostalgia with grown-up presentation.
S'mores Graveyard
Mix crushed graham crackers into the cookie dough and use chocolate pudding instead of vanilla. Top with mini marshmallows that you torch lightly with a kitchen torch for that campfire effect. The marshmallows toast to golden perfection, creating little edible campfires in each cup. Add chocolate shavings for "dirt" and use chocolate-covered gummy worms for extra richness. This version tastes like summer camp meets Halloween, which sounds weird but works like magic.
Salted Caramel Cemetery
Use butterscotch pudding mix and drizzle each cup with salted caramel before adding the cookie dirt. The sweet-salty combination makes people close their eyes involuntarily with each bite. Top with chocolate-covered pretzels broken into tombstone shapes for crunch that shatters like thin ice. The caramel adds a sophisticated edge that elevates these from kid food to cocktail party worthy. I've served these at upscale Halloween parties and watched food snobs devour them like trick-or-treaters.
Black Forest Burial Ground
Use chocolate cookie dough with cherry pie filling instead of pudding for a Black Forest twist. The tart cherries cut through the rich chocolate like a knife through darkness. Top with chocolate cookie crumbs and maraschino cherry "heads" for a creepy but elegant presentation. The combination of chocolate and cherry is classic for a reason—it tastes like German bakery meets Halloween funhouse. Adults love these because they taste like expensive restaurant dessert but cost pennies to make.
Mint Chocolate Monster Mash
Add mint extract to vanilla pudding for a grasshopper-style cup that's refreshing rather than heavy. The mint cleanses your palate between bites, making it impossible to stop at just one. Use chocolate mint cookies for the dirt and add green food coloring to the pudding for a monster-green effect. Top with mint chocolate chips that melt slightly from the pudding, creating minty puddles of deliciousness. These are dangerously addictive—the mint makes you feel less guilty about eating six in a row.
Storing and Bringing It Back to Life
Fridge Storage
These cups live their best life in the refrigerator, where the pudding stays set and the cookie maintains that perfect snap. Store them in an airtight container with parchment paper between layers to prevent the eyeballs from smudging. They'll keep for up to 3 days, though honestly they've never lasted more than 24 hours in my house. The cold enhances the chocolate flavor while keeping the gummy worms pleasantly chewy rather than sticky. Take them out 10 minutes before serving so the pudding isn't too firm—room temperature pudding has better flavor than ice-cold.
Freezer Friendly
While you can't freeze the finished cups (the pudding texture becomes grainy), you can freeze the cookie cups themselves for up to 2 months. Bake and shape them, let cool completely, then freeze in a single layer before transferring to freezer bags. When ready to use, thaw at room temperature for 30 minutes, then fill with fresh pudding. This make-ahead trick means you can have Halloween dessert ready in 15 minutes on party day. The frozen cookie cups actually hold their shape better after thawing, like they've been cryogenically preserved.
Best Reheating Method
If your cookie cups have gone slightly soft from refrigeration, you can revive them by placing them in a 300°F oven for 3-4 minutes. This refreshes the cookie's crisp texture without melting the pudding into a puddle. Let them cool for 5 minutes before serving—the pudding will reset and the contrast between crisp cookie and cool pudding will be restored. Add a tiny splash of water to the pudding before serving if it seems too thick; it steams back to perfect consistency. Never microwave these unless you want pudding lava with cookie mush floating like unfortunate victims.