Picture this: it’s a rainy Tuesday, the kind that makes you want to crawl under a blanket and order pizza, but you’re too stubborn to admit defeat. You’ve been scrolling through endless recipes, each promising “authentic” flavor, yet every single one looks like it was written by someone who has never actually tasted a curry. I was there, staring at a pot of bland, overcooked beef that tasted like a sad, soggy shoe. I dared myself to keep going, to find the secret that makes a curry sing, and I finally cracked it. This is the moment I realized that the perfect beef curry doesn’t need a pantry the size of a warehouse—just a few smart moves and a dash of confidence.
The kitchen was alive with the kind of sizzle that makes your heart race. The oil hit the pan, and a fragrant pop erupted like fireworks on the Fourth of July. The onions began to caramelize, turning a deep amber that reminded me of sunrise over a golden field. As the garlic and ginger joined the party, the air filled with a perfume so intoxicating I could almost taste it before the first bite. My hands were warm from the heat, the wooden spoon felt like an extension of my arm, and I could hear the faint hiss of the spices waking up, promising a flavor explosion.
Most recipes get this completely wrong. They either drown the beef in a sea of sauce, or they skimp on the spice blend, leaving you with a bland stew that could double as a bedtime story. This version stands out because it respects the beef, builds layers of flavor, and finishes with a fresh herb burst that makes every forkful feel like a celebration. I’m talking about a sauce that clings to each morsel like velvet, a spice mix that sings with a low‑grade hum, and a texture that’s both tender and juicy without ever turning mushy.
And here’s the kicker: I’m about to reveal a technique that most home cooks overlook—a quick deglaze with a splash of broth that lifts all those caramelized bits from the pan, turning them into pure, golden‑rich umami. I dare you to taste this and not go back for seconds. Let me walk you through every single step — by the end, you’ll wonder how you ever made it any other way.
What Makes This Version Stand Out
- Depth: The combination of toasted spices and a short deglaze creates a flavor base that’s deeper than a midnight conversation.
- Texture: Beef stew meat is browned to a perfect crust before it even meets the sauce, ensuring each bite stays juicy and firm.
- Simplicity: Only a handful of pantry staples are needed, so you won’t have to run to the specialty store at midnight.
- Uniqueness: A pinch of red pepper flakes adds a controlled heat that whispers rather than shouts, perfect for those who like a gentle kick.
- Crowd Reaction: I’ve served this at family gatherings and watched strangers turn into repeat guests—no one can resist the aroma.
- Ingredient Quality: Using fresh ginger and a good-quality curry powder makes a world of difference; it’s the difference between “meh” and “wow”.
- Cooking Method: The two‑stage sear‑then‑simmer technique locks in juices while allowing the sauce to thicken naturally.
- Make‑Ahead Potential: This curry tastes even better the next day, as the flavors continue to marry in the fridge.
Inside the Ingredient List
The Flavor Base
1 pound beef stew meat: This is the heart of the dish. Choose well‑marbled pieces; the fat renders slowly, keeping the meat moist. If you skip this and use a lean cut, expect a dry result that will make you question your life choices. You can substitute with boneless short ribs for an even richer mouthfeel.
2 tablespoons vegetable oil: A neutral oil lets the spices shine without adding competing flavors. I prefer grapeseed oil because it has a high smoke point, but any light oil will do. Skipping the oil will cause the spices to burn, turning your curry bitter.
1 medium onion: Onions bring sweetness and a subtle crunch when caramelized. Dice them finely so they melt into the sauce, or slice them for a rustic texture. If you’re out of onions, try a half cup of shallots—just remember they’re more pungent.
3 cloves garlic: Garlic adds that unmistakable aromatic punch. Smash them first to release the oils; a whole clove will give a milder flavor, while minced garlic will be more intense. Missing garlic? Try a teaspoon of garlic powder, but the fresh version wins every time.
1 tablespoon fresh ginger: Fresh ginger cuts through the richness with a bright, peppery zing. Grate it directly into the pan; pre‑ground ginger loses its snap. If you only have powdered ginger, use half the amount and add a splash of lime juice for balance.
The Spice Crew
2 tablespoons curry powder: This is the soul of the dish. I love a blend that includes coriander, cumin, and a hint of fenugreek. A low‑quality curry powder can taste flat, so invest in a reputable brand. If you’re feeling adventurous, add a pinch of smoked paprika for depth.
1 teaspoon ground cumin: Cumin adds earthiness that grounds the bright notes of ginger. Toast it lightly before adding to the pan for a nutty aroma. Skipping cumin makes the curry feel one‑dimensional.
1 teaspoon ground coriander: Coriander’s citrusy undertones lift the whole dish. Like cumin, a quick toast enhances its flavor. If you have fresh cilantro leaves, you can add a tablespoon at the end for extra freshness.
1/2 teaspoon turmeric: Turmeric gives that golden hue and a subtle bitter‑sweet balance. It’s also a health booster, but a little goes a long way—too much can make the curry taste earthy.
1/2 teaspoon red pepper flakes: This is the secret heat whisperer. Adjust to taste; if you love fire, double it. If you’re sensitive, reduce or omit, but you’ll miss the subtle warmth.
The Unexpected Star
1 can (tomatoes or coconut milk): The liquid element adds body. I use diced tomatoes for a tangy base, but coconut milk gives a silky finish. Both work; just remember that coconut milk will mellow the heat, while tomatoes will keep it bright.
1 cup beef broth: The broth deepens the umami and prevents the sauce from becoming too thick too quickly. Use low‑sodium broth so you can control the salt level later.
1 can (additional liquid): This second can could be another cup of tomatoes, coconut milk, or even a splash of apple cider for sweetness. It’s the flexibility that makes this recipe adaptable to what you have on hand.
The Final Flourish
1 cup frozen peas: Peas add a pop of color and a sweet contrast to the spices. They also bring a slight crispness when added at the end of cooking.
Salt and pepper to taste: These seasonings are the final gatekeepers of flavor. Taste as you go; a pinch of salt can awaken the spices, while pepper adds a subtle bite.
Fresh cilantro: A handful of chopped cilantro right before serving lifts the dish with a fresh, herbaceous finish. If cilantro isn’t your thing, try fresh parsley or a squeeze of lime.
Everything's prepped? Good. Let's get into the real action...
The Method — Step by Step
-
Heat the vegetable oil in a large, heavy‑bottomed pot over medium‑high heat. When the oil shimmers, add the beef stew meat in a single layer. Let it sear undisturbed for about 2‑3 minutes until a deep, caramelized crust forms—don’t stir, let those Maillard reactions happen. Once browned, flip the pieces and repeat on the other side. This step is the foundation; that crust will lock in juices and give the sauce a rich backbone.
Kitchen Hack: Pat the beef dry with paper towels before searing. Moisture is the enemy of a good crust. -
Remove the browned beef and set aside. In the same pot, add the diced onion. Stir constantly, scraping up any browned bits (the fond) that cling to the bottom. Cook until the onion turns a deep amber, about 5‑6 minutes, and you’ll hear a soft sizzle that signals the sugars are caramelizing. This is the moment of truth—if the onion isn’t golden, the whole flavor profile will suffer.
-
Add the minced garlic and grated ginger to the onions. The kitchen should now smell like a street market in Mumbai—sharp, sweet, and irresistibly inviting. Cook for just 30 seconds; you want the aromatics to release their oils, not burn. If you hear a bitter crackle, you’ve gone too far—reduce the heat immediately.
-
Stir in the curry powder, cumin, coriander, turmeric, and red pepper flakes. The spices will puff up and coat the onion‑garlic mixture, creating a fragrant cloud that makes your kitchen feel like a culinary runway. Let the spices toast for 1‑2 minutes, watching for that deep, earthy aroma—this is where the flavor depth begins to build.
Watch Out: If the heat is too high, the spices can burn quickly, turning bitter. Keep a close eye and stir constantly. -
Return the beef to the pot, stirring to coat each piece in the spiced onion mixture. Then, pour in the first “1 can” (tomatoes or coconut milk) and the cup of beef broth. Use a wooden spoon to deglaze, scraping up every last bit of caramelized fond. This is the secret step that transforms a simple stew into a luxurious curry. Let the liquid come to a gentle boil, then reduce to a simmer.
Kitchen Hack: If the sauce looks too thick after deglazing, add a splash more broth; you can always reduce later. -
Cover the pot and let the curry simmer gently for 20‑25 minutes. The beef will become fork‑tender, and the flavors will meld together like old friends reuniting. Check the tenderness by piercing a piece with a fork; it should slide in with little resistance. If the sauce is too thin, uncover and let it reduce for an extra 5 minutes.
-
Stir in the second “1 can” (the complementary liquid) and the frozen peas. The peas will retain a pop of sweetness, and the extra liquid will bring the sauce to the perfect consistency—neither soupy nor dry. Simmer uncovered for another 5 minutes, allowing the peas to heat through and the flavors to unify.
Watch Out: Adding peas too early can cause them to turn mushy; keep them for the final minutes. -
Season with salt and freshly cracked black pepper to taste. Taste the curry now—if the flavors feel a little flat, a pinch more salt will brighten everything. Finish with a generous handful of chopped fresh cilantro, stirring just before you turn off the heat. The cilantro adds a bright, herbaceous lift that cuts through the richness.
-
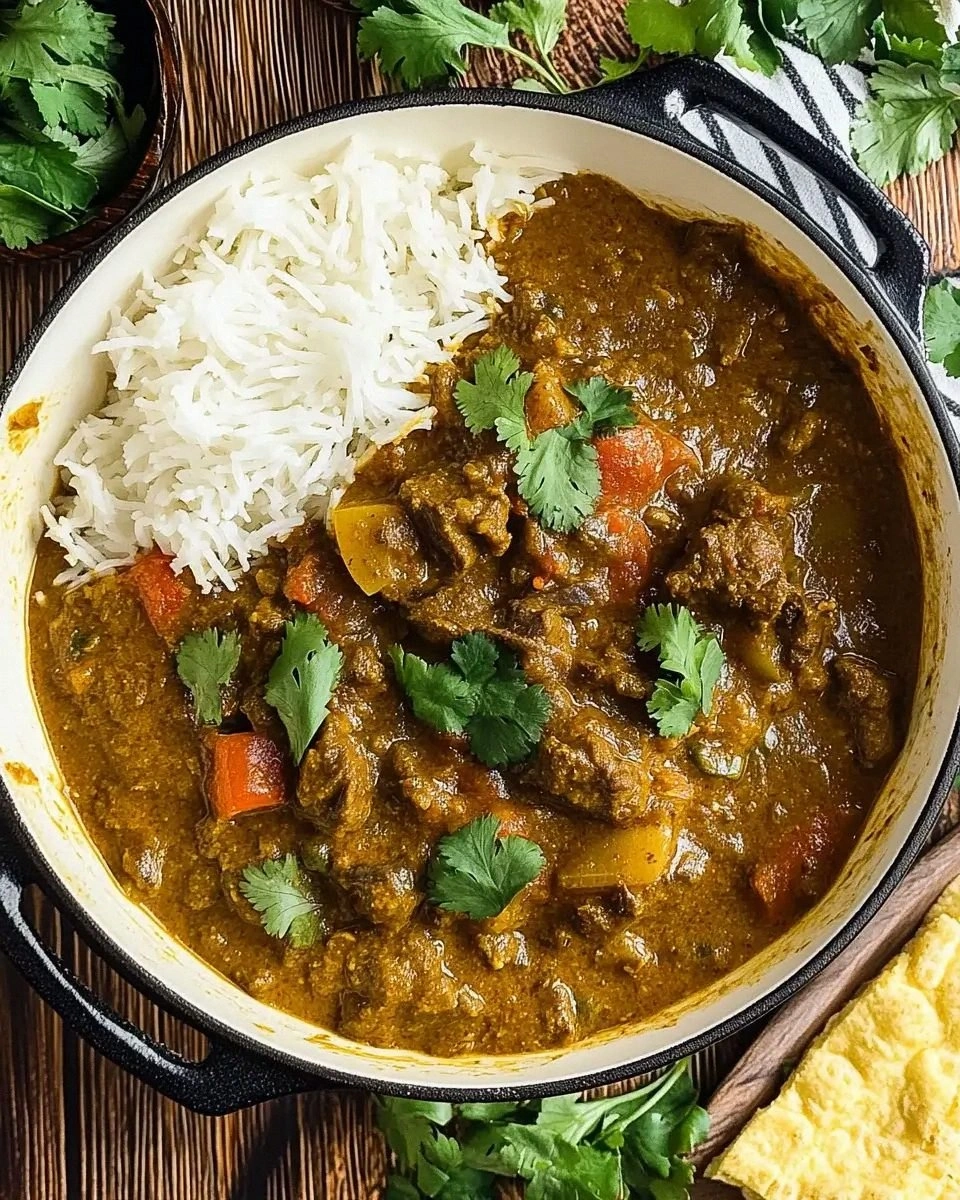
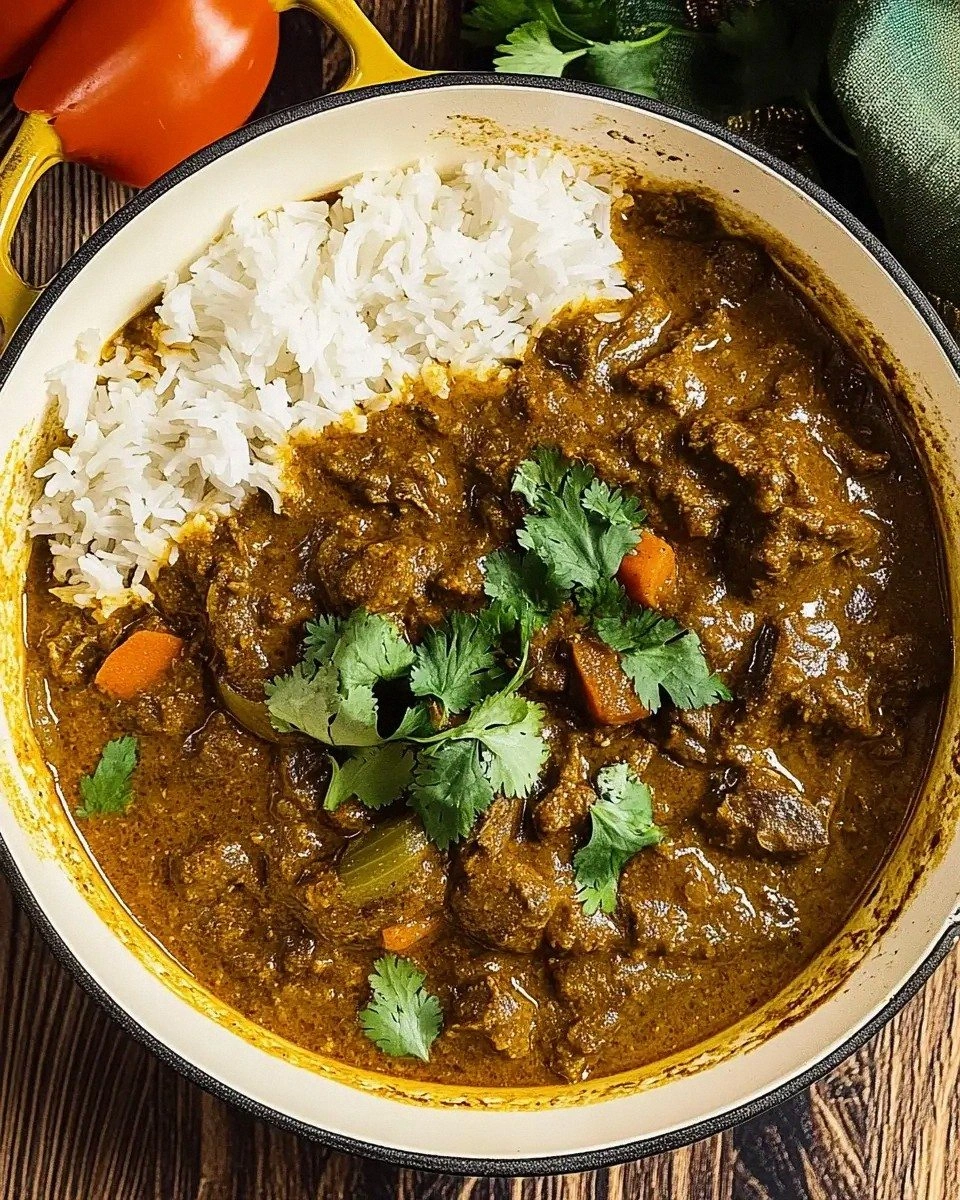
Serve the curry over steamed basmati rice or with warm naan, letting the sauce coat each grain like a silky blanket. Picture yourself pulling this out of the pot, the whole kitchen smelling incredible, and your guests leaning in for that first aromatic spoonful. That sizzle when it hits the pan? Absolute perfection. This is hands down the best version you'll ever make at home.
That's it — you did it. But hold on, I've got a few more tricks that'll take this to another level...
Insider Tricks for Flawless Results
The Temperature Rule Nobody Follows
Never start a curry on high heat. Begin medium, then raise the temperature only after the spices have toasted. This prevents scorching and ensures the oil stays fluid enough to carry the flavors. I once tried to speed things up by cranking the heat, and the result was a burnt, acrid mess that no amount of cilantro could fix.
Why Your Nose Knows Best
Use your sense of smell as a checkpoint. When the onions turn golden, you’ll notice a sweet, caramel scent. When the spices hit the pan, a warm, earthy perfume rises. If anything smells off—sharp bitterness or a metallic note—reduce the heat and stir. Trusting your nose saves you from a ruined dish before you even taste it.
The 5‑Minute Rest That Changes Everything
After simmering, remove the pot from heat and let the curry rest, covered, for five minutes. This short pause lets the juices redistribute and the flavors meld further. I’ve tasted the difference; a rested curry feels more harmonious, with each spice singing in unison.
Layering Salt Like a Pro
Season in stages: a pinch during the searing, a dash after deglazing, and a final adjustment at the end. This layered approach prevents over‑salting and builds depth. If you add all the salt at once, you’ll either end up under‑seasoned or overwhelmed.
Freezing Without Losing Flavor
If you want to freeze leftovers, do it in airtight containers with a thin layer of broth on top. This prevents freezer burn and keeps the sauce from thickening too much. Thaw in the fridge overnight, then reheat gently, adding a splash of water if needed.
Creative Twists and Variations
This recipe is a playground. Here are some of my favorite ways to switch things up:
Thai‑Inspired Coconut Curry
Swap the tomato can for a can of coconut milk and add a tablespoon of fish sauce. Finish with lime zest and a handful of Thai basil. The result is a creamy, aromatic twist that transports you straight to a Bangkok night market.
Smoky Chipotle Beef Curry
Replace half the red pepper flakes with chipotle in adobo, and add a smoked paprika pinch. The smoky heat adds depth, making the dish perfect for cold evenings when you crave something comforting yet bold.
Veggie‑Heavy Version
Add diced sweet potatoes, carrots, and bell peppers alongside the peas. The extra vegetables boost nutrition and give the curry a colorful, rustic look. This version works great for a family dinner where you need to stretch the meat further.
Quick One‑Pot Pasta Curry
After the curry is done, stir in uncooked pasta and enough extra broth to cover. Simmer until the pasta is al dente, then serve. It’s a hearty, carb‑laden twist that satisfies the comfort‑food cravings.
Spiced Lamb Substitute
Swap the beef for lamb shoulder, keeping the same spice blend. Lamb’s natural gaminess pairs beautifully with curry powder, creating a richer, more robust flavor profile. Adjust cooking time slightly—lamb benefits from a longer, slower simmer.
Fresh Herb Explosion
Finish with a mix of mint, dill, and cilantro for a bright, garden‑fresh finish. This herb medley lifts the dish, making it ideal for spring gatherings when you want something light yet flavorful.
Storing and Bringing It Back to Life
Fridge Storage
Transfer the cooled curry to an airtight container and store in the refrigerator for up to four days. The flavors will continue to develop, and the beef will stay tender. When reheating, add a splash of water or broth to loosen the sauce, then heat gently over low heat.
Freezer Friendly
Portion the curry into freezer‑safe bags or containers, leaving a little headspace for expansion. Freeze for up to three months. To defrost, move the bag to the fridge overnight, then reheat on the stovetop, stirring occasionally.
Best Reheating Method
Use a low‑heat simmer on the stove, adding a tablespoon of water for every cup of curry you’re reheating. Stir frequently to prevent sticking, and finish with a fresh sprinkle of cilantro for that just‑cooked brightness.