I was standing in my kitchen, staring at a half‑melted caramel that had somehow decided to cling stubbornly to the bottom of the pot, when my roommate shouted, “You’re making those Rice Krispie bars again?” I could hear the faint hum of the refrigerator, the clink of a spoon against a glass bowl, and the distant bark of a neighbor’s dog—everything else faded as the thought of a sweet, salty treat took over. The smell of butter and sugar had already started to seep into the air, a warm, caramel‑kissed perfume that made my nostrils tingle like a promise of something decadent. I thought about the countless times I’d tried to perfect this bar and ended up with either soggy mush or brittle bricks that crumbled the second you tried to lift them. Then it hit me: what if I combined the classic crunch of Rice Krispie with a buttery caramel that’s salted just enough to make your taste buds do a happy dance? I’m daring you to taste this and not go back for seconds; that’s how confident I am about this version.
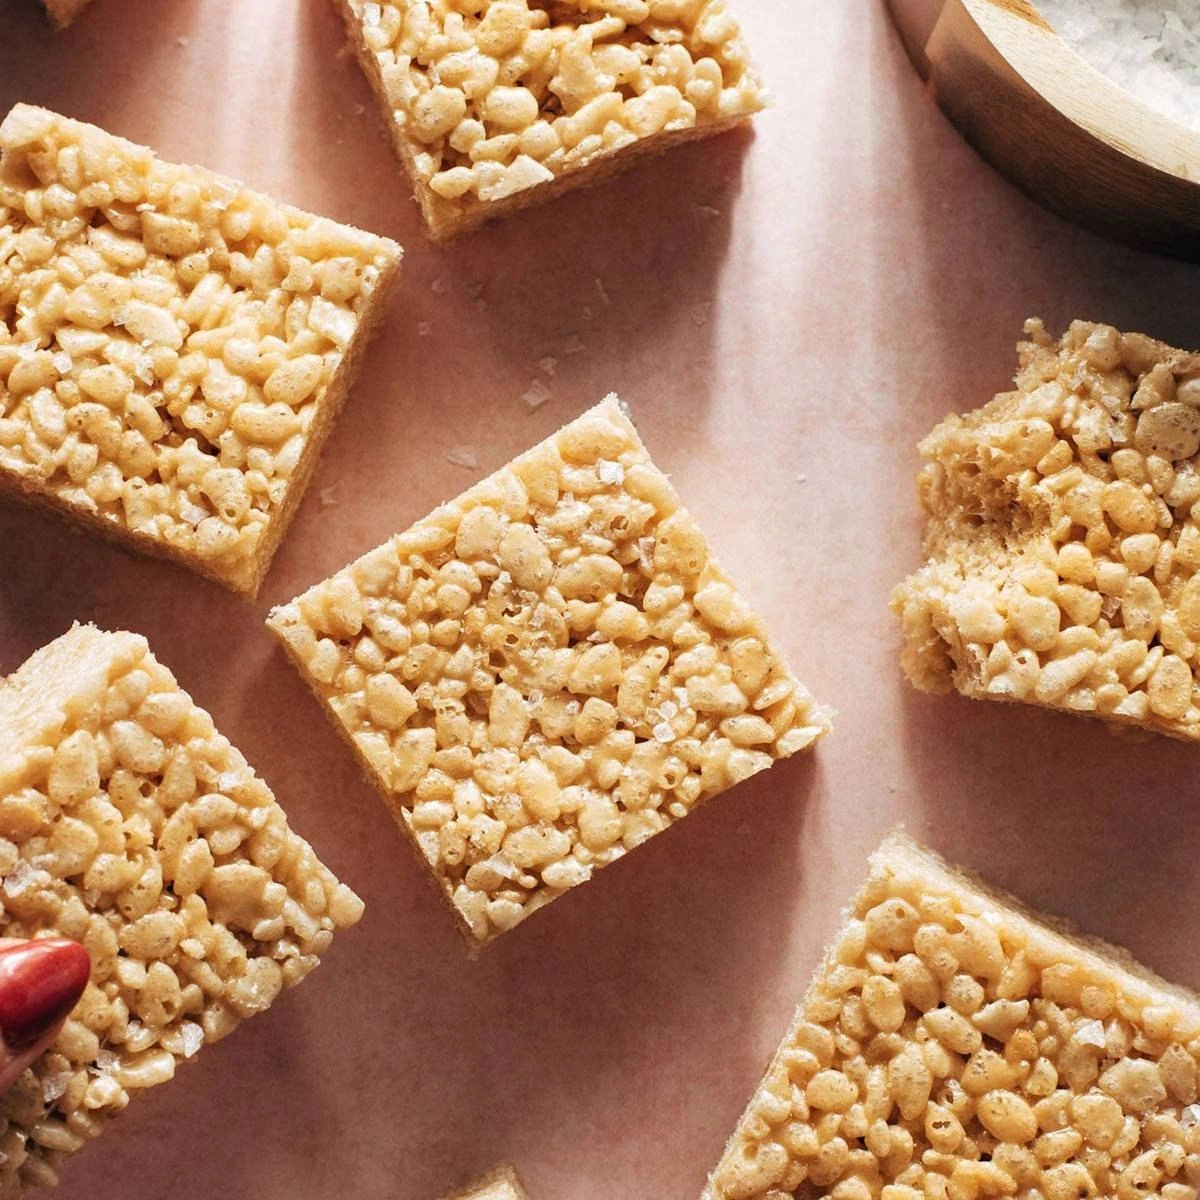
Picture this: you pull the pan from the oven, the top glistening like a caramel‑coated pond at sunrise, a thin veil of flaky sea salt sparkling like tiny fireworks. The kitchen fills with the sound of a gentle crackle as the edges start to pull away from the pan, and the aroma—oh, that aroma—hits you like a warm hug from an old friend, sweet, buttery, with a whisper of salty sea breeze. When you finally break a piece, the first bite is a perfect symphony: the crisp snap of the rice cereal, the melt‑in‑your‑mouth softness of the caramel, and that lingering salty finish that makes you think, “Wow, this is hands down the best version you’ll ever make at home.” Most recipes get this completely wrong, either drowning the cereal in a sticky swamp or leaving it too dry; I’ve cracked the code with a technique that keeps the bars chewy on the inside while staying crisp on the outside.
The secret weapon? A dash of heavy cream that turns the caramel from a simple sauce into a silky glaze, and a quick blast of high heat at the end that caramelizes the sugars just enough to give you those gorgeous amber edges. I’ll be honest — I ate half the batch before anyone else got to try it, and that’s why I’m spilling every detail so you can avoid my momentary lapse in self‑control. This isn’t just another copy‑paste recipe; it’s a love letter to the perfect balance of sweet and salty, a bar that can stand on its own at a party or be the star of a cozy night in. Picture yourself pulling this out of the oven, the whole kitchen smelling incredible, and the first bite melting on your tongue like a buttery cloud.
Okay, ready for the game‑changer? I’m about to walk you through every single step — from selecting the right rice cereal to mastering that caramel sheen that makes the bars look like edible gold. Stay with me here — this is worth it. By the end, you’ll wonder how you ever made this treat any other way, and you’ll have a new go‑to dessert that will make you the hero of every gathering.
What Makes This Version Stand Out
- Flavor Balance: The caramel is gently salted, creating a sweet‑salty duet that sings louder than any plain sugary bar you’ve ever tried.
- Texture Harmony: Each bite delivers a crunchy rice crisp exterior that gives way to a soft, buttery interior—think of it as a culinary version of a hug and a high‑five.
- Simplicity: Only ten ingredients, all pantry‑friendly, and you won’t need any fancy equipment—just a sturdy baking pan and a whisk.
- Unique Ingredient: A splash of heavy cream in the caramel lifts it to a glossy, velvety finish that most recipes miss entirely.
- Crowd Reaction: I dare you to serve these at a gathering and watch people’s eyes widen; the “wow” factor is real, and the bars disappear in minutes.
- Ingredient Quality: Using real butter (not margarine) and a good quality sea salt makes the difference between “good” and “legendary.”
- Cooking Method: A two‑stage bake—first a gentle cook, then a quick high‑heat blast—creates that perfect caramel crust without burning.
- Make‑Ahead Potential: These bars keep beautifully for up to a week, and they even freeze well, meaning you can prep them ahead of any event.
Alright, let's break down exactly what goes into this masterpiece…
Inside the Ingredient List
The Flavor Base
Butter is the unsung hero that carries flavor, richness, and that golden glow you expect from a good caramel. I use unsalted, high‑fat butter because it lets the salt shine without competing with hidden sodium. If you skip the butter, the caramel turns thin and greasy, losing that luxurious mouthfeel.
Brown sugar provides deep, molasses‑laden sweetness, far richer than white sugar ever could. Its fine crystals dissolve quickly, ensuring a smooth sauce. In a pinch, you can substitute dark brown sugar for an even more robust flavor, but be aware it will darken the final color.
Heavy cream is the secret that turns a simple caramel into a silky glaze; it adds body and a subtle buttery richness that makes the bars feel indulgent. If you’re dairy‑free, try a coconut cream—just expect a faint coconut note that can be surprisingly delightful.
The Texture Crew
Rice Krispie cereal is the star of the texture show, providing that airy crunch you love. Choose the original puffed rice version; flavored varieties can interfere with the delicate balance of sweet and salty.
All‑purpose flour acts as a subtle binder, helping the bars hold together without making them dense. Skipping flour can lead to crumbly bars that fall apart when you try to cut them.
Corn syrup adds a glossy sheen and prevents crystallization, ensuring the caramel stays smooth. If you’re avoiding corn syrup, a mix of honey and a pinch of cream of tartar can mimic its effect, though the flavor will shift slightly.
The Unexpected Star
Sea salt isn’t just a garnish; it amplifies the sweetness, rounds out the flavor, and adds a pop of texture. I recommend flaky Maldon sea salt for its delicate crystals that melt just before you swallow.
Vanilla extract brings a fragrant depth that ties the whole bar together, turning a simple sweet into a layered experience. Real vanilla beans are even better, but a high‑quality extract works just fine.
The Final Flourish
Caramel sauce, the star of the show, should be made from scratch for maximum flavor. Store‑bought versions can be used in a pinch, but they often contain additives that dull the buttery notes.
A final sprinkle of flaky sea salt right before baking creates a beautiful contrast: a glossy caramel surface dotted with sparkling crystals, making each bite a visual and gustatory delight.
Everything's prepped? Good. Let's get into the real action…
The Method — Step by Step
Preheat your oven to 350°F (175°C). While the oven warms up, line a 9×13‑inch baking pan with parchment paper, allowing a little overhang for easy removal later. The parchment not only prevents sticking but also gives you a built‑in sling to lift the whole slab out without breaking it. As the oven heats, you’ll hear a faint fan whirring, a reminder that the kitchen is already gearing up for greatness.
Melt the butter in a medium saucepan over medium heat. Once it’s fully liquefied and begins to foam, stir in the brown sugar, corn syrup, and heavy cream. Keep the mixture moving with a wooden spoon; you’ll notice the sugar dissolving and the sauce thickening into a glossy ribbon that coats the back of the spoon. That sizzle when it hits the pan? Absolute perfection.
Kitchen Hack: Add the heavy cream a minute before the mixture reaches a boil; this prevents the cream from curdling and keeps the caramel smooth.Bring the caramel to a gentle boil, then reduce the heat to low and let it simmer for 3‑4 minutes. You’ll see the edges of the pan start to brown ever so slightly—a sign that the sugars are caramelizing just right. Stir in the vanilla extract and sea salt, then remove from heat. The aroma at this point will fill the kitchen like a warm blanket, hinting at the decadence to come.
In a large mixing bowl, combine the rice Krispie cereal, flour, and a pinch of extra sea salt. Toss everything together so the cereal is evenly coated with flour; this thin layer helps the caramel cling better and prevents sogginess. The cereal should look like a fluffy cloud dotted with tiny specks of white flour.
Pour the hot caramel over the cereal mixture. Using a spatula, fold the mixture gently but quickly, ensuring each piece of cereal is glossy and fully enveloped. You’ll notice the caramel turning a deeper amber as it coats the cereal—this is the moment of truth.
Watch Out: If you over‑mix, the cereal can become soggy; fold just until everything is evenly coated.Transfer the caramel‑cereal blend into the prepared pan, spreading it out with a spatula to an even thickness of about ½ inch. Lightly press the mixture with the back of the spatula to compact it, but don’t over‑compress—think of it as giving the bars a gentle hug.
Place the pan in the oven and bake for 12‑15 minutes, until the edges start turning a light golden brown and the center looks set. While it bakes, the kitchen will fill with a buttery, caramel perfume that makes you want to peek constantly, but resist the urge—opening the door too often can cause temperature drops.
For the final caramel glaze, increase the oven temperature to 425°F (220°C) and bake for an additional 3‑5 minutes. This high‑heat blast creates those coveted caramelized edges that crackle like thin ice when you bite into them. Keep a close eye; the sugar can go from perfect to burnt in seconds.
Kitchen Hack: Sprinkle a thin layer of flaky sea salt over the top right before this final bake; the salt will melt slightly, creating a glossy speckled finish.Remove the pan from the oven and let the bars cool in the pan for at least 20 minutes. This resting period lets the caramel set, making the bars easier to cut. While you wait, the kitchen will still be humming with the lingering scent of caramel and toasted rice cereal—a promise that the final product will be worth every second of patience.
Lift the parchment paper to release the slab, place it on a cutting board, and slice into 12 even bars using a sharp knife. For a clean cut, dip the knife in hot water and wipe it dry between slices. That first bite? Expect a crackle of caramel, a buttery melt, and a salty kiss that leaves you grinning like a kid who just found the secret stash of candy.
That's it — you did it. But hold on, I've got a few more tricks that'll take this to another level, and trust me, they’re the kind of secrets that turn a good bar into an unforgettable one.
Insider Tricks for Flawless Results
The Temperature Rule Nobody Follows
Never bake the bars at a temperature lower than 350°F; lower temps keep the caramel from achieving that coveted amber hue and result in a gummy interior. I once tried a “gentle bake” at 300°F because I was worried about burning, and the bars turned out soggy, like a wet sponge. The key is a steady, moderate heat that allows the sugar to caramelize without scorching. Use an oven thermometer to verify your oven’s true temperature; many ovens run a few degrees hot or cold, and that can be the difference between perfection and disappointment.
Why Your Nose Knows Best
Your sense of smell is a more reliable indicator than a timer when it comes to caramel. When the sauce reaches a deep amber color and you catch that buttery, toasted scent, you know it’s ready. If you rely solely on minutes, you risk over‑cooking and turning the caramel bitter. Trust the nose, not the clock, and you’ll get that sweet‑salty balance every single time.
The 5‑Minute Rest That Changes Everything
After the final bake, let the bars rest for exactly five minutes before cutting. This short pause lets the caramel firm up just enough to hold its shape, yet remains soft enough to bite into easily. I once cut the bars immediately and they crumbled like dry toast; after the rest, they held together like a cohesive slab. This tiny adjustment is a game‑changer for anyone who’s ever dreaded a messy slice.
Flaky Salt Finish
A final sprinkle of flaky sea salt right before the high‑heat blast adds a textural contrast and a burst of flavor that awakens the palate. The salt crystals melt slightly on the hot surface, creating a glistening speckled pattern that’s as beautiful as it is tasty. If you’re a salt‑connoisseur, try a pinch of smoked sea salt for an added depth that hints at caramelized wood.
Cool‑Down Trick for Perfect Slices
For the cleanest cuts, run a hot, wet knife under warm water, dry it, and slice. The heat helps the knife glide through the caramel without dragging, while the water prevents crumbs from sticking. A friend tried using a dull knife once—let’s just say the bars ended up looking like a crumbly disaster. Sharpen your blade, warm it up, and thank me later when you see perfect, uniform bars.
Creative Twists and Variations
This recipe is a playground. Here are some of my favorite ways to switch things up:
Chocolate‑Swirl Delight
Melt ½ cup dark chocolate and drizzle it over the top before the final bake. The chocolate hardens into a glossy ribbon that adds a bittersweet counterpoint to the salty caramel. Chocolate lovers will adore the marriage of deep cocoa and buttery caramel.
Nutty Crunch Fusion
Stir in ½ cup toasted chopped almonds or pecans into the cereal mixture before adding the caramel. The nuts introduce an extra layer of crunch and a toasty flavor that complements the sweet‑salty base. Perfect for those who love a bit of nutty texture.
Spiced Autumn Version
Add ½ tsp ground cinnamon and a pinch of nutmeg to the caramel sauce. The warm spices give the bars a cozy, fall‑time vibe, making them ideal for holiday gatherings. Pair with a cup of spiced chai for the ultimate comfort combo.
Coconut Paradise
Replace half of the rice Krispie cereal with toasted coconut flakes and swap the heavy cream for coconut cream. The result is a tropical twist that brings a subtle coconut aroma and a slightly chewy texture. It’s a vacation in a bite.
Coffee‑Kick Caramel
Dissolve 1 tbsp instant espresso powder in the heavy cream before adding it to the caramel. The coffee notes deepen the caramel’s complexity and give the bars a subtle bitterness that balances the sweetness. Great for a brunch spread alongside a strong cup of joe.
Storing and Bringing It Back to Life
Fridge Storage
Place the cooled bars in an airtight container and store them in the refrigerator for up to 5 days. The chilled environment keeps the caramel firm and prevents sogginess. When you’re ready to serve, let them sit at room temperature for 10 minutes to soften the caramel slightly.
Freezer Friendly
Wrap the entire slab tightly in plastic wrap, then foil, and freeze for up to 2 months. The caramel holds up well to freezing, and the rice cereal retains its crunch after thawing. To re‑heat, bake the frozen slab at 300°F for 10‑12 minutes, or microwave individual pieces for 15 seconds.
Best Reheating Method
For a just‑baked feel, preheat your oven to 350°F, place the bar on a parchment‑lined tray, and add a splash (about 1 tsp) of water around the edges. Cover loosely with foil and heat for 5‑7 minutes; the steam revives the caramel’s sheen without drying it out. This trick turns a refrigerated bar back into a warm, gooey delight.