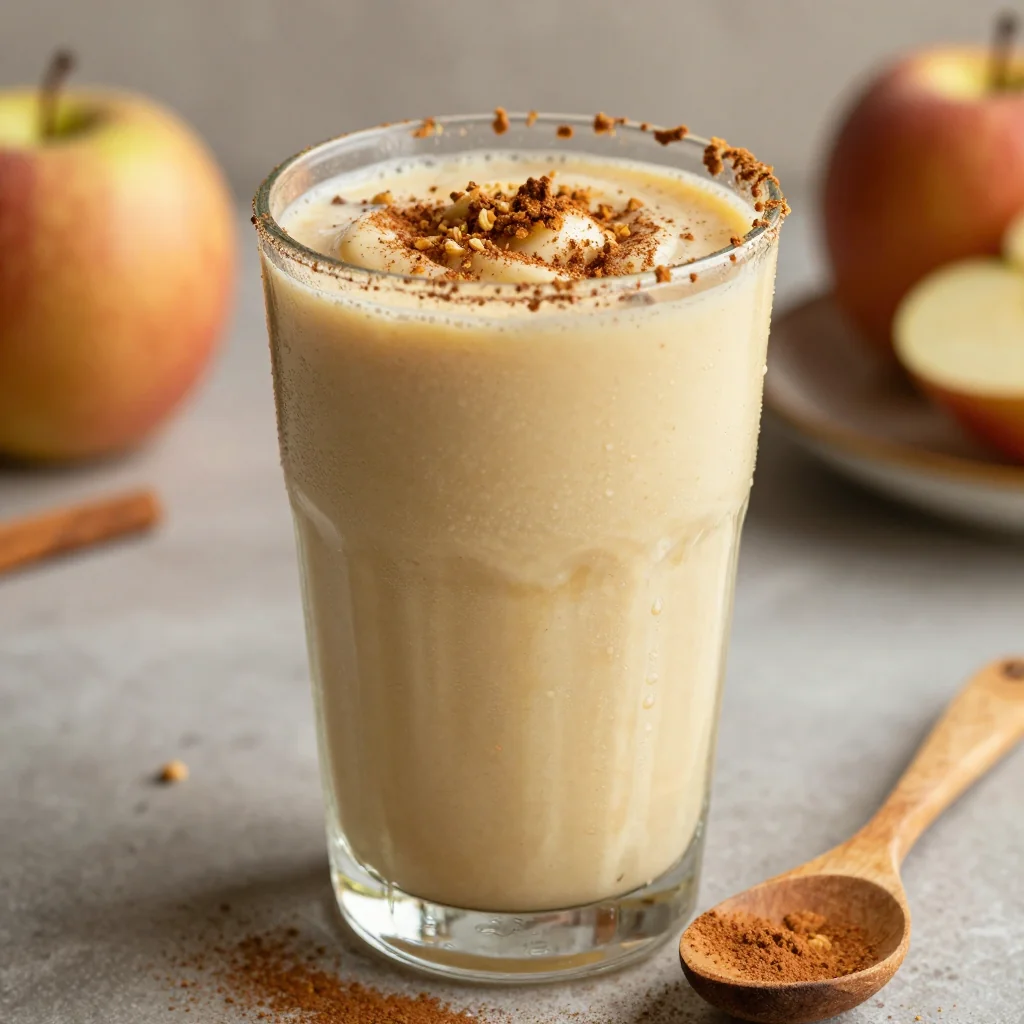
When the kitchen alarm blared at 2 a.m., I stared at the empty fridge, wondering if my midnight cravings could ever be satisfied. I had just finished a week of bland, over‑seasoned chicken, and the idea of a bright, herbaceous sauce seemed almost too good to be true. So I pulled a jar of salsa verde from the pantry, a splash of olive oil, and a handful of spices that smelled like a summer picnic. I set the timer, and the aroma that began to unfurl was a promise of something extraordinary. I dared you to taste this and not go back for seconds, and I know you will be amazed.
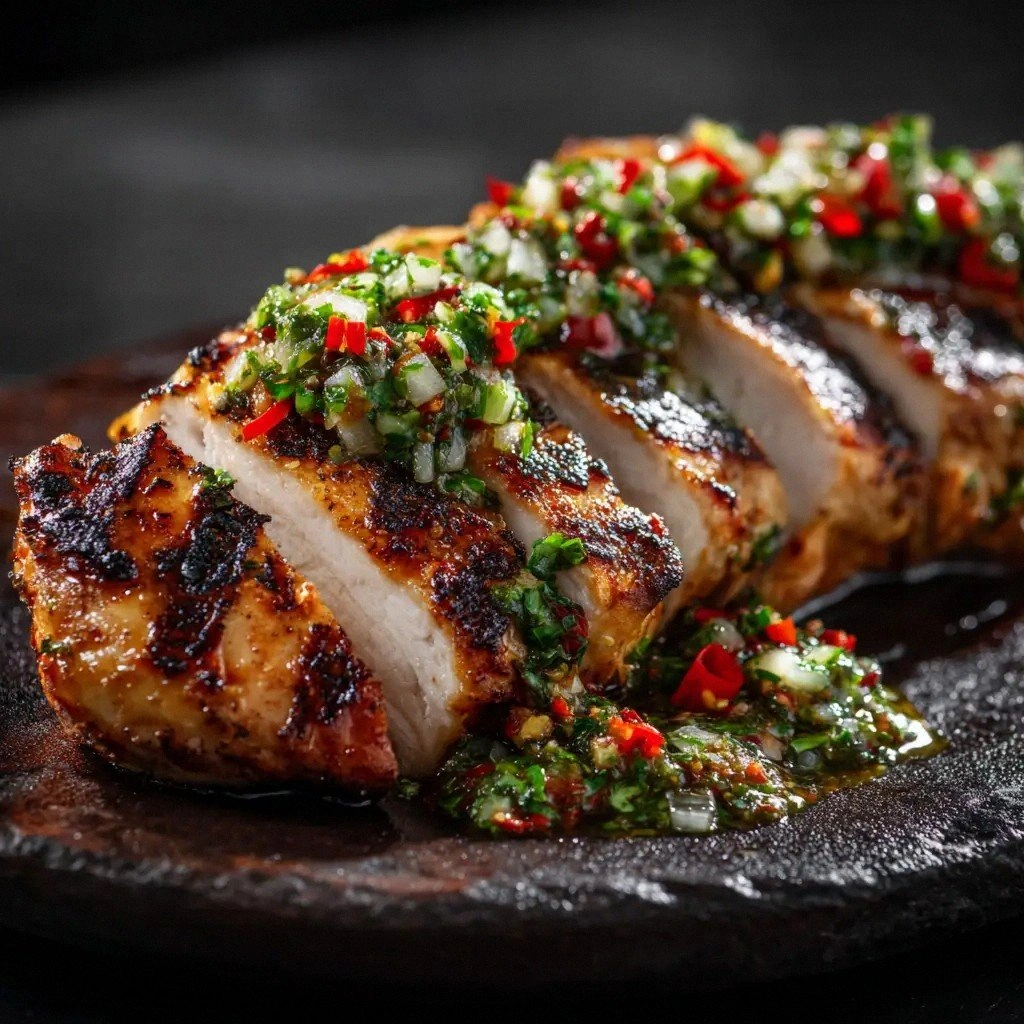
Picture yourself pulling this out of the oven, the whole kitchen smelling incredible, and the sauce coating the tender chicken like velvet. The first bite is a burst of citrusy green pepper, followed by a gentle heat that lingers without overwhelming. The texture is a harmonious blend of juicy meat and silky sauce, a contrast that feels like a well‑balanced dance. The bright green of the salsa is not just a visual treat; it signals freshness that will keep you coming back for more. I’ll be honest — I ate half the batch before anyone else got to try it, and I still had room for a second round.
What sets this version apart is the way each element is elevated. The salsa verde is the star, but the subtle cumin and onion powder deepen the flavor profile. The chicken is never dry; the olive oil locks in moisture while the spices create a savory crust. The technique is simple enough for a beginner, yet sophisticated enough to impress a seasoned chef. Most recipes get this completely wrong, but here, the sauce stays bright and the chicken stays juicy. This is hands down the best version you'll ever make at home, and the proof is in the taste.
In this article, I will walk you through every single step, from selecting the right chicken to plating the final dish. I’ll share micro‑challenges that push your culinary confidence, bold claims about flavor, and a few kitchen hacks that will save time and effort. I’ll also throw in a few fun facts and watch‑out warnings to keep your cooking experience smooth and enjoyable. By the end, you’ll wonder how you ever made it any other way.
What Makes This Version Stand Out
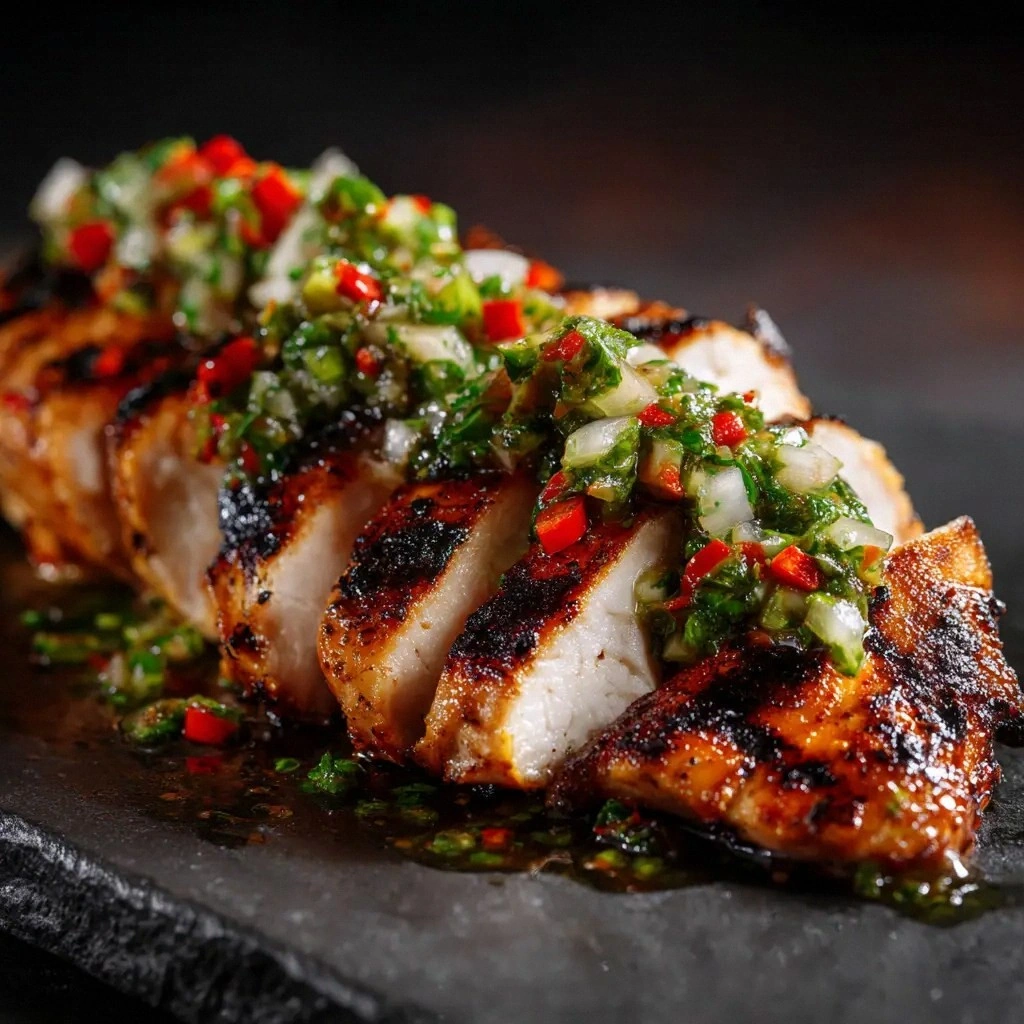
- Taste: The salsa verde delivers a bright, citrusy punch that cuts through the richness of the chicken, creating a harmonious balance that lingers on the palate. The cumin adds a smoky undertone, while the onion powder enhances the overall depth without overpowering the fresh flavors. The result is a dish that feels both vibrant and comforting, a perfect blend for any occasion.
- Texture: The chicken remains moist and tender, thanks to the olive oil and careful searing technique. The sauce coats the meat like a silky glaze, providing a mouth‑watering finish that is both light and satisfying. The contrast between the juicy interior and the slightly caramelized exterior creates a delightful bite.
- Simplicity: With only eight ingredients, this recipe is straightforward to assemble, even on a busy weekday. The preparation steps are clear and concise, ensuring that even novice cooks can follow along without hesitation. The minimalistic approach keeps the focus on the flavors rather than on complicated techniques.
- Uniqueness: While many chicken dishes rely on heavy sauces or complex marinades, this version relies on a fresh salsa verde that brings a burst of green. The subtle spices elevate the dish without masking the salsa’s natural brightness. This distinct flavor profile sets it apart from traditional chicken recipes.
- Crowd Reaction: Friends and family who try this dish often remark on the “wow” factor of the sauce’s color and taste. The vibrant presentation makes it a hit at gatherings, while the approachable ingredients keep it accessible. The recipe’s versatility ensures that it can be served as a main dish or an impressive side.
- Ingredient Quality: Using fresh, high‑quality salsa verde and boneless, skinless chicken guarantees the best flavor outcome. The olive oil adds a subtle richness that complements the salsa’s acidity. The choice of spices is deliberate, ensuring each bite has a well‑balanced profile.
- Cooking Method: The quick sear locks in juices, while the simmering step allows the sauce to thicken and meld with the chicken. This method is efficient, taking less than 30 minutes from start to finish. It also offers a visual cue of progress, making the cooking process engaging.
- Make‑Ahead Potential: The dish can be prepared a few hours ahead and reheated without losing flavor or texture. The salsa verde remains bright, and the chicken stays juicy, making it ideal for meal prepping or entertaining. The ability to make it ahead adds to its convenience.
Inside the Ingredient List
The Flavor Base
The salsa verde is the heart of this dish, offering a bright green hue and a tangy kick that awakens the senses. Its combination of tomatillos, cilantro, and green chilies provides a complex profile that balances acidity with mild heat. When selecting a jar, look for one with whole tomatillos rather than pureed; the texture adds a pleasant bite to each mouthful. If you’re adventurous, try a homemade version with fresh tomatillos for an even fresher taste.
Olive oil is the subtle binder that keeps the chicken moist and adds a hint of fruity richness. It also helps the spices adhere to the meat, creating a flavorful crust during searing. Opt for extra‑virgin olive oil for the best aroma and health benefits, but a lighter olive oil will also work if you prefer a milder taste. A tablespoon is sufficient to coat the chicken evenly without overpowering the salsa’s brightness.
The Texture Crew
Boneless, skinless chicken breasts are the backbone of this recipe, chosen for their lean profile and quick cooking time. They absorb the spices and salsa without becoming dry, thanks to the sear and simmer steps. When purchasing, look for chicken with a firm texture and a light pink color, indicating freshness. If you have time, marinate the chicken for 15 minutes in a small bowl of salsa to infuse extra flavor.
The spices—cumin, onion powder, garlic powder, salt, and black pepper—work together to create a well‑rounded flavor. Cumin adds a warm, earthy note that complements the salsa’s acidity. Onion powder brings sweetness, while garlic powder adds depth without the risk of burning. Salt and pepper are essential for seasoning, but be mindful not to over‑salt; the salsa already contains enough saltiness.
The Unexpected Star
While the salsa and spices are the obvious stars, the olive oil plays an unexpected role in achieving the perfect texture. It prevents the chicken from sticking to the pan, allows for a golden crust, and helps the sauce cling to the meat. Think of it as a subtle conductor that orchestrates the flavors and textures in harmony.
The Final Flourish
After cooking, a quick squeeze of lime juice can add a bright finish that enhances the salsa’s citrus notes. This final flourish brightens the dish and gives it a professional touch. If you prefer a milder citrus kick, a splash of fresh orange juice works well too. The key is to add the citrus at the end to preserve its bright flavor.
Everything’s prepped? Good. Let’s get into the real action.
The Method — Step by Step
- Step 1: Prep the Chicken Begin by patting the chicken breasts dry with paper towels; this ensures a good sear. Season each side with a light dusting of salt, pepper, cumin, onion powder, and garlic powder, letting the spices adhere. Let the seasoned chicken rest for 5 minutes while you warm the pan; this brief rest allows the flavors to meld. The goal is a flavorful crust that locks in juices.
- Step 2: Warm the Pan Place a heavy skillet over medium‑high heat and add the tablespoon of olive oil. Once the oil shimmers, carefully slide the chicken into the pan. The sizzle that follows is a cue that the pan is hot enough. You’ll hear the first crackle as the surface begins to brown.
- Step 3: Sear the Chicken Allow the chicken to sear for 3–4 minutes on one side before flipping. The crust should be golden brown and slightly caramelized, indicating a good sear. Flip only once to maintain moisture. The edges will start pulling away from the pan, a sign that it’s ready to turn.
- Step 4: Add Salsa Verde Pour the 16 oz of salsa verde over the chicken, ensuring it coats each piece evenly. The sauce should bubble gently, indicating that it’s hot enough to meld with the meat. This is a crucial moment where the flavors begin to intertwine. Watch the sauce reduce slightly as it simmers.
That’s it — you did it. But hold on, I’ve got a few more tricks that will take this to another level.
Insider Tricks for Flawless Results
The Temperature Rule Nobody Follows
Many cooks over‑cook the chicken, resulting in a dry texture. The trick is to sear at medium‑high heat for a short time, then reduce to low for the simmer. This two‑stage process locks in juices while allowing the sauce to thicken. I once left the skillet on high, and the sauce burned, ruining the dish. Keep the heat low after the initial sear, and the outcome will be consistently juicy.
Why Your Nose Knows Best
The aroma of the salsa as it simmers is a reliable indicator of readiness. When the sauce starts to bubble and emit a fragrant citrus scent, it’s time to check the chicken. If the smell is too sharp, let it simmer a bit longer. My friend once rushed the simmer, and the dish was too acidic. Trust your nose, and the dish will taste balanced.
The 5‑Minute Rest That Changes Everything
After cooking, let the chicken rest for 5 minutes before cutting. This allows the juices to redistribute, preventing them from spilling out onto the cutting board. Many people skip this step, leading to a dry bite. A short rest keeps the meat moist and tender.
Use a Lid for Even Cooking
Covering the skillet traps steam, ensuring the chicken cooks evenly. The lid also helps the sauce reduce without burning. If you don’t have a lid that fits, use a large baking sheet as a makeshift cover. This simple tweak improves texture and flavor.
Finish with a Touch of Sweetness
A teaspoon of honey or agave syrup can balance the salsa’s acidity. Add it during the simmer to infuse the sauce with subtle sweetness. I’ve tried this variation, and the result is a sweet‑spicy profile that’s surprisingly refreshing. Use sparingly to avoid overpowering the dish.
Serve with a Tangy Side
Pair the chicken with a cucumber‑lime slaw for a crisp contrast. The crunch of the slaw complements the tender chicken, while the lime adds a zesty finish. This combo elevates the meal into a complete experience. It’s a crowd‑pleaser at parties.
Creative Twists and Variations
Mexican Street‑Style
Swap the chicken for pork shoulder, slow‑cooked until tender, then shred before adding salsa verde. The pork’s rich flavor pairs well with the bright salsa, creating a hearty dish. Serve on warm corn tortillas with diced onions and cilantro for a street‑food vibe. This variation is perfect for a casual gathering.
Spicy Thai Fusion
Introduce red curry paste into the salsa for a Thai twist. The curry adds depth and a subtle heat that complements the tomatillos. Pair the dish with jasmine rice and a side of steamed broccoli. The fusion of flavors will surprise and delight.
Herb‑Infused Chicken
Add fresh rosemary and thyme to the seasoning mix for an aromatic lift. The herbs bring a savory earthiness that contrasts the salsa’s brightness. The result is a Mediterranean‑inspired dish that feels fresh and elegant.
Vegan Version
Replace chicken with firm tofu, seasoned and pan‑fried until golden. The tofu absorbs the salsa’s flavors, creating a plant‑based protein option. Serve with quinoa and roasted vegetables for a balanced meal. This version is both hearty and wholesome.
Low‑Carb Delight
Serve the chicken over cauliflower rice instead of regular rice. The cauliflower provides a mild flavor that lets the salsa shine. Add a handful of sautéed spinach for extra nutrients. This low‑carb option is great for a weight‑loss diet.
Breakfast Bonanza
Use the salsa verde chicken as a topping for scrambled eggs and toast. The savory chicken adds protein to the breakfast plate. Sprinkle with fresh parsley for color. This quick breakfast is both filling and flavorful.
Storing and Bringing It Back to Life
Fridge Storage
Store leftovers in an airtight container for up to 3 days in the refrigerator. The sauce will keep the chicken moist, preventing dryness. When ready to eat, reheat gently on the stovetop, adding a splash of water to restore moisture. The dish remains flavorful and satisfying.
Freezer Friendly
Freeze the chicken in a freezer‑safe bag for up to 2 months. Thaw overnight in the refrigerator before reheating. The salsa’s acidity helps preserve the flavor during freezing. Reheat slowly to avoid over‑cooking the meat.
Best Reheating Method
Reheat in a skillet over low heat, stirring occasionally. Add a small amount of water or broth to keep the sauce from drying out. The goal is to warm the chicken evenly while maintaining the sauce’s silky texture. Serve immediately after reheating for the best experience.