Love this? Pin it for later! 📌
Why This Recipe Works
- Triple Chocolate Power: Three types of chocolate create layers of flavor—bittersweet in the filling, cocoa in the crust, and a chocolate ganache glaze for maximum impact.
- Blind-Bake Technique: Par-baking the crust prevents sogginess and ensures it stays crisp even after filling.
- Perfect Texture: The filling's precise ratio of chocolate to cream creates a sliceable texture that's firm yet melts on your tongue.
- Make-Ahead Magic: This tart actually improves in flavor when made 24-48 hours in advance, making entertaining stress-free.
- Professional Finish: The mirror-shine ganache glaze creates a stunning presentation that looks bakery-perfect.
- Adaptable Recipe: Easily customize with different chocolates, flavor additions, or decorative elements to suit any occasion.
Ingredients You'll Need
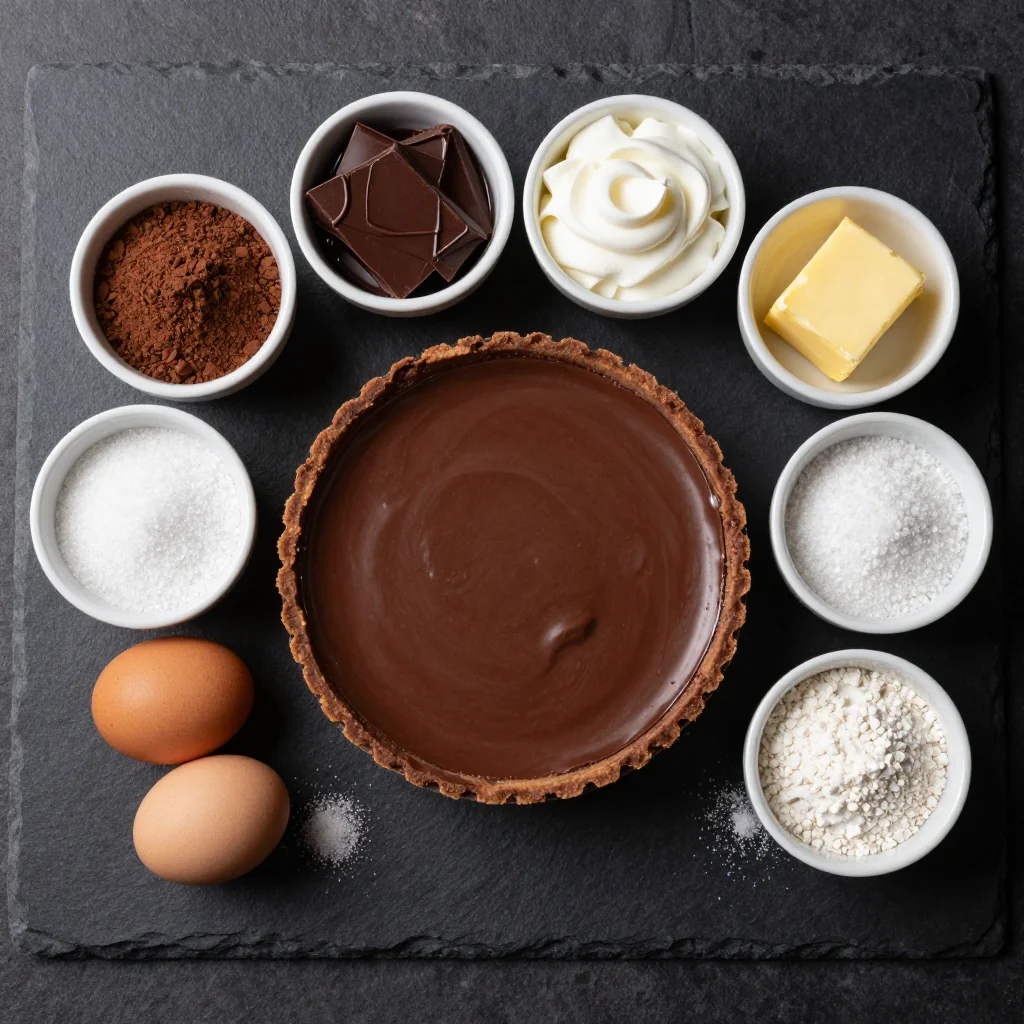
The secret to an exceptional chocolate tart lies in the quality of your ingredients. Each component plays a crucial role in creating the final masterpiece, so let's break down what you'll need and why each ingredient matters.
For the Chocolate Crust:
All-purpose flour (1½ cups) provides structure to our crust. I recommend unbleached flour for better flavor development. If you need a gluten-free option, substitute with a 1:1 gluten-free baking blend that contains xanthan gum.
Unsweetened cocoa powder (¼ cup) gives our crust its chocolate essence and rich color. Dutch-processed cocoa creates a smoother, more mellow chocolate flavor, while natural cocoa provides a more intense, slightly bitter note. Both work beautifully—choose based on your preference.
Powdered sugar (⅓ cup) sweetens the crust while contributing to its tender texture. The cornstarch in powdered sugar helps prevent gluten development, keeping our crust delicate and crisp.
Unsalted butter (½ cup, cold) creates those coveted flaky layers. European-style butter with its higher fat content (82% vs. 80%) yields an exceptionally rich, tender crust. Cut it into small cubes and keep it cold—warm butter leads to a tough crust.
Egg yolk (1 large) enriches the dough and helps bind everything together. The fat in the yolk contributes to tenderness, while proteins provide structure. Save the white for another use, like making meringue cookies.
Heavy cream (2 tablespoons) adds richness and helps bring the dough together. You can substitute with whole milk in a pinch, but the extra fat in cream makes for a more tender crust.
For the Chocolate Filling:
Bittersweet chocolate (12 oz) is the star here. Look for chocolate with 60-70% cacao content—anything higher becomes too bitter for most palates. Brands like Ghirardelli, Callebaut, or Valrhona deliver professional results. Avoid chocolate chips, which contain stabilizers that prevent smooth melting.
Heavy cream (1 cup) creates the luxurious texture of our filling. The fat content stabilizes the filling while keeping it silky smooth. Don't substitute with half-and-half or milk—the filling won't set properly.
Eggs (3 large) provide structure and richness. Room temperature eggs incorporate more easily into the warm chocolate mixture, preventing scrambling.
Unsalted butter (4 tablespoons) adds shine and richness to the filling. European butter's higher fat content creates an even silkier texture.
Pure vanilla extract (1 teaspoon) enhances the chocolate's complexity. Choose Madagascar vanilla for its classic flavor or Mexican vanilla for a spicier note.
Espresso powder (½ teaspoon, optional) intensifies the chocolate flavor without adding coffee taste. It's my secret weapon for deeper chocolate notes.
For the Ganache Topping:
Semisweet chocolate (4 oz) creates our glossy finish. The slightly higher sugar content than the filling chocolate creates a beautiful contrast and prevents the topping from being overly bitter.
Heavy cream (½ cup) should be heated just until simmering—too hot and the chocolate will seize, too cool and it won't melt properly.
How to Make Rich Chocolate Tart for a Showstopper Dessert
Make the Chocolate Crust
In a food processor, combine flour, cocoa powder, powdered sugar, and salt. Pulse 2-3 times to combine. Add cold butter cubes and pulse until mixture resembles coarse crumbs with some pea-sized pieces remaining. Don't overprocess—you want visible butter pieces for flakiness.
Whisk together egg yolk and cream in a small bowl. With processor running, pour egg mixture through feed tube. Process just until dough begins to come together—it will look shaggy and slightly crumbly.
Turn dough onto plastic wrap, gather into a ball, flatten into a disk, wrap tightly, and refrigerate at least 1 hour or up to 3 days. This resting time allows the flour to fully hydrate and prevents shrinkage during baking.
Roll and Shape the Crust
Remove dough from refrigerator and let stand 5-10 minutes to slightly soften—this prevents cracking during rolling. On a lightly floured sheet of parchment paper, roll dough into a 12-inch circle, rotating parchment occasionally and lifting dough to prevent sticking.
Transfer dough to a 9-inch tart pan with removable bottom. Gently press dough into bottom and up sides, ensuring it fits snugly into the fluted edges. Roll rolling pin across top of pan to trim excess dough. Prick bottom all over with fork—this prevents air bubbles from forming.
Freeze the shaped crust for 15 minutes while oven preheats to 375°F (190°C). Freezing helps the crust hold its shape during blind baking.
Blind Bake the Crust
Line frozen crust with parchment paper, pressing it into corners and up sides. Fill with pie weights, dried beans, or uncooked rice—this prevents the bottom from puffing up. Bake 20 minutes until edges begin to look dry and set.
Remove weights and parchment. Return crust to oven and bake 8-10 minutes more until it looks dry and set. The crust won't be fully baked yet—that's perfect. Brush with lightly beaten egg white while still hot—this creates a moisture barrier.
Cool completely on wire rack. Reduce oven temperature to 325°F (165°C) for the filling.
Prepare the Chocolate Filling
Place chopped chocolate in a large heatproof bowl. In a small saucepan, heat cream until just beginning to simmer—you should see small bubbles around the edges. Do not let it boil. Pour hot cream over chocolate and let stand 1 minute to begin melting.
Whisk gently from center outward until chocolate is completely melted and mixture is smooth. If needed, microwave in 10-second bursts, stirring between each, until smooth. Let cool 5 minutes.
Whisk in eggs one at a time until fully incorporated. Whisk in butter, vanilla, espresso powder (if using), and salt until smooth and glossy. The mixture should be thick but pourable.
Pour filling into cooled crust, smoothing top with offset spatula. Jiggle pan gently to release any air bubbles.
Bake the Tart
Place tart on a baking sheet for easy handling. Bake at 325°F for 20-25 minutes until filling is set around edges but still slightly jiggly in center when pan is gently shaken. The filling will continue to set as it cools.
Cool completely on wire rack, then refrigerate at least 4 hours or overnight. This chilling time is crucial for the filling to achieve its proper texture.
Once chilled, the filling should be firm enough to slice cleanly but still creamy and smooth.
Make the Ganache Topping
Place chopped chocolate in a heatproof bowl. Heat cream until just simmering—watch carefully as cream can boil over quickly. Pour hot cream over chocolate and let stand 1 minute.
Whisk gently until chocolate is completely melted and mixture is smooth and glossy. Let ganache cool 10-15 minutes until slightly thickened but still pourable. Test by lifting whisk—ganache should ribbon off in a thick stream.
Pour ganache over chilled tart, starting in center and working outward. Tilt pan to evenly distribute, allowing ganache to drip down sides. Smooth top with offset spatula if needed.
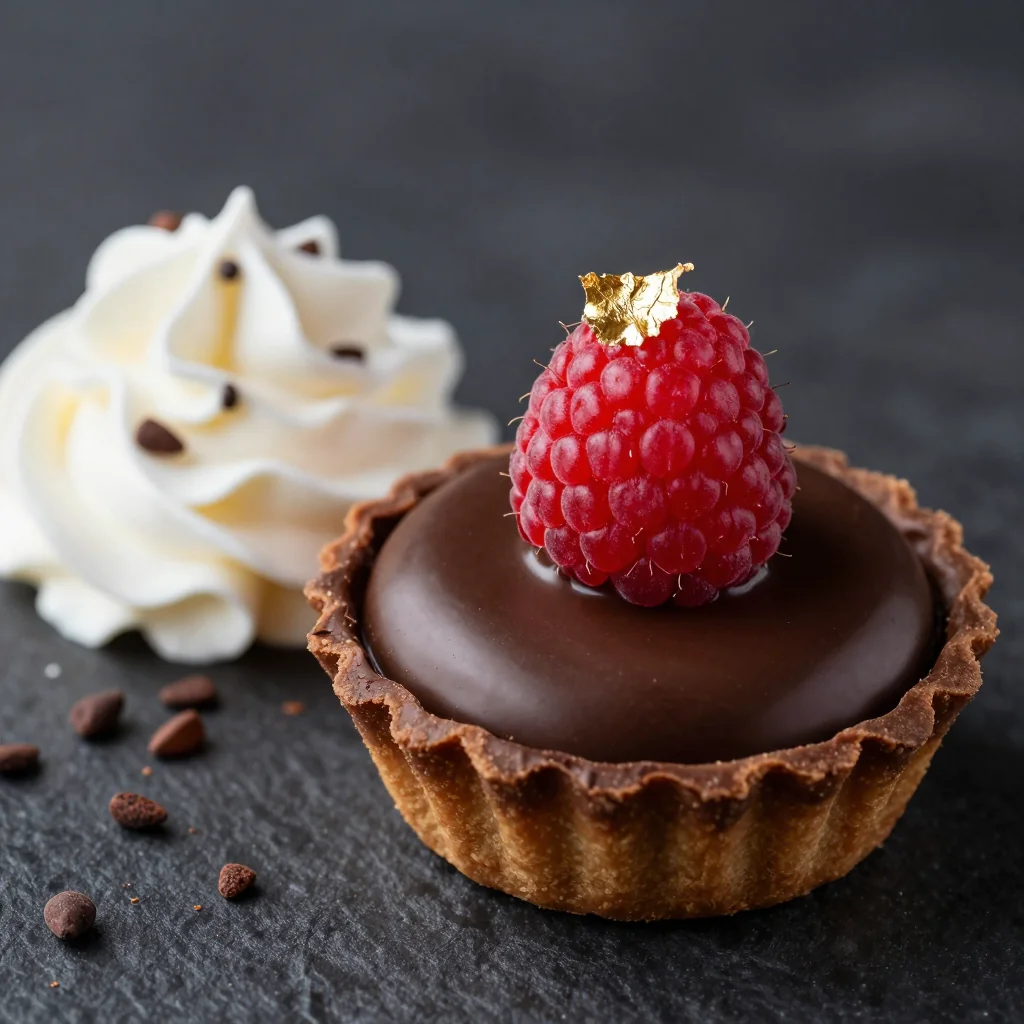
Decorate and Serve
While ganache is still soft, decorate with chocolate shavings, fresh berries, edible flowers, or gold leaf if desired. For chocolate shavings, use a vegetable peeler on a bar of room-temperature chocolate.
Refrigerate tart for 30 minutes to set ganache. Remove from refrigerator 15-20 minutes before serving for best flavor and texture. Use a sharp knife dipped in hot water and wiped clean between cuts for clean slices.
Serve with lightly sweetened whipped cream or vanilla ice cream if desired. The tart pairs beautifully with coffee, dessert wine, or a glass of cold milk.
Expert Tips
Temperature Matters
Always start with cold butter for the crust and room temperature eggs for the filling. This ensures proper incorporation and prevents curdling in the filling.
Water Bath Alternative
If your oven runs hot, place a pan of hot water on the rack below the tart while baking. This prevents the filling from cracking and ensures even cooking.
Patience Pays Off
Don't rush the chilling times. The filling needs at least 4 hours to set properly, but overnight is even better. The flavors meld and deepen beautifully.
Chocolate Quality
Use the best chocolate you can afford. This is a chocolate tart, after all! Cheap chocolate will result in a waxy, overly sweet dessert.
Clean Cuts
For picture-perfect slices, heat your knife under hot water, wipe clean, and cut while warm. Clean and reheat between each cut for professional results.
Prevent Cracks
Don't overbake! The filling should still jiggle slightly in the center when you remove it from the oven. It will continue to set as it cools.
Variations to Try
Mint Chocolate Tart
Add 1 teaspoon peppermint extract to the filling and top with crushed candy canes. Perfect for holidays or St. Patrick's Day!
Orange Chocolate Tart
Replace espresso powder with 1 teaspoon orange zest and add 2 tablespoons Grand Marnier to the filling. Garnish with candied orange peel.
Hazelnut Chocolate Tart
Replace ¼ cup flour with hazelnut flour in the crust. Add 1 teaspoon Frangelico to filling and top with toasted chopped hazelnuts.
Mexican Chocolate Tart
Add ½ teaspoon cinnamon, ⅛ teaspoon cayenne pepper, and ¼ teaspoon chipotle powder to the filling. Top with cinnamon whipped cream.
Mocha Tart
Add 2 tablespoons instant espresso powder and 1 tablespoon coffee liqueur to the filling. Top with coffee-flavored whipped cream and chocolate-covered espresso beans.
Salted Caramel Chocolate Tart
Spread ½ cup caramel sauce over cooled crust before adding chocolate filling. Sprinkle with flaky sea salt before serving.
Storage Tips
Refrigeration
Store the tart in the refrigerator, covered loosely with plastic wrap or in an airtight container, for up to 5 days. The flavor actually improves after the first day as the chocolate deepens and intensifies. For best results, let the tart sit at room temperature for 15-20 minutes before serving to allow the filling to soften slightly.
Freezing
This tart freezes beautifully! Wrap individual slices or the whole tart (without garnishes) tightly in plastic wrap, then aluminum foil. Freeze for up to 2 months. Thaw overnight in the refrigerator, then add fresh garnishes before serving. The texture remains perfect, making this an excellent make-ahead dessert for busy periods.
Make-Ahead
The crust can be baked up to 3 days ahead and stored at room temperature in an airtight container. The entire tart can be made 2 days before serving—in fact, it's better this way! If making for a special occasion, I recommend baking on Thursday for a Saturday event. Add fresh garnishes just before serving for maximum impact.
Frequently Asked Questions
Yes, you can use a 9-inch pie pan, but the results won't be quite the same. A tart pan's straight sides and removable bottom make for cleaner slices and easier serving. If using a pie pan, reduce the filling by 20% to prevent overflow, and be prepared for slightly softer slices. You'll also miss the elegant presentation that a tart pan provides.
Grainy ganache usually results from overheating the cream or chocolate. The cream should be just hot enough to melt the chocolate—small bubbles around the edges but not a rolling boil. If your ganache seizes, you can often save it by whisking in a tablespoon of warm cream. For future batches, heat cream just until steaming and let chocolate sit for a full minute before whisking.
Absolutely! You can make the crust by hand using a pastry cutter or two knives. Cut the butter into the dry ingredients until it resembles coarse crumbs with some pea-sized pieces. Create a well in the center, add the egg yolk and cream, and mix with a fork until dough comes together. The key is working quickly to keep the butter cold and not overworking the dough.
Shrinking happens when the dough is overworked or not properly chilled. Make sure to chill the dough for at least an hour before rolling, and don't stretch the dough when placing it in the pan. Dock (prick) the bottom thoroughly with a fork before blind baking, and don't skip the freezing step. If your kitchen is warm, pop the shaped crust in the freezer for 5 minutes between steps.
While you can substitute milk chocolate, the tart will be much sweeter and less complex. If you prefer milk chocolate, reduce the amount to 10 ounces and increase the cream to 1¼ cups. The result will be softer, more like a chocolate cream pie, and won't slice as cleanly. Consider using a combination of 8 ounces bittersweet and 4 ounces milk chocolate for a balanced flavor.
Cracks form when the filling is overbaked or the oven temperature is too high. The filling should still jiggle slightly in the center when you remove it from the oven—it will continue to set as it cools. If your oven runs hot, use an oven thermometer to verify the temperature. You can also place the tart pan on a baking sheet to moderate heat distribution. Don't worry—cracks will be covered by the ganache topping!
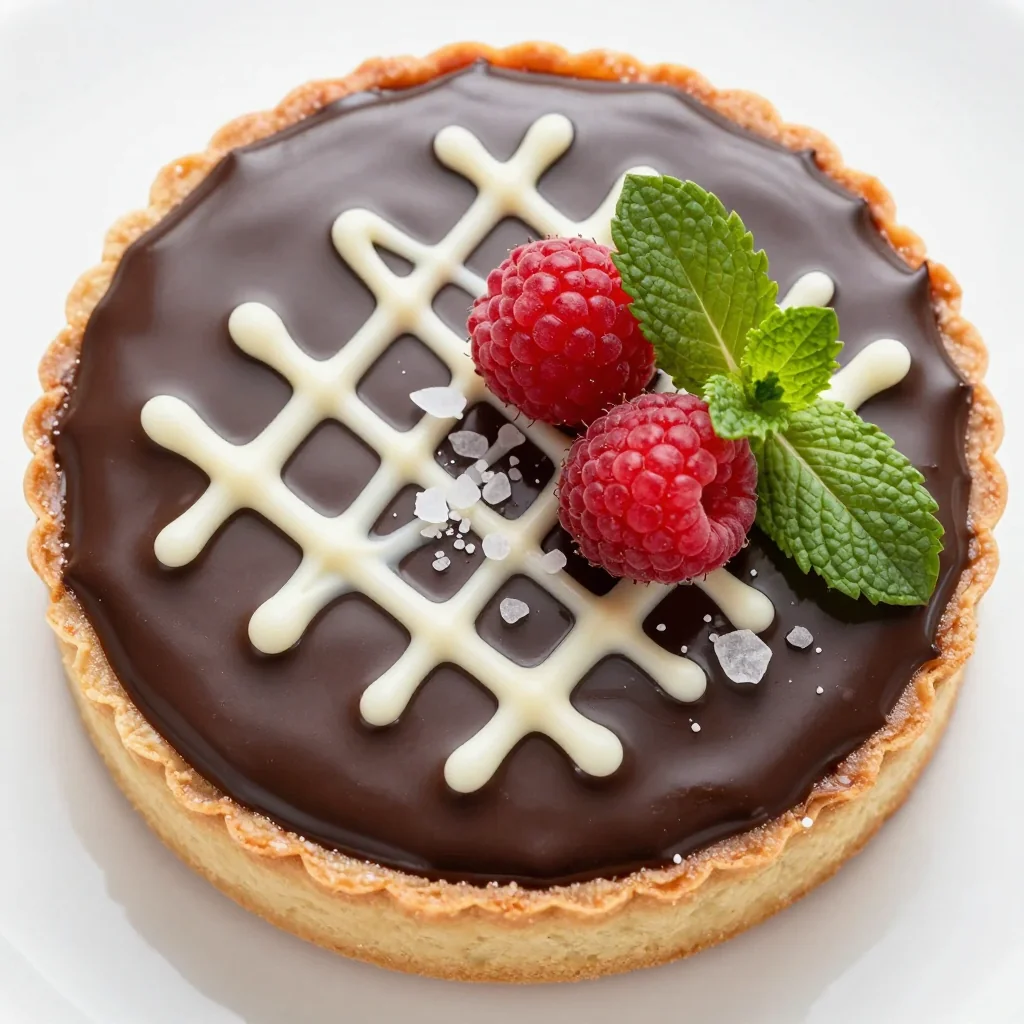
Rich Chocolate Tart for a Showstopper Dessert
Ingredients
Instructions
- Make the crust: Combine flour, cocoa, sugar, and salt in food processor. Add butter and pulse until coarse crumbs form. Add egg yolk and cream; process until dough comes together. Shape into disk, wrap, and chill 1 hour.
- Roll and shape: Roll dough into 12-inch circle on floured parchment. Transfer to 9-inch tart pan, pressing into corners. Trim excess and freeze 15 minutes.
- Blind bake: Line with parchment and fill with weights. Bake at 375°F for 20 minutes. Remove weights and bake 8-10 minutes more. Cool completely.
- Make filling: Pour hot cream over chocolate; let stand 1 minute, then whisk until smooth. Whisk in eggs, then butter, vanilla, and espresso powder.
- Bake tart: Pour filling into crust. Bake at 325°F for 20-25 minutes until set around edges but slightly jiggly in center. Cool, then chill 4 hours.
- Make ganache: Pour hot cream over chocolate; let stand 1 minute, then whisk until smooth. Let cool 15 minutes until thickened.
- Finish: Pour ganache over chilled tart, tilting to distribute evenly. Refrigerate 30 minutes to set. Garnish as desired before serving.
Recipe Notes
For clean slices, heat knife under hot water and wipe clean between cuts. Tart tastes best when made 1-2 days ahead. Store covered in refrigerator for up to 5 days or freeze for up to 2 months.