I was in a frantic rush, trying to salvage a dinner that had turned into a kitchen disaster. The chicken I’d seasoned with soy and garlic had burned on the edges, leaving a bitter char that threatened to ruin the whole meal. In that moment of culinary panic, I remembered a recipe I’d seen on a food blog that promised a bright, citrusy sauce with just the right kick of heat. I grabbed my orange, a jar of chili flakes, and a splash of honey, and decided to give it a shot. The result? A dish that not only saved the night but turned a potential flop into a flavor triumph.
Picture the scene: the aroma of sizzling chicken mingles with the sharp, sweet scent of orange zest drifting through the kitchen. The sizzle on the pan is a satisfying, almost musical cue that something good is happening. The sound of garlic cloves being minced fills the air, a rhythmic percussion that builds anticipation. The first spoonful of sauce is a burst of citrusy brightness, followed by a gentle, warming heat that dances across your palate. The texture—juicy chicken coated in a glossy, velvety glaze—creates a satisfying contrast to the crisp edges that crackle like thin ice.
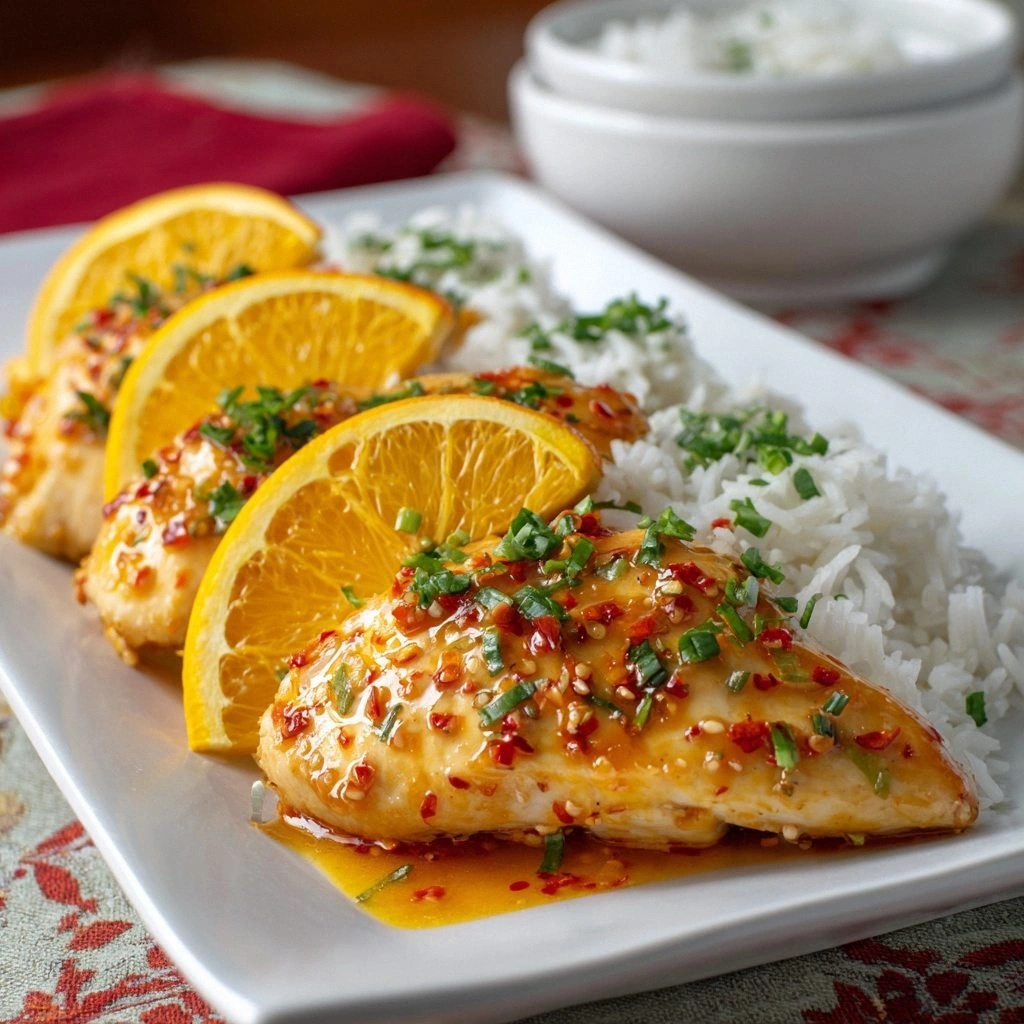
What makes this version stand out is its balance of sweet, savory, and spicy notes, all wrapped in a sauce that coats the chicken like velvet. The sauce’s bright orange hue is not just eye candy; it signals the depth of flavor that comes from combining fresh citrus with a subtle heat. The technique of briefly searing the chicken before simmering it in the sauce locks in moisture while creating a caramelized crust that adds a delightful crunch. The use of cornstarch gives the glaze a silky texture without being heavy, and the final splash of sesame oil adds a nutty aroma that rounds out the dish. Most importantly, this recipe is simple enough to pull off in under 45 minutes, making it perfect for a weeknight dinner that feels like a special occasion.
I dare you to taste this and not go back for seconds. If you’ve ever struggled with balancing sweet and spicy in a single dish, you’re not alone—this recipe has the fix. And if you’re skeptical, let me walk you through every single step—by the end, you’ll wonder how you ever made it any other way.
What Makes This Version Stand Out
- Taste: The sauce marries the bright acidity of fresh orange juice with the umami depth of soy sauce, creating a flavor profile that’s both complex and approachable. The subtle sweetness from honey balances the heat from chili flakes, ensuring no single element overwhelms.
- Texture: A silky glaze coats the chicken, while the quick sear adds a caramelized crust that provides a satisfying bite. The cornstarch thickening gives the sauce body without making it clumpy.
- Simplicity: With fewer than ten ingredients and a straightforward method, you can achieve restaurant-quality flavor in a fraction of the time.
- Uniqueness: The unexpected star is the orange zest, which adds a fragrant brightness that most chicken recipes lack. It’s a small ingredient that transforms the dish.
- Crowd Reaction: Friends who’ve tried this version say it’s “hands down the best version you'll ever make at home.” The dish is a guaranteed hit at potlucks and family dinners alike.
- Ingredient Quality: Using fresh, high‑quality orange juice and a good‑grade soy sauce elevates the sauce’s depth, making a noticeable difference in the final taste.
- Cooking Method: The dual-stage cooking—sear then simmer—ensures the chicken remains juicy while the sauce caramelizes to a glossy finish.
- Make‑Ahead Potential: The sauce can be prepared ahead of time and refrigerated, allowing you to assemble the dish quickly when you’re ready to cook.
Alright, let’s break down exactly what goes into this masterpiece…
Inside the Ingredient List
The Protein Core
Four boneless, skinless chicken breasts are the heart of this dish. They’re the perfect canvas for the bright, citrusy glaze, absorbing the sauce’s flavors without becoming dry. If you’re looking for a lean protein, chicken breast is ideal; if you prefer a richer bite, consider substituting half the chicken with thighs, which add a subtle depth of flavor. The key is to slice the chicken into even pieces so they cook uniformly and stay juicy.
The Flavor Base
The sauce’s foundation is a combination of soy sauce, honey, orange juice, and orange zest. Soy sauce provides umami and saltiness, while honey adds a natural sweetness that balances the acidity of the citrus. Orange juice brings brightness, and the zest delivers aromatic oils that elevate the dish. If you’re watching sodium, use low‑sodium soy sauce; if you prefer a sweeter sauce, increase the honey slightly.
The Heat Factor
Red chili flakes are the secret to the gentle heat that lingers on the palate. They’re subtle enough to complement the citrus without overwhelming it. For a milder version, reduce the flakes to a pinch; for an extra kick, double the amount. The heat is also amplified by a splash of rice vinegar, which adds a subtle tang that enhances the overall flavor profile.
The Final Flourish
Garlic, ginger, and scallions bring depth and freshness to the dish. Minced garlic releases its full flavor when seared, while grated ginger adds a warm, slightly peppery note that pairs beautifully with citrus. Scallions, sliced thinly, provide a mild onion flavor and a pop of color when sprinkled on top. Optional sesame seeds add a nutty crunch that contrasts with the smooth glaze.
Everything’s prepped? Good. Let’s get into the real action…

The Method — Step by Step
- Season the chicken breasts with salt, pepper, and a light dusting of cornstarch. This coating will help the chicken develop a golden crust during searing. Keep a small bowl of water nearby; you’ll need it for deglazing later.
- Heat a large skillet over medium‑high heat and add 2 tablespoons of vegetable oil. When the oil shimmers, place the chicken in the pan, skin side down if you’ve added skin. Let it sear for 3‑4 minutes on each side until it develops a beautiful brown crust.
- Remove the chicken and set it aside. In the same pan, add the minced garlic and grated ginger, sautéing for 30 seconds until fragrant. Watch the aroma—this is the first hint that the dish is coming together.
- Pour in 1/4 cup of soy sauce, 1/4 cup of honey, and 1/4 cup of orange juice. Stir to combine, scraping up any browned bits from the pan. These bits are packed with flavor and will enrich the sauce.
- Add the zest of one orange, 1 teaspoon of chili flakes, and 1 tablespoon of rice vinegar. Stir the mixture; the sauce should begin to bubble gently. The orange zest releases its oils, giving the sauce a bright, citrusy aroma.
- Return the seared chicken to the pan, nestling it into the sauce. Reduce the heat to low, cover, and let it simmer for 10 minutes. The chicken should absorb the sauce while remaining tender and juicy.
- After 10 minutes, remove the lid and increase the heat to medium. Allow the sauce to reduce until it coats the back of a spoon, about 5 minutes. The sauce should thicken to a glossy glaze.
- Stir in 1 tablespoon of sesame oil for a nutty finish. This step is optional but recommended for depth. The sesame oil should be added at the very end to preserve its aroma.
- Remove the skillet from heat, sprinkle sliced scallions and optional sesame seeds over the chicken. Let the dish rest for 2 minutes before serving. The resting period allows the flavors to meld and the glaze to set.
- Serve immediately over steamed rice or sautéed greens. The dish is best enjoyed fresh, but leftovers can be reheated with a splash of water to restore moisture.
That’s it—you did it. But hold on, I’ve got a few more tricks that will take this to another level.
Insider Tricks for Flawless Results
The Temperature Rule Nobody Follows
Most people heat the pan too high and end up with a burnt exterior. I recommend starting with medium‑high heat for the initial sear, then lowering to medium when simmering. This controlled heat keeps the chicken juicy and the sauce from scorching. A quick test: if the sauce sizzles lightly and the chicken browns evenly, you’re on the right track.
Why Your Nose Knows Best
Before you add the chili flakes, take a deep sniff of the sauce. A bright, citrusy aroma indicates the orange juice is fresh. If it smells flat, the juice might be old or diluted, which will affect the overall brightness. Trust your nose—it’s the quickest way to gauge freshness.
The 5‑Minute Rest That Changes Everything
After you remove the skillet from heat, let the dish rest for five minutes. This allows the glaze to thicken slightly and the flavors to meld. It also gives the chicken a chance to re‑absorb some of the sauce, ensuring every bite is luscious. Skipping this step often results in a sauce that’s too thin.
Use Fresh Orange Zest, Not Grated
Fresh zest is essential for that bright, aromatic punch. Grated zest can lose its essential oils quickly, resulting in a dull sauce. Use a microplane for a fine, even zest that disperses evenly throughout the dish.
Keep the Scallions Crisp
Add scallions right before serving to preserve their crunch and fresh flavor. If you add them too early, they’ll wilt and lose their bright green color. A quick splash of lemon juice can also brighten the green, making the garnish pop.
Creative Twists and Variations
This recipe is a playground. Here are some of my favorite ways to switch things up:
Asian Fusion Bowl
Serve the chicken over jasmine rice, top with shredded carrots, sliced cucumber, and a drizzle of extra sauce. Add a sprinkle of toasted sesame seeds for crunch. This variation turns the dish into a complete, balanced bowl.
Spicy Pineapple Kick
Replace half the orange juice with fresh pineapple juice and add diced pineapple to the pan during the last five minutes of simmering. The tropical sweetness pairs beautifully with the chili heat, creating a vibrant, exotic flavor profile.
Herb‑Infused Variation
Stir in a handful of chopped fresh cilantro or basil just before serving. The herb adds a fresh, green note that brightens the dish and complements the citrus.
Low‑Carb Version
Use a sugar‑free sweetener in place of honey and reduce the orange juice to 2 tablespoons. Serve over cauliflower rice for a low‑carb, keto‑friendly meal that still delivers on flavor.
Vegan Take‑Away
Swap the chicken for tofu or tempeh, sear it until crispy, then simmer in the sauce. The tofu will absorb the glaze, resulting in a plant‑based dish that’s just as satisfying.
Gluten‑Free Twist
Use tamari instead of soy sauce and a gluten‑free cornstarch slurry to thicken the sauce. The flavor remains unchanged, and the dish is safe for gluten‑sensitive diners.
Storing and Bringing It Back to Life
Fridge Storage
Store leftovers in an airtight container in the refrigerator for up to 3 days. The sauce will thicken slightly as it cools, so a quick stir before reheating restores its glossy consistency. For best flavor, reheat over low heat with a splash of water or broth.
Freezer Friendly
Freeze the dish in freezer‑safe containers for up to 2 months. When ready to eat, thaw overnight in the fridge and reheat gently on the stovetop. Add a tablespoon of water to prevent the sauce from becoming too thick.
Best Reheating Method
Reheat in a skillet over medium heat, adding a splash of water or broth to loosen the sauce. Stir frequently to prevent sticking. Once the sauce is heated through and glossy again, serve immediately over fresh rice or noodles.