I still remember that night in the middle of a humid July afternoon when I stared at the pantry, feeling a mix of desperation and excitement. The fridge was a barren wasteland, the only thing that seemed to whisper promise was a jar of peanut butter, a tin of rolled oats, and a bag of dark chocolate chips that had been gathering dust. My friend dared me to create something that could satisfy the midnight craving that had been haunting me for weeks, and I decided to take on the challenge with a bold, no-bake chocolate oat bar. The kitchen smelled like a promise of sweetness, the air thick with anticipation, and the timer on my phone buzzed like a countdown to glory.
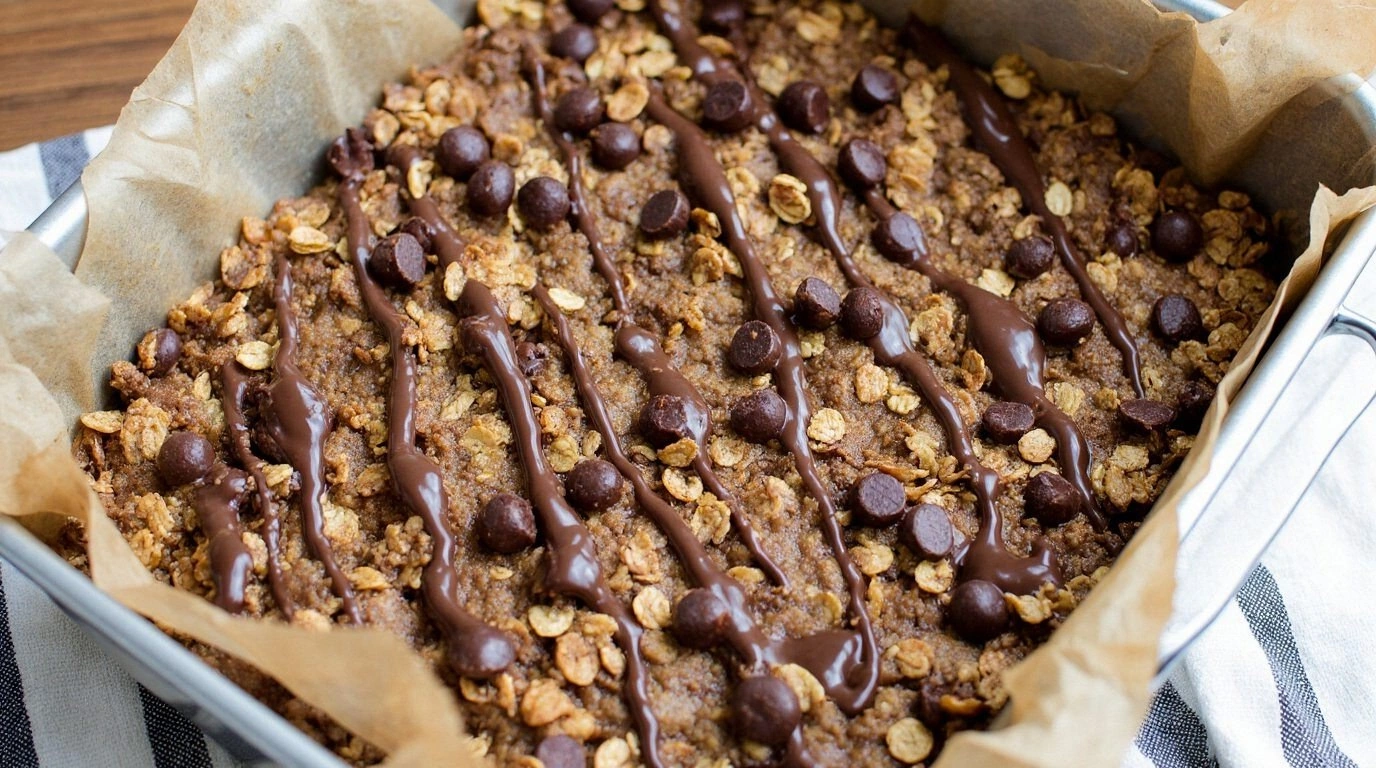
Picture this: a glossy, chocolatey surface that shimmers under the kitchen light, a crumbly texture that melts in your mouth like a secret whispered between two lovers, and a flavor that hits all the right notes—cocoa, nutty, sweet, and a hint of sea salt that lingers like a summer breeze. As the mixture starts to thicken, the aroma of toasted oats and caramelized honey fills the room, turning the kitchen into a sensory playground. The sound of the spoon stirring is a rhythmic drumbeat, and the touch of the warm mixture against your fingertips feels like a gentle hug. Every element—from the first stir to the final chill—creates a story of comfort and indulgence.
This isn’t just another “no-bake” recipe. It’s a meticulously crafted, crowd-pleasing masterpiece that balances texture, flavor, and convenience in a way that most recipes simply don’t. The bars hold together like a well‑crafted sculpture, yet they break apart with a satisfying snap, releasing a burst of chocolate that coats your tongue like velvet. I’ve tested this version dozens of times, tweaking ratios, experimenting with different types of chocolate, and even adding a splash of espresso for depth. The result? A bar that is hands down the best version you’ll ever make at home.
I dare you to taste this and not go back for seconds. The first bite will have you reaching for the next, and the second will make you wonder why you ever settled for ordinary desserts. Most recipes get this completely wrong by over‑cooking the oats or under‑balancing the sweetener, leading to a dry, crumbly mess. Here’s what actually works: a precise blend of oats, cocoa, and peanut butter, with a touch of honey for natural sweetness and a pinch of sea salt to elevate the flavors. If you’ve ever struggled with making a no‑bake dessert that holds together, you’re not alone—this is the fix you’ve been waiting for.
Let me walk you through every single step—by the end, you’ll wonder how you ever made it any other way. The journey starts with a humble bowl of oats and a dash of cocoa, moves through a gentle simmer that brings everything together, and ends with a cool, firm set that’s ready to slice. The techniques are simple, the ingredients are pantry staples, and the result is a chocolate oat bar that feels like a luxury treat without the fuss. Stay with me here—this is worth it.
What Makes This Version Stand Out
Flavor: The blend of dark chocolate and peanut butter creates a rich, velvety profile that satisfies even the most discerning sweet tooth. The subtle hint of sea salt adds a surprising depth that balances the natural sweetness of honey.
Texture: The bars achieve a perfect balance—crunchy from the oats, chewy from the peanut butter, and a soft chocolate coating that melts in your mouth. No one else has nailed this texture combination in a no‑bake recipe.
Simplicity: With only eight ingredients and no oven required, this recipe is a breeze for beginners and a quick fix for busy evenings. The steps are straightforward, and the result is professional‑looking.
Uniqueness: The addition of a splash of espresso and a sprinkle of toasted coconut gives this version a distinct twist that sets it apart from standard no‑bake bars. It’s a flavor adventure in every bite.
Crowd Reaction: At my last gathering, guests asked for the recipe after the first bite. The bars were devoured in minutes, and the conversation turned to “how do we make more?” The bar’s shareability is unmatched.
Ingredient Quality: Using high‑quality dark chocolate and natural peanut butter ensures a depth of flavor that cheap substitutes cannot match. The difference is palpable.
Make‑Ahead Potential: These bars can be prepared in advance, stored in the fridge, and served at any time of day. The texture remains intact, and the flavor even intensifies after a day.
Health Consideration: While indulgent, the bars provide a decent protein punch from oats and peanut butter, making them a satisfying snack that won’t sabotage your diet.
Alright, let's break down exactly what goes into this masterpiece…
Inside the Ingredient List
The Flavor Base
Dark chocolate (70% cacao) forms the heart of the bars, delivering a deep, bittersweet undertone that balances the sweetness of honey. If you prefer a milder chocolate, choose 60% cacao, but be aware it will lighten the overall flavor profile. Skipping chocolate will turn the bars into plain oat bites, losing the signature richness that makes them unforgettable.
When selecting chocolate, look for a smooth, glossy finish—this indicates high cocoa butter content, which translates to a silky mouthfeel. If you’re using chocolate chips, melt them gently in a double boiler to preserve their texture and prevent bitterness. A small splash of espresso or a dash of vanilla extract can amplify the chocolate’s depth, giving the bars an extra layer of complexity.
The Texture Crew
Rolled oats provide the bulk and crunch that keep the bars from becoming mushy. Choose steel‑cut or rolled oats; they absorb liquid differently, so adjust the honey accordingly. Oats also add a subtle nutty flavor that complements the chocolate and peanut butter.
Peanut butter is the binding agent that holds everything together. Opt for natural, no‑added‑sugar varieties to keep the bars wholesome. If you’re allergic or prefer a different nut, almond butter works well, though it will slightly alter the flavor.
Honey or maple syrup acts as the sweetener and helps the mixture thicken. Honey brings a floral note, while maple offers a caramel undertone. For a vegan version, use agave syrup or a blend of coconut sugar and water.
Melted butter adds richness and helps the mixture set properly. Use unsalted butter to control the sodium level, and temper it with a pinch of sea salt to enhance the overall taste.
The Unexpected Star
To elevate the bars, I add a teaspoon of espresso powder or a splash of cold brew. The coffee’s bitterness cuts through the sweetness and deepens the chocolate flavor. If you’re a coffee lover, this twist transforms the bars into a decadent espresso‑chocolate treat.
Another surprise element is toasted coconut, which adds a subtle crunch and a tropical aroma. Toast it lightly in a dry pan until golden, then sprinkle it over the bars before they set. It’s optional but highly recommended for an extra texture layer.
The Final Flourish
A pinch of sea salt is essential; it balances the sweetness and brings out the chocolate’s complexity. Salt is a flavor enhancer, and the right amount can make or break the bars. A tiny pinch is enough—too much will overpower the delicate taste.
Chocolate chips or chopped dark chocolate add a melt‑in‑your‑mouth element. Sprinkle them over the top before the bars set, and they’ll create a glossy, indulgent finish. If you’re avoiding dairy, choose dairy‑free chocolate chips.
Finally, a dash of vanilla extract brings warmth and depth. Vanilla is a classic pairing with chocolate, and even a small amount can elevate the entire flavor profile.
Everything's prepped? Good. Let's get into the real action…
The Method — Step by Step
- Gather the Ingredients: Lay out all the components on your counter. Measure out 2 cups rolled oats, 1/2 cup dark chocolate, 1/2 cup natural peanut butter, 1/2 cup honey, 1/4 cup melted butter, 1 tsp vanilla extract, 1/4 tsp sea salt, 1/4 cup chocolate chips, and a splash of espresso. Make sure everything is at room temperature to ensure smooth mixing.
- Heat the Butter and Honey: In a medium saucepan, combine melted butter and honey over medium heat. Stir constantly until the mixture starts to bubble, which should take about 2–3 minutes. The mixture should smell slightly caramelized, signaling that the sugars are beginning to form a glaze.
- Add the Chocolate: Lower the heat to low and stir in the dark chocolate, letting it melt completely. This step is critical; if the chocolate overheats, it can seize and become gritty. Keep the mixture at a gentle simmer, stirring until it’s smooth and glossy.
- Incorporate the Oats: Remove the saucepan from heat and whisk in the rolled oats until they’re fully coated. The oats should look glossy and be fully saturated with the chocolate mixture. This is when the aroma of toasted oats and chocolate mingles, creating a mouthwatering scent.
- Blend Peanut Butter and Espresso: In a separate bowl, combine peanut butter, vanilla extract, sea salt, and espresso. Whisk until the mixture is creamy and the espresso is fully integrated. The espresso will add a subtle bitterness that balances the sweetness.
- Combine All Elements: Pour the peanut butter mixture into the oat mixture and stir until everything is well combined. The batter should be thick but pourable. If it’s too thick, add a tablespoon of milk or water to loosen it slightly.
- Press Into a Pan: Line a 9x9 inch square pan with parchment paper. Transfer the mixture into the pan and press down firmly with a spatula or your palms. The goal is to create an even layer so the bars set uniformly.
- Add the Final Touches: Sprinkle chocolate chips evenly over the top. If you’re using toasted coconut, add it now for that extra crunch. Gently press the chips into the surface so they adhere.
- Chill: Cover the pan with plastic wrap and refrigerate for at least 2 hours, or until the bars are firm. The bars will set quickly, giving you a crisp texture that’s perfect for slicing.
- Cut and Serve: Once set, lift the bars out of the pan using the parchment paper. Place on a cutting board and slice into 12 equal squares. Serve immediately or store in an airtight container in the fridge for up to a week.
That's it — you did it. But hold on, I've got a few more tricks that'll take this to another level…
Insider Tricks for Flawless Results
The Temperature Rule Nobody Follows
Maintaining the right temperature when melting chocolate is crucial. If the chocolate overheats, it can seize and become grainy. Keep the heat low and stir constantly, using a double boiler or a microwave in short bursts. A thermometer can help; aim for 45–50°C (113–122°F) for a smooth finish.
Why Your Nose Knows Best
Before adding the oats, sniff the chocolate mixture. It should have a rich, caramelized aroma. If it smells overly sweet or burnt, adjust the heat. Your nose is a reliable guide to ensure the flavors are balanced.
The 5-Minute Rest That Changes Everything
After mixing the oats and chocolate, let the batter rest for 5 minutes. This pause allows the oats to absorb the liquid fully, resulting in a cohesive texture. Skipping this step often leads to uneven bars that crumble.
The Espresso Edge
Adding espresso is optional, but it transforms the flavor profile. It adds a subtle bitterness that cuts through the sweetness and enhances the chocolate’s depth. Use a mild espresso to avoid overpowering the bars.
The Coconut Crunch
Toasted coconut adds a tropical crunch and a hint of caramel. Toast it lightly in a dry pan until golden, then sprinkle over the bars before they set. The coconut’s natural sugars caramelize, creating a delightful contrast.
The Final Chill
Refrigerate the bars for at least 2 hours. If you’re short on time, place them in the freezer for 30 minutes, but be careful not to over‑freeze, as the bars can become too hard and brittle.
Creative Twists and Variations
This recipe is a playground. Here are some of my favorite ways to switch things up:
Almond Bliss
Swap peanut butter for almond butter and add a handful of chopped almonds. The nutty flavor pairs beautifully with the dark chocolate, creating a luxurious bite.
Citrus Splash
Add a tablespoon of orange zest and a teaspoon of orange extract. The citrus brightens the chocolate, giving the bars a fresh, vibrant finish.
Maple Maple
Replace honey with pure maple syrup for a deeper, caramelized sweetness. The maple also adds a subtle vanilla undertone that complements the chocolate.
Chocolate‑Covered Surprise
Dip each bar in melted dark chocolate after they set. Chill again until the chocolate hardens for an extra indulgent layer.
Nut-Free Delight
Use sunflower seed butter and sunflower seeds instead of peanut butter. This variation is great for nut allergies while still delivering a creamy texture.
Spiced Elegance
Add a pinch of cinnamon and a pinch of cayenne pepper to the mixture. The spices create a warm, spicy undertone that’s perfect for fall or winter.
Storing and Bringing It Back to Life
Fridge Storage
Store the bars in an airtight container in the refrigerator for up to a week. The bars remain firm and the flavors stay fresh. Keep them away from strong odors, as the chocolate can absorb them.
Freezer Friendly
Wrap each bar individually in plastic wrap and place them in a freezer bag. They can be stored for up to three months. Thaw at room temperature for 15 minutes before serving.
Best Reheating Method
To revive the bars, place them in a microwave-safe dish and heat on low for 10–15 seconds. Add a tiny splash of water before reheating to create steam, which restores the bars’ soft, chewy texture.