Picture this: the kitchen lights flicker, the oven timer blares, and you’re staring at a bowl of egg whites that has somehow turned into a cloud of disappointment. I had just attempted a classic meringue for a holiday dessert, but the result was a rubbery, lumpy mess that could barely hold a fork. The moment I tasted it, I felt a pang of culinary betrayal – the sweet, airy promise of a meringue had been betrayed by the stubbornness of my whisk. I swore then that I would not let this happen again. So I set out to create a version that would make even the most skeptical of guests gasp.
The kitchen was a symphony of sizzling pans, the faint scent of cocoa drifting through the air, and the rhythmic clink of spoon against bowl. My eyes were glued to the glossy surface of the egg whites as they rose, foamy and gleaming like a sunrise on a quiet lake. The anticipation was tangible, almost like the hush before a thunderclap. I could almost taste the crisp edges, the buttery interior, the hint of dark chocolate melting into a velvety glaze. It was the kind of moment that makes you feel like a culinary wizard, but also a little terrified of what could go wrong.
Fast forward to the present, and I’m about to reveal a recipe that will forever change the way you think about meringue. This isn’t just about whipping egg whites; it’s about marrying that airy texture with the deep, bittersweet kiss of premium dark chocolate and a whisper of cocoa powder. The result is a dessert that feels both indulgent and airy, like a cloud that has been dipped in midnight velvet. The trick? A precise technique that locks in the sweetness, a careful tempering of chocolate, and a final flourish that gives it a dramatic, almost theatrical finish. I promise, this is hands down the best version you’ll ever make at home.
Now, I dare you to taste this and not go back for seconds – or at least, I dare you to try it first and then come back for the second. Imagine the first bite: a crisp, golden shell that cracks like a brittle shell, revealing a soft, chocolate-infused interior that melts in your mouth. The subtle crunch gives way to a silky, chocolatey melt that lingers, leaving a faint echo of cocoa on your palate. Picture yourself pulling this out of the oven, the whole kitchen smelling incredible, and your guests gasping in awe. Let me walk you through every single step – by the end, you’ll wonder how you ever made it any other way.
What Makes This Version Stand Out
- Texture: The meringue’s exterior is a perfectly crisp shell that yields to a velvety interior, creating a delightful contrast that excites the palate. The careful whipping technique ensures a stable foam that holds its shape even when topped with chocolate.
- Flavor Depth: Premium dark chocolate is tempered to release its full-bodied flavor, while a subtle cocoa powder infusion adds a hint of earthiness that balances the sweetness.
- Visual Appeal: The glossy, caramelized edges of the meringue, paired with a glossy chocolate glaze, create a stunning presentation that looks as good as it tastes.
- Time Efficiency: Despite its sophisticated flavor profile, the recipe takes less than an hour from start to finish, making it a practical choice for holiday gatherings.
- Make‑Ahead Potential: The meringues can be prepared up to 24 hours in advance, allowing you to focus on other festive tasks while the dessert finishes baking.
- Ingredient Quality: Using only four simple, high‑quality ingredients ensures that each component shines, without any artificial additives or preservatives.
Inside the Ingredient List
The Flavor Base
Dark chocolate is the heart of this dessert, providing a rich, bittersweet backdrop that elevates the airy meringue. Choose a chocolate that is at least 70% cacao to ensure depth without overpowering the delicate egg whites. If you prefer a milder taste, a 60% cacao will still deliver a satisfying bite. Skipping chocolate would turn this into a plain meringue, losing the luxurious chocolatey finish that makes it stand out.
The Texture Crew
Egg whites form the structural backbone, whipping into a stable foam that holds the meringue’s shape. The key is to start with room‑temperature whites; they rise faster and reach a higher peak. If you use cold whites, give them a few minutes to warm up at room temperature before whipping. A small pinch of salt can also help stabilize the foam, but avoid too much or it will alter the flavor.
The Unexpected Star
Powdered sugar is the sweetener that binds the meringue together. It dissolves instantly, preventing graininess that can ruin the silky texture. Using superfine sugar instead of regular powdered sugar can further smooth the final product. If you’re looking for a lower‑sugar option, a sugar substitute that behaves similarly in meringues can be used, but expect a change in taste.
The Final Flourish
Cocoa powder adds a subtle depth of flavor and a hint of color to the final glaze. It also balances the sweetness of the powdered sugar. A dark, unsweetened cocoa powder works best, as it won’t introduce additional sugar. If you’re allergic to cocoa or simply want a different twist, try a small amount of espresso powder for a mocha‑inspired finish.
Everything's prepped? Good. Let's get into the real action.
The Method — Step by Step
- Step 1: Prep the Oven and Pan. Preheat your oven to 325°F (160°C) and line a rimmed baking sheet with parchment paper. A preheated oven ensures a slow, even rise for the meringues, preventing a sudden collapse. Place a small dish of water in the oven to maintain humidity, which helps keep the meringue moist inside. Let the oven settle for 10 minutes before proceeding. This step sets the foundation for a flawless rise.
- Step 2: Whip the Egg Whites. Separate the egg whites into a clean, dry bowl, ensuring no yolk contaminates them. Use a stainless steel or glass bowl; plastic can retain oils that inhibit whipping. Begin whipping on medium speed until the whites are frothy, then increase to high. Aim for soft peaks before adding sugar, as this gives you a better chance to reach a glossy peak. Keep your whisk steady to avoid introducing air pockets that can cause the meringue to collapse.
- Step 3: Incorporate the Sugar. Gradually add the powdered sugar in a slow, steady stream while continuing to whip. The sugar dissolves quickly once the whites reach medium peaks, preventing graininess. Stir gently with a spatula until the mixture is smooth and glossy. The meringue should hold stiff peaks that stand straight up when the beaters are lifted. This step locks in the sweetness and sets the structure for the final product.
- Step 4: Temper the Chocolate. While the meringue rises, melt the dark chocolate over a double boiler or in a heat‑proof bowl set over a pot of simmering water. Stir until fully melted and silky. Remove from heat and let it cool to a temperature where it’s warm but not hot, about 110°F (43°C). This tempering process ensures the chocolate coats the meringues without hardening too quickly. A properly tempered glaze will remain glossy and pour smoothly over the tops.
- Step 5: Fold in Cocoa Powder. Gently fold the cocoa powder into the meringue using a spatula. This step must be done with care; too vigorous folding can deflate the airy foam. The cocoa adds depth and color, giving the meringue a subtle, chocolatey undertone. Be sure to sift the cocoa powder to avoid lumps. A smooth, even distribution will result in a more uniform flavor profile.
- Step 6: Pipe the Meringues. Transfer the meringue mixture into a piping bag fitted with a small round tip. Pipe small, uniform circles onto the prepared baking sheet, spacing them about an inch apart. The size should be about 1.5 inches in diameter to allow for even cooking. This uniformity ensures each meringue cooks at the same rate, preventing some from burning while others remain underdone. The piping bag gives you control over the shape and consistency.
- Step 7: Bake to Perfection. Place the baking sheet in the preheated oven and bake for 30–35 minutes. The meringues should rise slightly, develop a golden brown crust, and feel firm to the touch. Avoid opening the oven door frequently; the sudden temperature drop can cause the meringues to collapse. Once baked, turn off the oven and let the meringues sit inside for an additional 10 minutes with the door ajar. This final resting period allows the interior to set without drying out.
- Step 8: Cool Completely. Remove the baking sheet and transfer the meringues onto a wire rack. Allow them to cool for at least 15 minutes; this ensures the interior fully sets before glazing. The cooling time also prevents condensation that could make the glaze run. While cooling, you can prepare the glaze, which will be poured over the meringues once they’re at the right temperature.
- Step 9: Glaze the Meringues. Once the meringues are cool, drizzle the tempered chocolate glaze over the tops, letting it pool slightly for a dramatic effect. The glaze should coat the surface evenly, creating a glossy finish that contrasts with the crisp meringue. Allow the glaze to set for 5 minutes before serving. This final step adds a decadent chocolate layer that ties the whole dessert together.
- Step 10: Serve and Enjoy. Present the meringues on a festive platter, perhaps garnished with fresh berries or a dusting of powdered sugar for an extra touch. The aroma of chocolate and toasted meringue will fill your kitchen, making guests eager to taste. Serve immediately for the best texture, but if you need to hold them, keep them in an airtight container at room temperature. Remember, the first bite is where the magic happens.
Insider Tricks for Flawless Results
The Temperature Rule Nobody Follows
Temperature is everything when whipping egg whites. Keep the bowl and whisk chilled; a temperature difference of even a few degrees can double your whipping time. I once tried room‑temperature whites in a hot kitchen and the meringue collapsed. The trick is to refrigerate the bowl and whisk for 10 minutes before use. This simple step guarantees a stable foam that holds its shape.
Why Your Nose Knows Best
Smell the meringue as it rises – it should have a sweet, almost buttery aroma. If it smells slightly metallic, you may have overwhipped, and the structure will be fragile. The aroma is a reliable indicator that the meringue has reached the right peak. Trust your nose; it’s a seasoned judge of texture.
The 5‑Minute Rest That Changes Everything
After baking, let the meringues sit in the oven with the door slightly open for 5 minutes. This gentle rest allows the interior to set without the outer shell becoming too hard. I once skipped this step and ended up with a chewy center. That extra 5 minutes makes the difference between a perfect bite and a disappointing chew.
The Secret to a Smooth Glaze
When tempering chocolate, aim for a temperature of 110°F (43°C). This temperature ensures the glaze flows smoothly without hardening too quickly. Use a candy thermometer for precision. A properly tempered glaze will coat the meringue like liquid silk.
Avoiding the Crumbly Pitfall
If the meringue feels crumbly, the sugar may not have dissolved completely. Whisk the mixture until it’s glossy and the sugar is fully integrated. A quick test is to touch the surface; it should be smooth, not gritty. A crumbly texture ruins the airy experience.
The Final Touch: A Dusting of Powdered Sugar
Just before serving, lightly dust the glazed meringues with powdered sugar. This adds a subtle sweetness and a visual contrast that makes the dessert pop. It also helps to mask any slight bitterness from the dark chocolate. A final dusting is the finishing flourish that elevates the dish.
Creative Twists and Variations
This recipe is a playground. Here are some of my favorite ways to switch things up:
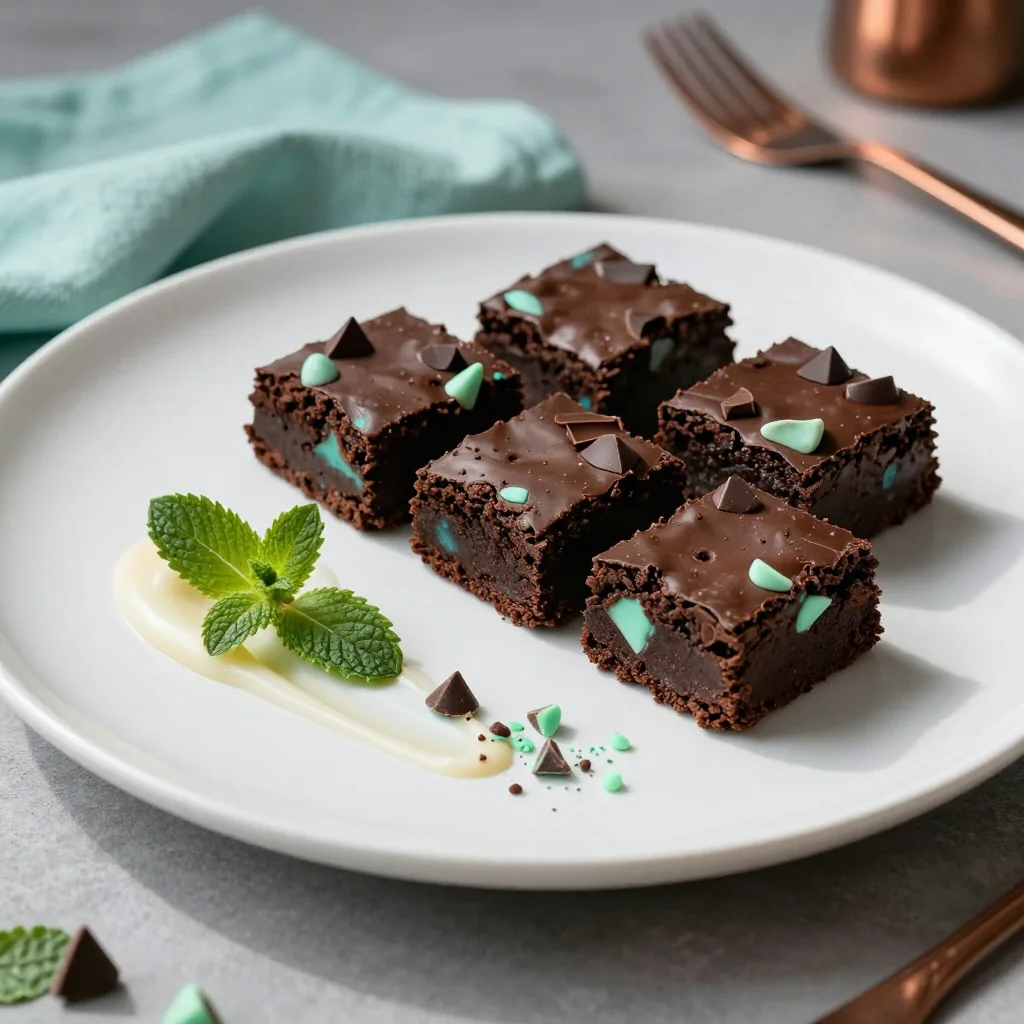
Minty Magic
Add a teaspoon of fresh mint extract to the meringue mixture before whipping. The mint provides a refreshing contrast to the chocolate, making it ideal for spring celebrations. The aroma of mint will also lift the overall flavor profile.
Espresso Espresso
Replace the cocoa powder with a tablespoon of espresso powder for a mocha‑inspired twist. The coffee notes deepen the chocolate flavor and add a subtle bitterness that balances the sweetness. This version is perfect for coffee lovers and pairs well with a glass of dessert wine.
Nutty Crunch
Fold chopped toasted almonds or hazelnuts into the meringue before piping. The nuts add a delightful crunch and nutty aroma that complement the chocolate glaze. Be careful not to overmix; the nuts should be evenly distributed without deflating the foam.
Citrus Burst
Add a teaspoon of lemon zest to the meringue for a bright, citrusy lift. The zest introduces a zesty brightness that cuts through the richness of the chocolate. This variation is especially refreshing during the holiday season.
Spiced Wonder
Incorporate a pinch of ground cinnamon and nutmeg into the meringue for a warm, spiced flavor. The spices add depth and are reminiscent of holiday desserts. This version pairs beautifully with a warm cup of tea.
Caramel Swirl
Drizzle a thin stream of caramel sauce over the glazed meringues before the chocolate sets. The caramel adds a buttery sweetness that balances the bitterness of the dark chocolate. The result is a decadent, multi‑layered dessert.
Storing and Bringing It Back to Life
Fridge Storage
Place the cooled meringues in an airtight container and store them in the refrigerator for up to 2 days. The cold environment preserves the crisp exterior while keeping the interior from becoming soggy. When ready to serve, let them sit at room temperature for 10 minutes to regain their airy texture.
Freezer Friendly
For longer storage, freeze the meringues on a parchment‑lined tray for 24 hours, then transfer them to a freezer bag. They can stay fresh for up to 3 weeks. Thaw at room temperature for 30 minutes before serving. This method keeps the meringues firm and ready to be glazed on demand.
Best Reheating Method
Reheat frozen or refrigerated meringues in a preheated oven at 250°F (120°C) for 10 minutes. Avoid higher temperatures, which can melt the chocolate glaze. Add a tiny splash of water to the baking sheet to create steam, which helps maintain the crispness of the meringue while preventing the glaze from cracking.