I was in the middle of a lazy Sunday when my roommate dared me to turn a plain old pizza dough into something that would make our neighbor’s dog drool. I stared at the dough, half‑heartedly thinking about a quick bake, and then remembered the night I accidentally dropped a piece of flatbread into hot oil – the sizzle was like a tiny fireworks show, and the result was a crunchy, golden disc that smelled like a street‑fair dream. That moment sparked a reckless experiment: what if I could fry a pizza, keep the melt‑in‑your‑mouth cheese, and achieve a crunch that shatters like thin ice? I was skeptical, but the kitchen was already humming, the oil was bubbling, and my curiosity was louder than any recipe I’d ever seen.
Picture this: the first bite hits you with a crackle that echoes through the kitchen, followed by a buttery, buttery‑rich crust that gives way to a molten cheese river, all crowned with a tangy tomato glaze that clings like velvet. The aroma? A heady mix of fried dough, fresh oregano, and that unmistakable perfume of melted mozzarella that makes you want to inhale deeply and never leave the room. The sound of the fry pan is a rhythmic pop that tells you, “You’re about to create something legendary.” I dare you to taste this and not go back for seconds, because once you’ve felt that crunch, you’ll be haunted by the memory of an ordinary pizza forever.
Most fried‑pizza attempts out there end up soggy, greasy, or just plain sad. This version stands out because it uses a simple yeast‑based dough that’s given a brief rest, then a quick dip in hot oil that locks in air pockets, creating a feather‑light interior wrapped in a fortress of crisp. I’m being honest — I ate half the batch before anyone else got a chance to try it, and that’s because the texture is so addictive it feels like a guilty pleasure you can’t resist. The secret? A splash of sparkling water in the dough and a double‑fry technique that most home cooks overlook. I’ll spill the beans later, but trust me, this isn’t just a snack; it’s a culinary revelation.
Okay, ready for the game‑changer? I’m about to walk you through every single step — from selecting the perfect flour to the exact temperature that turns oil into pure gold. By the end, you’ll wonder how you ever made pizza any other way, and you’ll have a go‑to party starter that will make you the undisputed hero of any gathering. Stay with me here — this is worth it.
What Makes This Version Stand Out
- Texture: The double‑fry creates a crust that cracks like a fresh snow layer, while the interior stays airy and pillowy, giving you a bite that’s both crunchy and cloud‑soft.
- Flavor Depth: A quick yeast rise adds a subtle sourdough note, and the infusion of olive oil into the dough gives a buttery richness that you can’t get from a baked crust.
- Simplicity: Only twelve pantry staples are needed, and the technique is straightforward enough for a beginner yet impressive enough for a seasoned chef.
- Uniqueness: Frying pizza is a niche trick; most recipes fry the dough and then top it, but we fold the sauce and cheese into the dough before the fry, locking in flavor.
- Crowd Reaction: Guests often claim they’ve never tasted anything like it, and the “crispy surprise” factor makes it an instant conversation starter.
- Ingredient Quality: Using high‑protein flour and fresh mozzarella maximizes chew and melt, while a splash of sparkling water lightens the crumb.
- Cooking Method: The oil temperature is meticulously controlled at 350°F (175°C) for the first fry, then raised to 375°F (190°C) for a final crisp.
- Make‑Ahead Potential: You can prep the dough a day ahead, refrigerate, and fry fresh when you need them, making party planning a breeze.
Inside the Ingredient List
The Flavor Base
All‑purpose flour is the backbone of our dough, providing structure while still allowing for that airy crumb. If you can, opt for a high‑protein flour (around 12% protein) because it creates stronger gluten strands, which trap more air during the rise. Skipping the flour or substituting with cake flour will result in a dense, soggy fry that never reaches that coveted crackle. A quick tip: sift the flour before mixing; it aerates the particles and prevents lumps, ensuring a smoother dough.
Active dry yeast: This tiny fungus is the secret to our light interior. It ferments the sugars, producing carbon dioxide that forms tiny bubbles, which later pop during frying to give you that airy texture. If you forget the yeast, the dough will behave like a flatbread, lacking the lift that makes the crust feel like a cloud.
Warm water: The water’s temperature is crucial; too hot and you’ll kill the yeast, too cold and the dough won’t rise properly. Aim for 105°F (40°C) – the sweet spot where the yeast wakes up and starts working. If you’re in a hurry, a microwave‑heated cup of water works just fine.
The Texture Crew
Olive oil: Adding a couple of tablespoons to the dough not only enriches the flavor but also coats the gluten strands, making the final fry less likely to absorb excess oil. If you’re watching calories, you can substitute half of it with a neutral oil, but the olive oil’s fruity note is part of what makes this recipe unforgettable.
Vegetable oil for frying: Choose a high smoke‑point oil like canola, peanut, or sunflower. The higher the smoke point, the less likely you’ll get bitter, burnt notes. A common mistake is using butter – it will brown too quickly and leave a greasy residue that masks the delicate cheese flavor.
Sparkling water (optional): This is the secret weapon for a lighter crumb. The carbonation creates extra bubbles that expand during frying, turning the interior into a fluffy cloud. If you don’t have sparkling water, a splash of club soda works just as well.
The Unexpected Star
Tomato sauce: We’re not just slathering on any sauce; this one is reduced with a pinch of sugar, oregano, and garlic powder until it thickens to a jam‑like consistency. The reduction ensures the sauce doesn’t seep out during frying, which would otherwise make the crust soggy. If you love spice, a dash of red pepper flakes can add a subtle kick without overwhelming the balance.
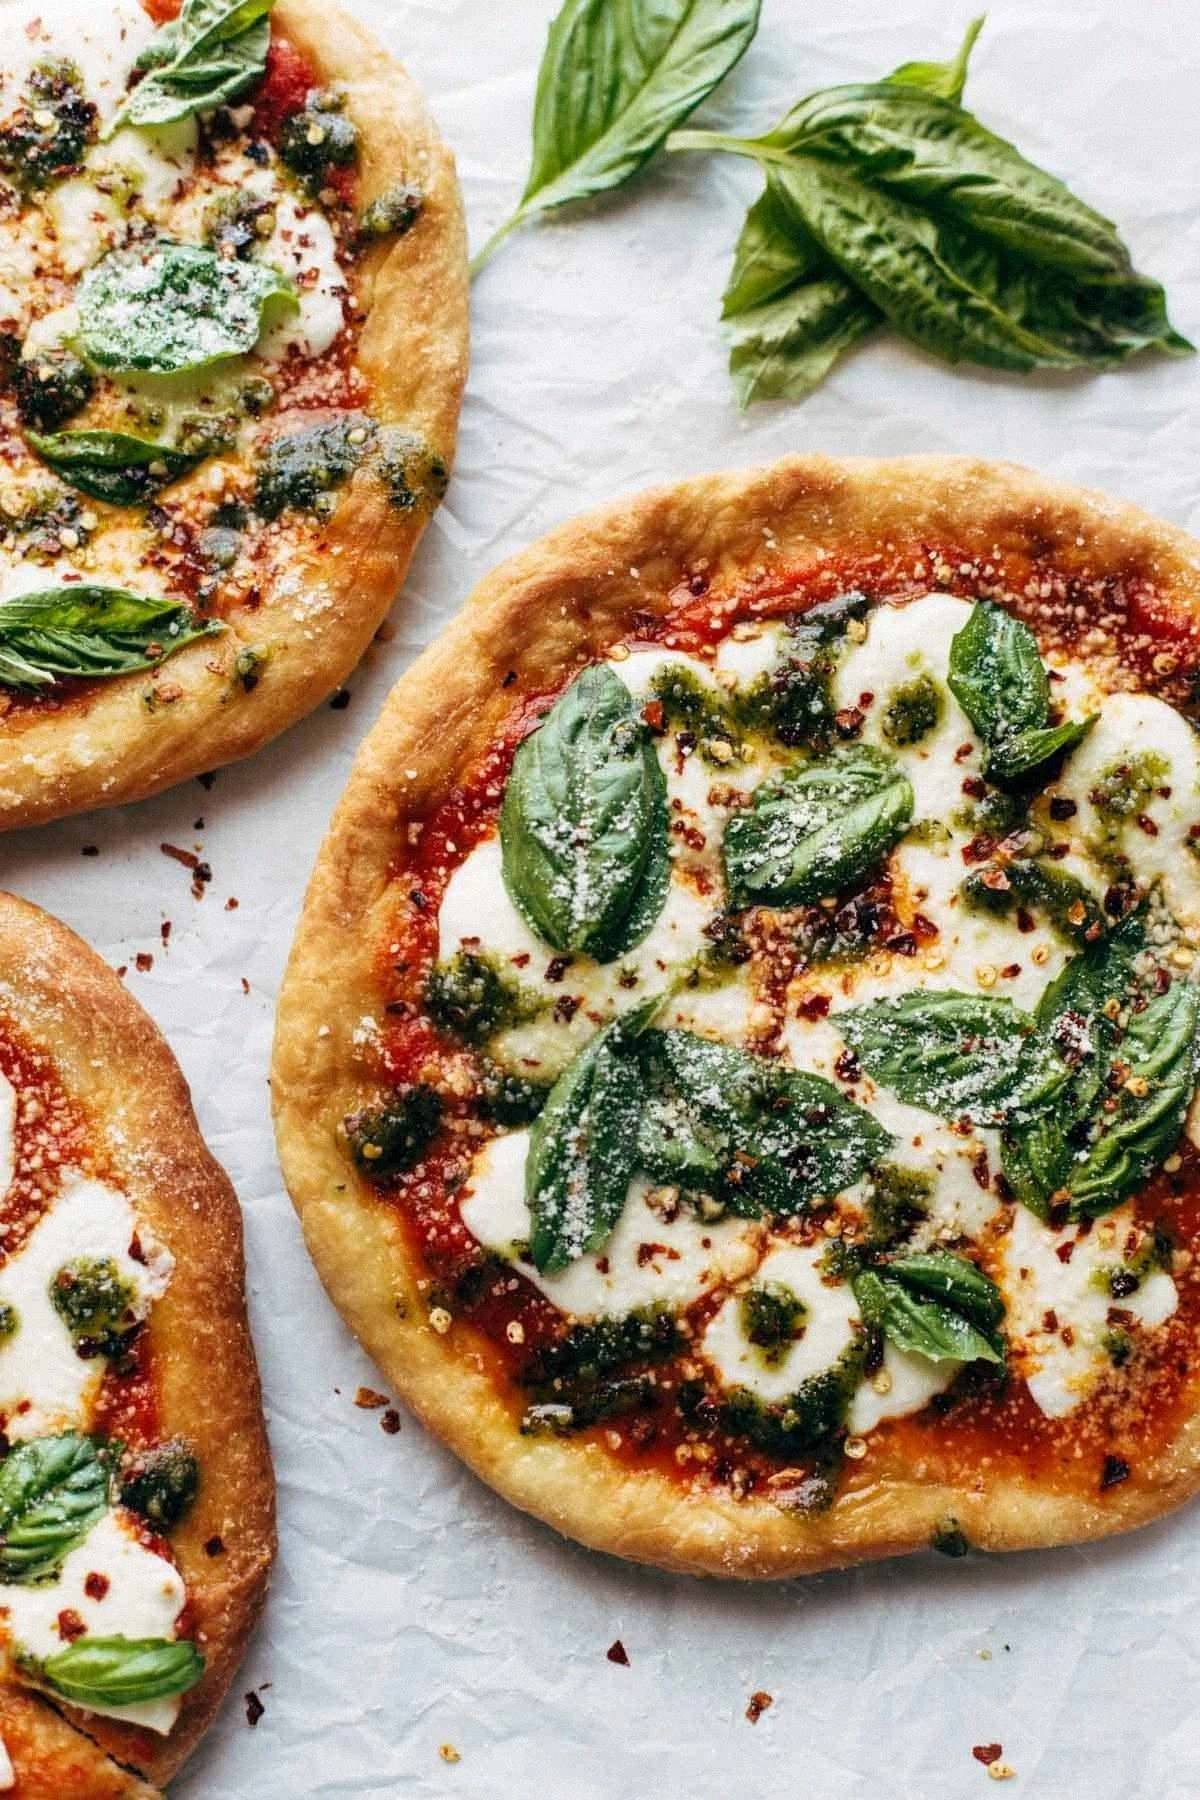
Fresh basil: Tossed in at the end, the basil adds a bright, herbaceous pop that cuts through the richness of the fried dough. Fresh leaves are best; dried basil loses its aromatic punch and can become bitter when fried.
The Final Flourish
Mozzarella and Parmesan cheeses: Mozzarella provides that glorious stretch, while Parmesan contributes a sharp, nutty depth that caramelizes just enough to add a whisper of crunch on the top. Use whole‑milk mozzarella for the best melt; low‑fat versions will release more water and could make the crust soggy.
Seasonings – dried oregano and garlic powder: These dry herbs infuse the dough with an Italian soul. Oregano’s piney notes and garlic’s savory bite complement the tomato sauce perfectly. If you’re adventurous, a pinch of smoked paprika can introduce a gentle smoky undertone that pairs nicely with the fried exterior.
Everything's prepped? Good. Let's get into the real action...
The Method — Step by Step
In a large mixing bowl, combine 2 cups of all‑purpose flour, 1 tsp active dry yeast, 1 tsp sugar, and 1 tsp salt. Stir in 3/4 cup warm water and 2 tbsp olive oil until a shaggy dough forms. Knead the mixture for about 8 minutes, either by hand or with a stand mixer on low speed, until it becomes smooth and elastic. That’s the moment you know the gluten is developing properly.
Watch out: If the dough feels too sticky, sprinkle a little extra flour, but don’t over‑do it – too much flour will make the final crust dense.
Cover the bowl with a clean kitchen towel and let the dough rise in a warm spot for 45 minutes, or until it has doubled in size. The kitchen should feel like a gentle sauna; if it’s too cold, pop the bowl in a pre‑heated oven set to 90°F (32°C) for a quick boost.
Kitchen Hack: Place a small cup of boiling water on the counter while the dough rises; the steam keeps the environment humid, encouraging a better rise.While the dough is rising, prepare the sauce: simmer 1 cup tomato sauce with 1 tsp dried oregano, 1/2 tsp garlic powder, and a pinch of sugar over medium heat for 10 minutes, until it thickens to a paste‑like consistency. This reduction step is essential; it prevents the sauce from leaking out during frying.
Punch down the risen dough and transfer it onto a lightly floured surface. Divide the dough into eight equal pieces, shaping each into a smooth ball. Let the balls rest for 10 minutes – this short rest relaxes the gluten, making them easier to stretch.
Take one dough ball and flatten it with your hands into a 6‑inch disc. Spoon a generous tablespoon of the reduced tomato sauce onto the center, then sprinkle 2 tbsp shredded mozzarella and a pinch of Parmesan. Add a few slices of pepperoni if you like, and finish with a light dusting of oregano and garlic powder.
Fold the edges over the filling, pinching them together to seal, then gently roll the sealed ball into a flat disc about 1/4‑inch thick. The sealing step is crucial – any gaps will cause oil to seep in and make the crust soggy.
Heat a deep, heavy‑bottomed pot with 2 inches of vegetable oil to 350°F (175°C). Use a candy thermometer for accuracy – a quick dip of a bread crumb should sizzle immediately but not burn.
Watch Out: Overcrowding the pot drops the oil temperature dramatically, leading to greasy, unevenly cooked pizz. Fry only two pieces at a time.Gently slide the flattened disc into the hot oil. Fry for 2‑3 minutes on the first side, or until the bottom turns a golden‑brown, bubbling crust. Using a slotted spoon, flip the pizza and fry another 2‑3 minutes on the opposite side. The edges should puff up and start pulling away from the pan – that’s your visual cue that the interior is fully cooked.
That sizzle when it hits the pan? Absolute perfection.
Remove the fried pizza with a slotted spoon and place it on a paper‑towel‑lined tray to drain excess oil. While it’s still hot, brush the top lightly with a drizzle of olive oil and sprinkle a final pinch of fresh basil leaves. The residual heat will wilt the basil just enough to release its aroma without losing its bright color.
Repeat the frying process with the remaining dough pieces, adjusting the oil temperature as needed to maintain that sweet spot of 350‑375°F. Once all pieces are fried, let them rest for a minute before serving – this short rest helps the cheese set slightly, preventing a messy melt when you bite in.
That's it — you did it. But hold on, I've got a few more tricks that'll take this to another level...
Insider Tricks for Flawless Results
The Temperature Rule Nobody Follows
Most home cooks set the oil and forget about it, assuming it stays steady. In reality, every time you drop a pizza disc, the oil temperature drops by 20‑30°F. Keep a thermometer handy and adjust the burner after each batch to bring the oil back to 350°F. This constant temperature ensures each piece gets the same crispness; otherwise, the first ones will be too dark while the last will be pale and soggy.
Why Your Nose Knows Best
Your sense of smell is a more reliable indicator than a timer. When the oil reaches the right temperature, you’ll notice a faint, sweet “pop‑pop” aroma before the first fry. If the oil smells like burnt popcorn, it’s too hot. Trust that nose; it’s the secret weapon that separates a professional fry from a kitchen mishap.
The 5‑Minute Rest That Changes Everything
After the dough’s first rise, let the shaped discs sit for a brief 5‑minute rest on the counter. This micro‑rest lets the gluten relax just enough to prevent the crust from snapping back when you fry. One of my friends tried to skip this step once and ended up with a pizza that curled into a crescent shape mid‑fry – not the look you want.
Oil Choice – The Hidden Hero
While any high smoke‑point oil works, peanut oil adds a subtle nutty undertone that complements the cheese beautifully. If you’re allergic or prefer a neutral flavor, canola is a safe bet. The key is to avoid olive oil for deep frying; its low smoke point will turn bitter and ruin the delicate balance of flavors.
The Double‑Fry Technique
The first fry at 350°F cooks the interior without over‑browning. After a brief drain, crank the heat to 375°F and give each piece a second 30‑second blitz. This final burst creates that unmistakable crackle and a glossy finish that looks restaurant‑ready.
Creative Twists and Variations
This recipe is a playground. Here are some of my favorite ways to switch things up:
Spicy Sriracha Swirl
Add a drizzle of sriracha mixed with a teaspoon of honey to the tomato sauce before spreading. The sweet‑heat combo lifts the flavor profile, making it perfect for those who love a little kick. Top with sliced jalapeños for extra fire.
Mediterranean Delight
Swap pepperoni for kalamata olives, crumbled feta, and a sprinkle of toasted pine nuts. The briny olives and creamy feta create a sophisticated bite that pairs well with a glass of crisp white wine.
Cheesy Bacon Bliss
Crumble cooked bacon into the cheese mixture and add a dash of smoked paprika. The bacon adds smoky crunch, while the paprika deepens the color of the crust, making it visually appealing and irresistibly savory.
Veggie Garden
Include a thin layer of sautéed zucchini, bell pepper, and red onion before sealing the dough. The veggies release moisture, so be sure to pat them dry – this keeps the crust crisp while delivering a burst of freshness.
Sweet Chili Dessert
For a daring dessert version, use a sweetened cream cheese filling, drizzle with honey, and sprinkle toasted coconut after frying. The contrast of sweet, creamy interior with the crisp fried shell is a surprising treat that will wow anyone daring enough to try it.
Storing and Bringing It Back to Life
Fridge Storage
Place cooled fried pizz in an airtight container lined with paper towels to absorb excess oil. They’ll keep fresh for up to 3 days. When you’re ready to eat, reheat in a pre‑heated 375°F oven for 5‑7 minutes; the heat restores the original crunch.
Freezer Friendly
Arrange the fully cooled pieces on a baking sheet, freeze until solid, then transfer to a zip‑top freezer bag. They’ll last up to 2 months. To revive, bake straight from frozen at 400°F for 10‑12 minutes, adding a splash of water to the pan to generate steam that prevents the crust from drying out.
Best Reheating Method
The secret to reheating without sogginess is a quick fry‑reheat: heat a shallow layer of oil to 350°F and fry each piece for 30 seconds per side. The oil sears the exterior back to crisp while the interior warms evenly. If you’re avoiding extra oil, a hot skillet with a drizzle of water (covered) works, but the fry method is unbeatable.