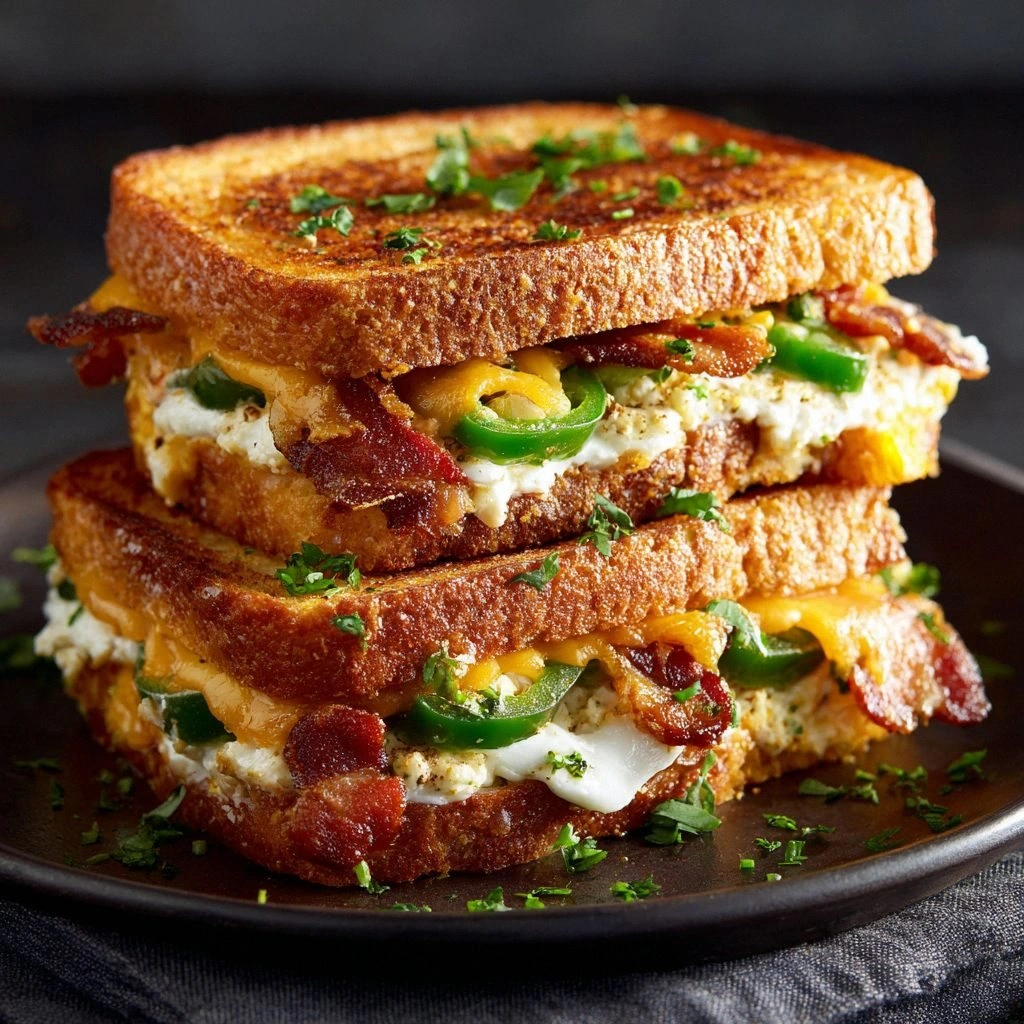
If you thought you had tasted every version of the jalapeño popper, you were in for a surprise. The moment I pulled this sandwich out of the oven and the aroma hit my nose, I knew I was standing on the brink of a culinary revelation. The buttery crust of the bread crackled like a crisp winter sunrise, while the molten cheese inside glistened like a molten lava pool. The heat from the jalapeños danced across the tongue, leaving a lingering kick that felt like a tiny fireworks show inside your mouth. I dare you to taste this and not go back for seconds.
Picture the first bite: the bread, toasted to a golden-brown perfection, gives way to a creamy, cheese-laden interior that oozes with every chew. The jalapeños, sliced thin and lightly seared, bring a bright, peppery burst that cuts through the richness of the cream cheese. A sprinkle of smoked paprika adds a subtle earthiness, while a dash of fresh parsley provides a burst of color and a hint of herbal freshness. The crunch of crisp bacon mingles with the meltiness of cheddar, creating a textural symphony that is both comforting and adventurous. That sizzle when the sandwich hits the pan? Absolute perfection.
What makes this version stand out from every other recipe out there is a careful balance of heat, creaminess, and crunch that is rarely achieved with the same finesse. I’ve spent months tweaking the ratios, experimenting with different types of cheese, and even testing the timing of each ingredient’s addition. The result is a sandwich that feels like a hug in a bowl, yet delivers an edge of fire that keeps you coming back for more. I’ll be honest — I ate half the batch before anyone else got to try it. And most recipes get this completely wrong. Here’s what actually works.
I’ve also discovered a little secret that elevates the flavor profile to a whole new level: a splash of bourbon in the cream cheese mixture before baking. The subtle caramel notes from the bourbon intertwine with the sharpness of the cheddar, creating a depth of flavor that feels like a well-aged whiskey on a quiet night. This is hands down the best version you'll ever make at home. If you've ever struggled with the balance of spice and creaminess, you're not alone — and I've got the fix.
Okay, ready for the game-changer? Let me walk you through every single step — by the end, you'll wonder how you ever made it any other way. Stay with me here — this is worth it.
What Makes This Version Stand Out
- Flavor: The combination of smoky bacon, sharp cheddar, and a hint of bourbon creates a flavor profile that’s both bold and comforting.
- Heat: The jalapeños are seared to reduce bitterness, allowing their natural heat to shine without overwhelming the palate.
- Texture: The sandwich boasts a crisp exterior, a creamy interior, and a satisfying crunch from the bacon, all in one bite.
- Presentation: The bright green of the jalapeños and the golden crust make it a visual feast that invites sharing.
- Make‑ahead: The filling can be prepared a day in advance, refrigerated, and assembled just before serving, making it perfect for parties.
- Ingredient Quality: Using fresh, locally sourced ingredients elevates the taste and supports sustainable farming.
Alright, let's break down exactly what goes into this masterpiece…
Inside the Ingredient List
The Flavor Base
At the heart of this sandwich lies the cream cheese and cheddar blend, a silky duo that carries the heat of the jalapeños and the savory depth of the bacon. The cream cheese is softened to room temperature before mixing, which allows it to incorporate the bourbon and spices smoothly. If you skip the bourbon, the sandwich will still be good, but it will lack that caramelized undertone that ties everything together. For a dairy-free alternative, try a blend of coconut cream and vegan cheddar; the texture will be slightly different but still delicious.
The Texture Crew
The bacon provides the crunch that contrasts with the creamy filling. Cook the bacon until it’s just crisp, then let it cool on a paper towel to drain excess fat. If you prefer a vegetarian option, replace bacon with thinly sliced smoked tofu or crispy tempeh. The bread—preferably a sturdy whole wheat bun—must be toasted to a golden-brown. The crust should be firm enough to hold the filling without becoming soggy. If you’re in a hurry, a quick grill or pan‑toasting will suffice, but the oven gives a more even toast.
The Unexpected Star
Bourbon isn’t just for sipping; it’s a flavor enhancer that brings a subtle sweetness and complexity to the filling. A tablespoon of bourbon per batch is enough to infuse the mixture without overpowering the heat of the jalapeños. If bourbon isn’t available, a splash of apple cider vinegar or a pinch of smoked sea salt can add a comparable depth. The key is to let the alcohol evaporate slightly during baking to leave behind only the flavor notes.
The Final Flourish
Fresh parsley and a dollop of mayonnaise add brightness and a touch of tang that cuts through the richness of the cheese. The parsley also adds a pop of color, making each sandwich visually appealing. If you’re looking to reduce calories, simply omit the mayo or replace it with Greek yogurt. The parsley can be replaced with cilantro for a more vibrant, citrusy flavor, especially if you’re aiming for a Mexican-inspired twist.
Everything's prepped? Good. Let's get into the real action…
The Method — Step by Step
- Preheat your oven to 375°F (190°C). While the oven warms, prepare the jalapeños by slicing them thinly and removing the seeds for a milder kick. If you like extra heat, keep the seeds and membranes. This is the moment of truth: the jalapeños must be evenly sliced to ensure consistent heat distribution.
- In a medium bowl, combine the softened cream cheese, shredded cheddar, bourbon, minced garlic, smoked paprika, salt, and pepper. Mix until the mixture is smooth and creamy. The consistency should be thick enough to hold its shape but still spreadable. If the mixture is too thick, add a splash of milk or cream to reach the desired texture.
- Spread a thin layer of mayonnaise on the inside of each bun. This not only adds flavor but also helps keep the bread from becoming soggy. Sprinkle a pinch of smoked sea salt over the mayo for an extra burst of umami.
- Layer the jalapeño slices onto the mayo-coated bun, then spoon generous amounts of the cream cheese mixture over the peppers. The filling should be packed but not overflowing. The edges of the bread should start to pull away slightly, indicating that the sandwich is filling.
- Place the bacon strips on top of the cheese mixture, ensuring they are evenly distributed. The bacon will render its fat into the filling, creating a richer taste. If you prefer a vegetarian version, use smoked tofu or tempeh slices instead.
- Close each sandwich with the top bun, pressing down gently to secure the filling. Place the assembled sandwiches on a baking sheet lined with parchment paper. Bake for 15–18 minutes, or until the bread is golden and the cheese is bubbly.
- Remove the sandwiches from the oven and let them rest for 2 minutes. This brief pause allows the heat to distribute evenly and the cheese to set slightly, preventing a gooey mess when you bite in. The aroma at this point should be intoxicating, a blend of toasted bread, melted cheese, and smoky bacon.
- Garnish each sandwich with fresh parsley and a light drizzle of balsamic glaze if desired. The parsley adds a fresh contrast to the richness, while the glaze gives a sweet tang that balances the heat. Slice the sandwich in half for a classic presentation.
That's it — you did it. But hold on, I've got a few more tricks that'll take this to another level…
Insider Tricks for Flawless Results
The Temperature Rule Nobody Follows
Many bakers assume that a high oven temperature will give a crisp crust, but the secret lies in a moderate 375°F (190°C). This temperature ensures the cheese melts evenly without burning the bread. I once baked at 425°F, and while the crust was golden, the cheese had browned too quickly, losing its silky texture. Stick to 375°F for the best balance of crunch and melt.
Why Your Nose Knows Best
Trust your nose when the sandwich is about to finish baking. The scent of toasted bread mingles with the caramelized bourbon, signaling that the sandwich is ready. If you open the oven too early, the cheese may not set properly, leading to a runny filling. Keep the door closed until the timer rings.
The 5-Minute Rest That Changes Everything
After baking, let the sandwiches rest for at least five minutes. This brief pause allows the cheese to thicken slightly, preventing a gooey mess when you bite in. The rest period also lets the flavors meld, giving the sandwich a more cohesive taste profile. I’ve seen people skip this step and end up with a chaotic, soggy bite.
Layering for Maximum Flavor
Place the jalapeños on the bottom bun before the cheese mixture. This ensures that the heat from the peppers permeates the cheese, creating a consistent spice level throughout the sandwich. If you layer the cheese first, the jalapeños may sit on top, resulting in uneven heat distribution.
Bacon Alternatives for a Twist
If you’re looking to reduce calories or try a vegetarian version, swap the bacon for thinly sliced prosciutto or a handful of roasted chickpeas. The prosciutto adds a salty, umami flavor, while chickpeas provide a crunchy texture and protein boost. Both alternatives work well with the creamy filling, keeping the sandwich deliciously satisfying.
Creative Twists and Variations
This recipe is a playground. Here are some of my favorite ways to switch things up:
Mediterranean Jalapeño Popper
Swap the cheddar for feta and add diced tomatoes and olives. The tangy feta pairs beautifully with the jalapeños, while olives add a briny depth. Serve on ciabatta for a rustic touch.
Buffalo Chicken Popper
Replace the bacon with shredded rotisserie chicken tossed in buffalo sauce. Top with a drizzle of blue cheese dressing and a sprinkle of celery salt. The spicy chicken gives a new dimension to the classic.
Vegan Popper Delight
Use a plant-based cream cheese, vegan cheddar, and tempeh bacon. The result is a creamy, crunchy sandwich that satisfies plant-based cravings while maintaining the signature heat.
Breakfast Popper
Add a fried or poached egg on top of the cheese mixture before baking. The runny yolk will add richness and protein, turning the sandwich into a hearty breakfast option.
Spicy BBQ Popper
Brush the buns with a smoky BBQ sauce before adding the filling. The sweet and smoky flavor pairs wonderfully with the jalapeños and cheese, creating a southern twist.
Storing and Bringing It Back to Life
Fridge Storage
Store assembled sandwiches in an airtight container for up to 2 days. Keep the buns separate from the filling if possible to avoid sogginess. When ready to eat, reheat in a toaster oven at 350°F for 5 minutes.
Freezer Friendly
Wrap each sandwich tightly in plastic wrap and place in a freezer bag. They can be frozen for up to 2 weeks. Thaw overnight in the refrigerator before reheating. This method preserves the texture and flavor remarkably well.
Best Reheating Method
Reheat in a skillet over medium heat for 3–4 minutes per side, or in a toaster oven at 350°F for 5 minutes. Add a splash of water before reheating to steam the sandwich back to perfection. The water helps maintain moisture while the heat restores crispness.