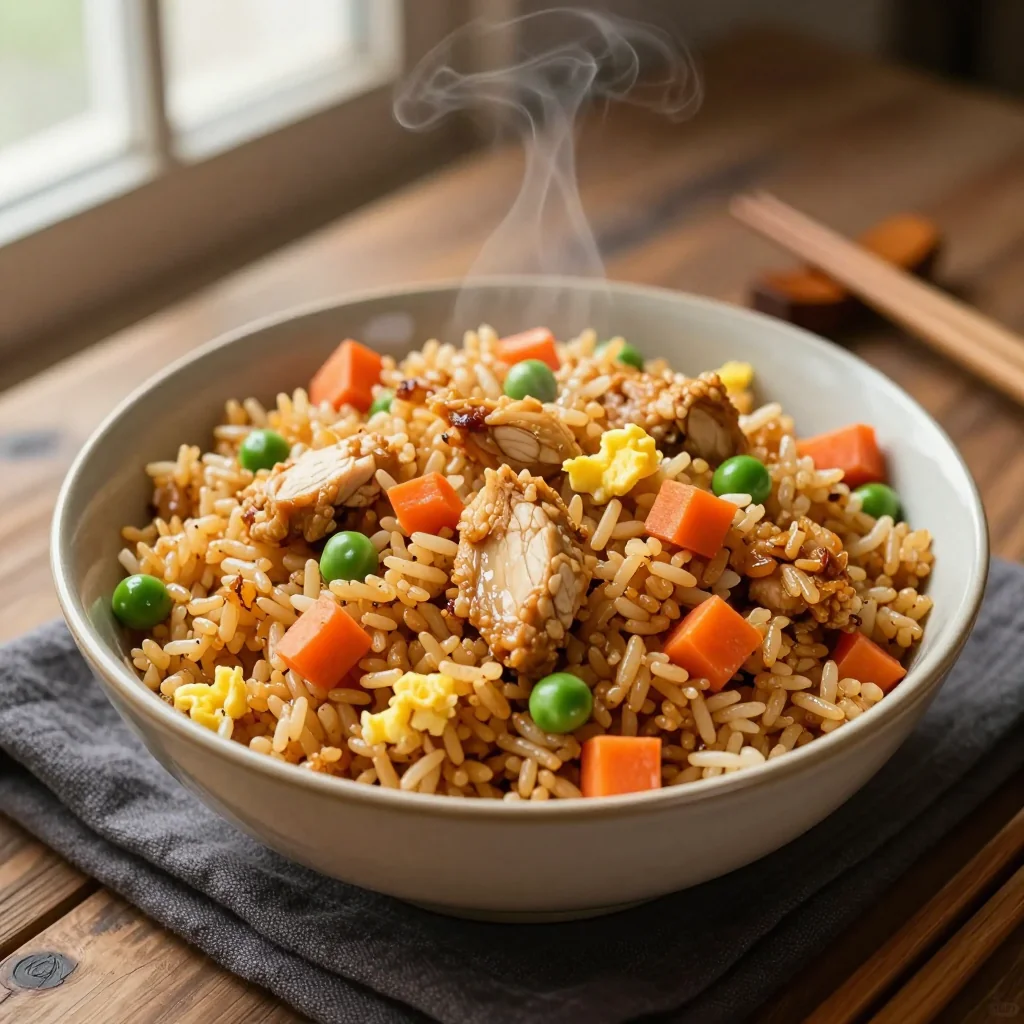
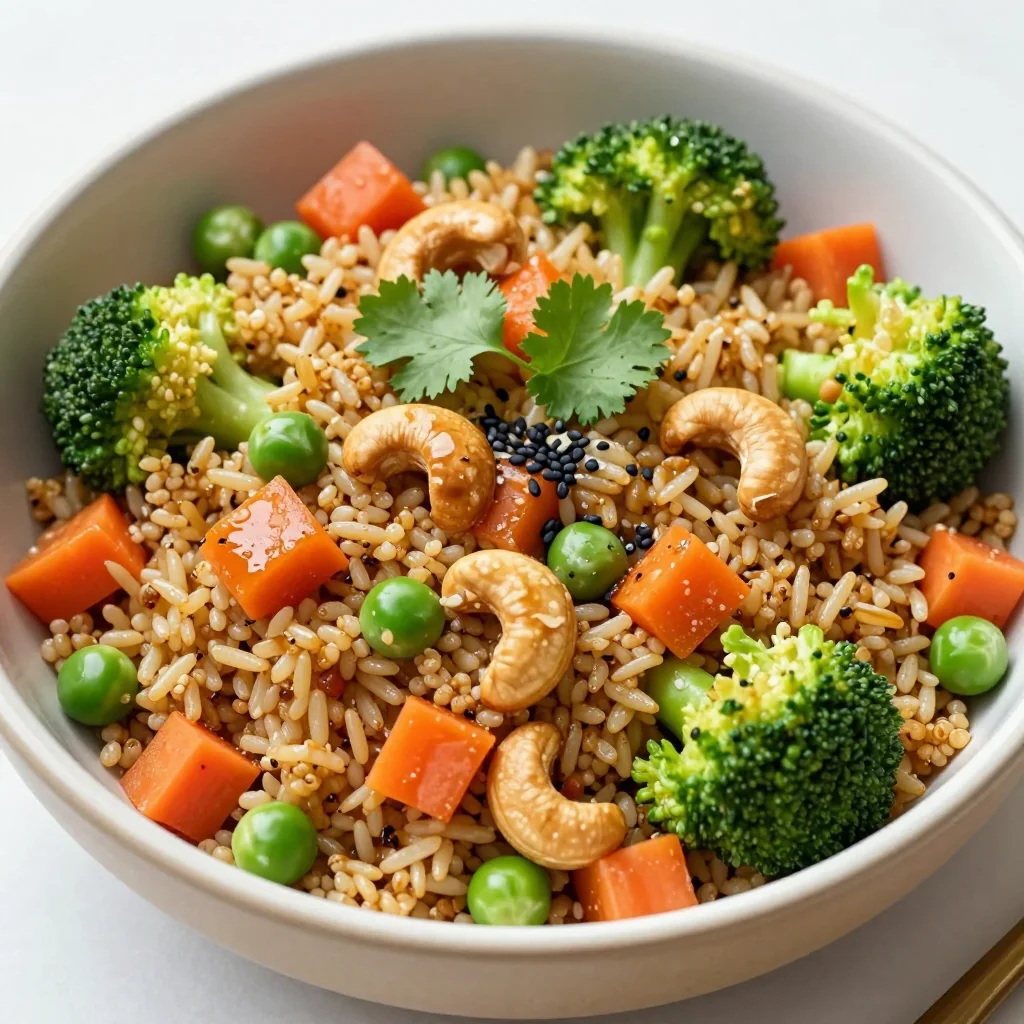
A vibrant, comforting bowl that turns everyday leftovers into a festival of flavors.

When I first stepped into my grandmother’s modest kitchen in the heart of the countryside, the air was thick with the aroma of sizzling garlic, toasted sesame, and the faint whisper of distant street markets. She would pull out a battered wok, toss in leftover rice, and within minutes, a glorious, fragrant dish would emerge, filling the room with a sense of home that still lingers in my memory.
Fried rice, a staple across countless Asian cultures, embodies the spirit of resourcefulness: it transforms yesterday’s leftovers into today’s feast. In my family, the version with chicken and egg has always been the crowd‑pleaser, balancing protein, texture, and the comforting umami of soy and oyster sauces.
In this article, I’ll walk you through every nuance—from selecting the perfect jasmine rice to mastering the high‑heat wok technique—so you can recreate that magical balance in your own kitchen. You’ll learn how to achieve restaurant‑level flavor without any fancy equipment, and why each step matters for texture and taste.
Let’s dive in together, and I promise you’ll be serving a bowl of golden, fragrant fried rice that feels both nostalgic and freshly exciting.
🌟 Why This Recipe Will Captivate You
Fried rice is more than just a quick meal; it’s a celebration of flavors, textures, and culinary ingenuity that can be tailored to any palate.
- ✨ Perfect Balance of Sweet, Salty, and Umami: The combination of soy sauce, oyster sauce, and a dash of sesame oil creates a layered taste that satisfies every craving while keeping the palate intrigued.
- ✨ Texture Mastery – Crispy Meets Tender: By using day‑old rice and a scorching wok, each grain develops a subtle crispness, while the chicken remains juicy and the egg adds a silky richness.
- ✨ Speed Without Compromise: From prep to plate in under 30 minutes, this dish proves that fast cooking doesn’t mean sacrificing depth of flavor.
- ✨ Versatile Base for Creative Twists: Whether you add a splash of sriracha for heat or swap chicken for tofu, the foundation adapts effortlessly to countless variations.
- ✨ Nutrient‑Rich and Satisfying: Packed with protein, vegetables, and complex carbs, this bowl fuels both body and soul, making it ideal for busy weekdays or relaxed weekend gatherings.
- ✨ Crowd‑Pleaser for All Ages: Its familiar flavors and colorful appearance appeal to children and adults alike, ensuring it becomes a staple in any household.
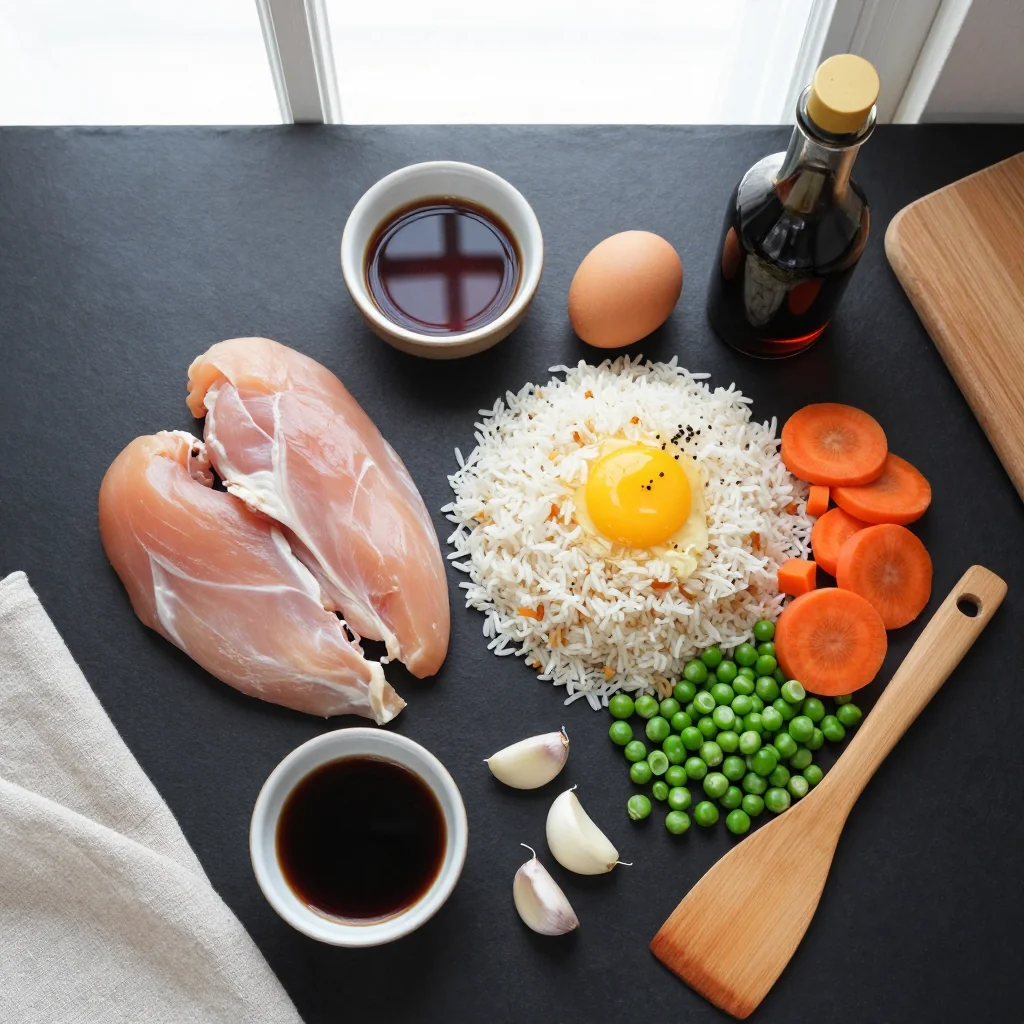
🥗 Ingredients
📝 Complete Ingredient List
For the Rice Base:
- 600 g cooked jasmine rice
- 30 ml vegetable oil
For the Chicken & Egg Mix:
- 200 g chicken breast, diced
- 2 large eggs
- 70 g frozen peas
- 70 g diced carrots
For the Sauce & Garnish:
- 45 ml soy sauce
- 15 ml oyster sauce
- 5 ml sesame oil
- 2 garlic cloves, minced
- 1 tsp fresh ginger, minced
- 2 green onions, sliced
- salt, to taste
- freshly ground black pepper, to taste
🔍 Focus on Key Ingredients
Jasmine Rice
Jasmine rice is prized for its delicate floral scent and slightly sticky texture, which makes each grain cling beautifully to the sauce while still keeping its individuality. For optimal results, cook the rice a day ahead, spread it on a tray, and refrigerate to dry out a little – this prevents clumping when the rice hits the hot wok.
Chicken Breast
Choosing fresh, free‑range chicken breast ensures tenderness and a clean flavor that absorbs the savory sauces without overpowering the dish. Cutting the meat into uniform bite‑size pieces guarantees even cooking, so every morsel is perfectly browned and juicy.
Soy & Oyster Sauce
Soy sauce delivers the essential salty umami, while oyster sauce adds a subtle sweetness and depth reminiscent of the sea. Together they create a harmonious backdrop that lifts the vegetables and rice, making each spoonful a balanced burst of flavor.
🔄 Quick Substitutions
| If you don’t have... | Use instead... |
|---|---|
| Jasmine rice | Long‑grain basmati rice |
| Oyster sauce | Hoisin sauce (½ the amount) |
| Sesame oil | Peanut oil (slightly less) |
👨🍳 Step‑by‑Step Instructions
Follow these detailed steps to achieve a perfect wok‑kissed fried rice that’s both aromatic and satisfying.
📋 Phase 1: Preparation & Mise en Place
Gather and prep everything before the heat hits the wok – this ensures a smooth cooking flow.
Prepare the Rice
Break up any clumps of the day‑old jasmine rice using your hands or a fork, spreading it out on a large plate. Drizzle a thin layer of the vegetable oil over the rice and toss gently; this light coating helps each grain stay separate during the high‑heat stir‑fry.
Dice Chicken & Prepare Veggies
Trim any visible fat from the chicken breast, then cut into 1‑centimeter cubes. Rinse the frozen peas under warm water to thaw quickly, and pat dry. Peel the carrots, slice them thinly (about 0.5 cm), and set aside with the peas. Mince garlic and ginger finely to release their aromatics.
Beat the Eggs
Crack the eggs into a shallow bowl, add a pinch of salt and pepper, and whisk until the yolk and white are fully combined. This creates a smooth custard that will coat the rice evenly.
🔥 Phase 2: Cooking & Assembly
High heat is the secret to that signature wok‑kissed flavor.
Heat the Wok
Place a wok or large skillet over medium‑high heat. When a drop of water sizzles and evaporates instantly, add 1 tablespoon of vegetable oil and swirl to coat the surface. The oil should shimmer but not smoke.
Sauté Aromatics
Add the minced garlic and ginger to the wok. Stir‑fry for 15–20 seconds until fragrant, being careful not to let them brown. Their aroma forms the flavor base for the entire dish.
Cook Chicken
Introduce the diced chicken to the wok, spreading it in a single layer. Let it sear without stirring for 1 minute, then toss to ensure all sides turn golden brown. This quick sear locks in juices.
Add Vegetables
Stir in the peas and carrots, cooking for another 2 minutes until they turn bright green and slightly tender. The vegetables should retain a slight crunch for texture contrast.
Scramble the Eggs
Push the chicken‑vegetable mixture to one side of the wok. Pour the beaten eggs into the empty space, allowing them to set for a few seconds before gently scrambling. Once just set, fold the eggs into the rest of the ingredients.
Incorporate Rice & Sauces
Add the prepared rice, soy sauce, oyster sauce, and sesame oil. Toss vigorously using a spatula, ensuring each grain is coated evenly. Continue stir‑frying for 3–4 minutes, allowing the rice to develop a light crisp on the edges.
✨ Phase 3: Finishing & Plating
A few finishing touches elevate the dish from good to unforgettable.
Season & Garnish
Season with a pinch of salt and freshly ground black pepper, tasting as you go. Sprinkle the sliced green onions over the top for a fresh, oniony bite and a pop of color.
Serve Immediately
Transfer the fried rice to a serving bowl while it’s still hot. Serve alongside a simple cucumber salad or a side of fresh lime wedges for an extra zing.
💡 Expert Tips & Tricks
🛒 Choosing the Right Ingredients
Always opt for day‑old rice; fresh rice is too moist and will turn mushy. When selecting chicken, look for firm, pink flesh with no gray spots, indicating freshness. For the best flavor, choose naturally brewed soy sauce rather than the chemically enhanced versions. Fresh garlic and ginger release essential oils that define the dish’s aromatic backbone.
🔪 Preparation Techniques
Uniformly dice the chicken to ensure even cooking. Mince garlic and ginger together using a micro‑plane for the finest texture, which prevents large chunks that could burn. Keep all sauces in a small bowl before adding them to the wok; this allows you to pour quickly and evenly, preventing the rice from steaming.
🌡️ Mastering the Heat
High heat is essential; a medium‑high flame creates the signature “wok‑hei” (breath of the wok) that gives fried rice its subtle char. If your stove isn’t powerful enough, pre‑heat the wok longer and work in batches to avoid crowding, which drops the temperature and leads to soggy rice.
🍽️ Presentation & Service
Serve the fried rice in a shallow bowl or directly on a large plate. Garnish with extra sliced green onions, a drizzle of sesame oil, and a few red chili flakes for visual contrast. Pair with a light cucumber‑vinegar salad to cut through the richness.
🏆 Pro Secrets
Professional chefs rely on precision, timing, and subtle adjustments to turn a simple fried rice into a masterpiece.
- 🎯 Use a Carbon Steel Wok: Carbon steel conducts heat faster than cast iron, delivering the rapid temperature spikes needed for that perfect sear. Season it well to create a natural non‑stick surface that enhances flavor without synthetic coatings.
- 🎯 Pre‑Season the Rice: Lightly toss the cold rice with a teaspoon of oil and a pinch of salt before cooking. This pre‑seasoning ensures each grain is flavored from the start and reduces sticking.
- 🎯 Control Moisture with a Splash Technique: If the rice looks dry during stir‑fry, add a splash (≈10 ml) of hot water. The steam instantly re‑hydrates the grains without making them soggy, preserving that coveted crisp‑outside, fluffy‑inside texture.
- 🎯 Layer Flavors Sequentially: Add aromatics first, then protein, followed by vegetables, and finally rice and sauces. This order prevents overcooking delicate ingredients and ensures each component retains its distinct taste.
- 🎯 Finish with a “Cold Oil” Drizzle: A final drizzle of cold, high‑smoke‑point oil (like grapeseed) right before serving adds a glossy sheen and a subtle mouthfeel that feels luxurious.
- 🎯 Taste as You Go: Professional kitchens never assume flavor; they continuously taste and adjust salt, acidity, and heat. Add a squeeze of lime or a dash of fish sauce at the end if the dish needs a brightness boost.
“The secret to great fried rice is simplicity executed with precision; every grain should sing.” — Chef Ming Li, Michelin‑starred Chef
🔄 Variations & Adaptations
Fried rice is a canvas; feel free to remix it according to dietary needs, flavor cravings, or seasonal produce.
🥬 Vegetarian / Vegan Version
Swap the chicken for firm tofu cubes (pressed and lightly pan‑fried) and replace the eggs with scrambled chickpea flour (a mixture of chickpea flour, water, and turmeric). Keep the same vegetables and sauces, ensuring the soy sauce is vegan‑friendly.
- Use 200 g extra‑firm tofu, diced and crisped in a separate pan.
- Replace 2 eggs with ½ cup chickpea flour batter seasoned with black salt for an “eggy” flavor.
🌶️ Flavor Twists
Adjust the spice profile or regional influences to keep the dish exciting.
Spicy Sriracha Version:
Add 1 tablespoon of Sriracha and a pinch of crushed red pepper flakes during the sauce step for a fiery kick.
Mediterranean Version:
Replace soy and oyster sauces with 2 tablespoons of sun‑dried tomato pesto, add Kalamata olives, and finish with crumbled feta.
Thai‑Inspired Version:
Swap oyster sauce for 1 tablespoon of fish sauce, add a handful of Thai basil leaves, and finish with a squeeze of lime juice.
⚠️ Dietary Adaptations
Gluten‑Free:
Use tamari (gluten‑free soy sauce) and ensure the oyster sauce is certified gluten‑free.
Lactose‑Free:
This recipe is naturally lactose‑free; just double‑check any packaged sauces for hidden dairy.
Low‑Calorie:
Reduce oil to 1 tablespoon, use cauliflower rice instead of jasmine rice, and increase the proportion of non‑starchy vegetables.
👶 Kid‑Friendly Version
For younger palates, omit the garlic and ginger, use a milder low‑sodium soy sauce, and add finely diced sweet corn. Serve with a side of sliced fruit for a balanced meal.
📦 Storage & Reheating
🧊 Conservation
Refrigerator:
- Duration: 3 days
- Recommended container: Airtight glass or BPA‑free plastic container
- Tip: Place a paper towel on top to absorb excess moisture.
Freezer:
- Duration: 2 months
- Method: Portion into freezer‑safe bags, flatten, and label with date.
- Defrost: Transfer to fridge overnight or use the microwave’s defrost setting.
💡 For best texture after freezing, reheat in a skillet rather than a microwave to restore crispness.
♨️ Reheating
🔥 Oven (Recommended):
- Preheat to 180 °C (350 °F).
- Cover the dish with aluminum foil to retain moisture.
- Heat for 12‑15 minutes.
- Remove foil, stir, and heat an additional 3‑5 minutes for a lightly crisp top.
⚡ Microwave (Quick):
- Place a microwave‑safe bowl, cover with a microwave‑safe lid.
- Heat on medium power for 1 minute, stir, then repeat in 30‑second bursts.
- Stir well to distribute heat evenly.
🍳 Skillet:
Heat a tablespoon of oil in a non‑stick skillet over medium heat, add the fried rice, and toss for 3‑4 minutes until heated through and slightly crisp.
🍷 Perfect Pairings
🥗 Side Dishes
- Cucumber‑Sesame Salad: Lightly dressed cucumber ribbons provide a refreshing crunch that balances the richness of the fried rice.
- Steamed Edamame with Sea Salt: Adds protein and a pop of color while keeping the meal light.
- Pickled Carrots & Daikon: Their tangy acidity cuts through the umami, refreshing the palate between bites.
🍷 Wine & Beverage Pairings
- Riesling (off‑dry): Its slight sweetness and acidity complement the salty soy sauce and enhance the dish’s aromatics.
- Pinot Noir: Light‑bodied red with subtle fruit notes works well with the savory profile.
- Non‑Alcoholic: Sparkling ginger‑lime mocktail adds a bright, effervescent contrast.
🍰 To Complete the Meal
Start with a simple miso soup, move to the fried rice as the main, and finish with a delicate mango sticky rice dessert. The sweet coconut‑infused mango rounds off the flavors beautifully.
❓ Frequently Asked Questions
Q: Can I use brown rice instead of jasmine rice?
Yes, you can substitute brown rice, but it requires a longer cooking time and a higher moisture content. To avoid a mushy texture, use day‑old brown rice that has been cooled and dried. You may also need to increase the cooking oil slightly to help separate the grains.
Q: What’s the best way to prevent the rice from sticking to the wok?
Ensure the wok is properly pre‑heated and lightly oiled before adding the rice. Using day‑old rice that has been refrigerated reduces surface moisture. If you notice sticking, add a splash of hot water or a teaspoon of oil and keep the rice moving constantly.
Q: How can I make the dish spicier without overpowering it?
Add a teaspoon of chili oil or a pinch of crushed red pepper flakes during the sauce step. For a more layered heat, incorporate a tablespoon of Sriracha or a dash of fresh Thai bird’s eye chilies, adjusting to taste.
Q: Is it okay to add other vegetables like bell peppers or mushrooms?
Absolutely! Feel free to include diced bell peppers, sliced mushrooms, or even baby corn. Add them after the garlic and ginger so they have enough time to soften but retain a slight crunch.
Q: Can I prepare the sauce in advance?
Yes, mix soy sauce, oyster sauce, and sesame oil in a small bowl and store it in the refrigerator for up to three days. Give it a quick stir before using to recombine any settled ingredients.
Q: How do I adjust the recipe for a larger crowd?
Increase all ingredients proportionally based on the desired number of servings. The built‑in portion adjuster on the recipe card will automatically recalculate quantities when you set the new serving count.
🎉 Let’s Get Cooking!
This fried rice brings together the comforting familiarity of home cooking with the bold, aromatic flair of Asian street food. By mastering the high‑heat technique, you’ll achieve that perfect balance of crispy edges and tender interiors, while the sauce delivers depth without overwhelming the fresh vegetables. Whether you serve it for a quick weekday dinner or as the centerpiece of a weekend feast, this dish promises satisfaction in every bite.
Give it a try, snap a photo, and share your experience in the comments below. Your feedback helps us refine the recipe, and we love seeing how you make it your own. Don’t forget to rate the recipe and tag your creations with #FriedRiceFiesta on Instagram for a chance to be featured!
Have you tried this recipe?
Leave a comment and rating below! Share your photos on Instagram with #FriedRiceFiesta to be highlighted on our page.
Fried Rice with Chicken and Egg
A vibrant wok‑kissed bowl that turns leftovers into a festival of flavor.
📝 Ingredients
Rice Base
Chicken & Egg Mix
Sauce & Garnish
👨🍳 Instructions
- 1 Break up day‑old rice, drizzle with a thin layer of oil, and set aside.
- 2 Dice chicken, thaw peas, slice carrots, and whisk eggs with a pinch of salt.
- 3 Heat wok, add oil, and sauté garlic‑ginger until fragrant.
- 4 Add chicken, sear until golden, then stir in peas and carrots.
- 5 Push mixture aside, scramble eggs in the empty space, then fold together.
- 6 Add rice and sauces, toss vigorously for 3‑4 minutes until each grain is glossy.
- 7 Season with salt and pepper, garnish with green onions.
- 8 Serve hot, optionally with lime wedges or extra chili flakes.
- 9 Store leftovers in airtight containers; reheat using preferred method.
- 10 Enjoy and share your creation with friends and family!
🥗 Nutritional Information (per serving)
*Nutritional values are estimates based on standard ingredient data.
📚 You Might Also Like

Chicken Teriyaki Bowl

Thai Basil Fried Rice

Shrimp Pad Thai


💬 Comments & Reviews
Leave a Comment
Comments will appear here once readers start sharing.