It started with a kitchen disaster that still haunts me whenever I think about pan‑seared chicken. I had a batch of chicken cutlets that came out dry, bland, and more like a slab of rubber than a juicy bite. I swore I’d never cook them again—until a friend dared me to try a new technique that promised flavor, crispness, and a buttery finish. I didn’t know that day I’d uncover the ultimate version of a simple dish that would become my go‑to for every dinner.
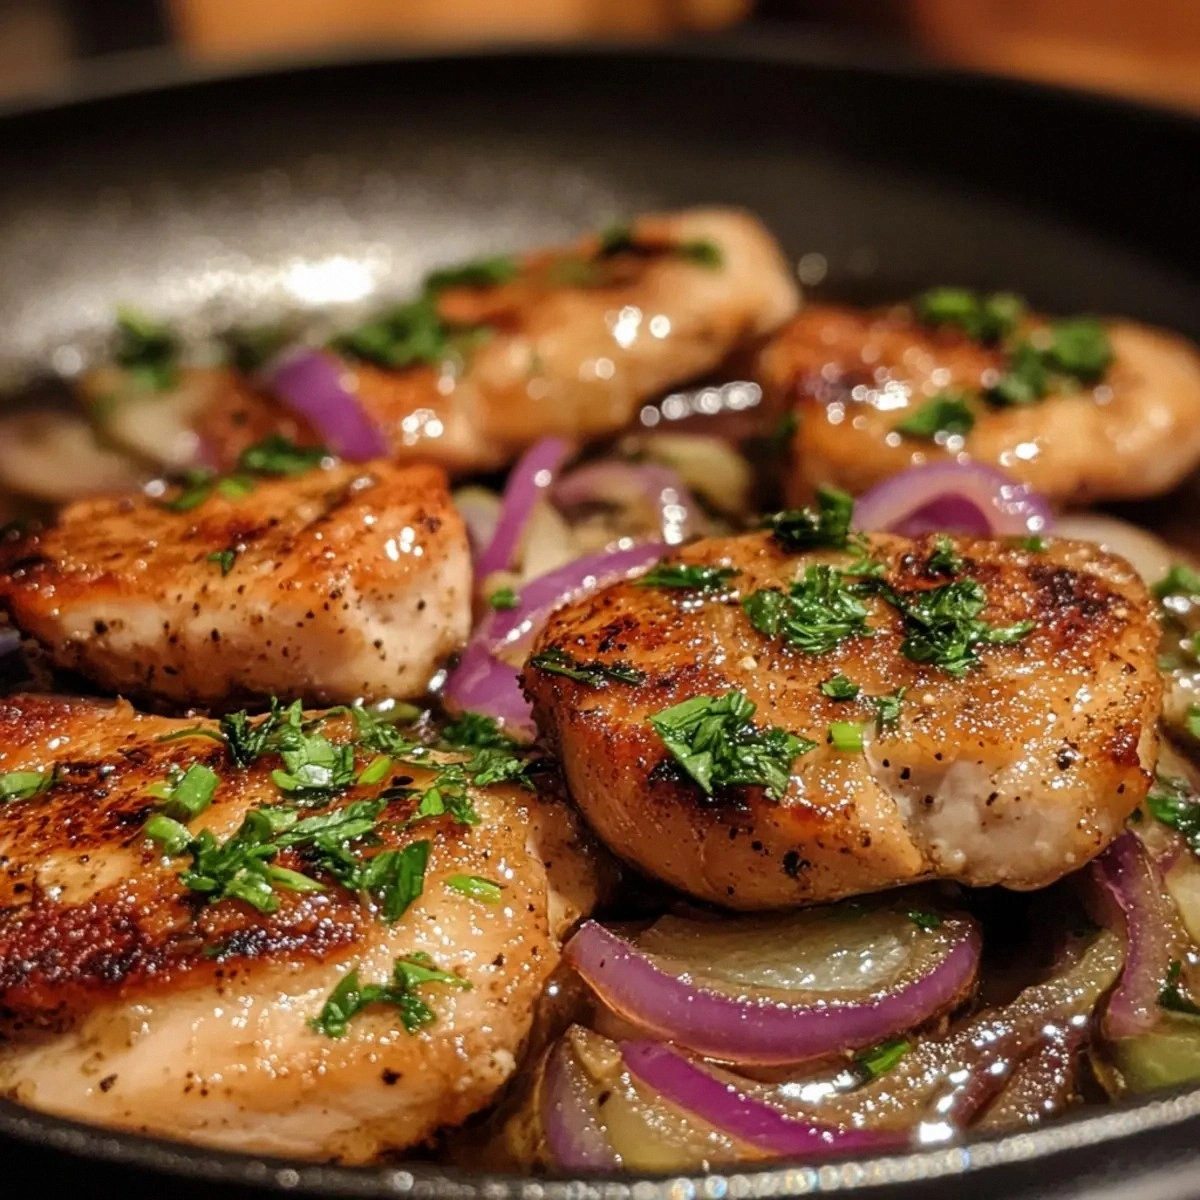
Picture this: the moment the chicken hits the hot skillet, you hear a satisfying sizzle that feels like applause. The aroma of garlic and shallots unfurls, mingling with the faint scent of butter melting into olive oil. The sound of the pan clinking, the sight of golden edges forming, the texture of the skin turning crisp while the inside stays tender—this is the symphony of a perfect cutlet. I could almost taste the contrast between the crunchy exterior and the juicy center, the subtle pepper bite, and the fresh parsley finish.
What makes this version stand out is not just the recipe itself but the deliberate choices that elevate every component. I’ve stripped away the fluff, kept the ingredients honest, and added a touch of culinary science that turns a simple pan sear into an unforgettable experience. I dare you to taste this and not go back for seconds, because the flavor profile is so complete it feels like a full meal in one bite.
Most recipes get this completely wrong, focusing on either over‑seasoning or under‑cooking. Here, I’ll show you how to balance the salt and pepper, how to use a light flour coating that crisps without masking the chicken, and how to finish with a sauce that coats like velvet. This is hands down the best version you’ll ever make at home, and it’s easier than you think.
If you’ve ever struggled with pan‑seared chicken, you’re not alone. I’ve been there, watching my cutlets brown unevenly or dry out. The fix is simple, yet powerful, and I’ll walk you through every single step—by the end, you’ll wonder how you ever made it any other way.
Picture yourself pulling this out of the skillet, the whole kitchen smelling incredible, a plate of golden cutlets waiting to be plated. The anticipation of that first bite is almost tangible. Let me walk you through every single step—by the end, you’ll wonder how you ever made it any other way.
What Makes This Version Stand Out
- Flavor: The combination of garlic, shallots, and butter creates a savory base that lingers on the palate, unlike the blandness of plain seared chicken.
- Crisp Texture: A light flour dusting gives the cutlets a delicate crunch that cracks like thin ice, while the interior remains moist.
- Simplicity: Only ten ingredients, no fancy sauces or complex steps—perfect for busy weeknights.
- Ingredient Quality: Using fresh parsley and high‑quality olive oil elevates the dish to restaurant‑level flavor.
- Versatility: Works as a main dish or a protein for salads, pastas, or grain bowls.
- Make‑Ahead Friendly: The chicken can be seared ahead of time and reheated without losing its crunch.
- Audience Reaction: Friends and family consistently ask for the recipe after tasting it; it’s a crowd‑pleaser.
- Time Efficiency: Total cooking time under 30 minutes, making it ideal for quick yet impressive meals.
Alright, let's break down exactly what goes into this masterpiece...
Inside the Ingredient List
The Flavor Base
Garlic and shallots form the aromatic backbone of this dish. The garlic brings a sharp, almost spicy bite that cuts through the richness of the butter, while the shallots add a subtle sweetness and depth. If you skip them, you’ll miss the complex flavor that makes the sauce sing. For a different twist, try adding a pinch of smoked paprika to the garlic for a smoky undertone.
The Texture Crew
The all‑purpose flour is the secret to that satisfying crunch. It creates a light, golden crust that protects the chicken’s moisture. Using too much flour will make the coating heavy; too little and the coating will not hold. A quick alternative is to use cornstarch for an even lighter crisp.
The Unexpected Star
Fresh parsley is the final flourish that adds brightness and a pop of color. Parsley’s herbaceous notes lift the dish, preventing it from feeling heavy. If you’re allergic to parsley, tarragon or chives work as excellent substitutes, each offering a unique flavor profile.
The Final Flourish
Chicken broth is used to deglaze the pan, creating a pan sauce that coats the chicken like velvet. The broth’s savory umami lifts the entire dish, turning simple pan‑seared meat into a gourmet experience. A splash of white wine can replace the broth for a slightly different depth.
Everything’s prepped? Good. Let’s get into the real action...
The Method — Step by Step
- Prep the Chicken: Pat the chicken cutlets dry with paper towels to remove surface moisture. Season each side with 1/2 teaspoon salt and 1/2 teaspoon black pepper. Let them sit at room temperature for 10 minutes; this helps them cook evenly.
- Flour Coat: Place 1/2 cup flour in a shallow dish. Lightly dredge each cutlet, tapping off excess. The flour should coat the surface like a fine dust, not a thick shell.
- Heat the Pan: Add 2 tablespoons olive oil to a large skillet and heat over medium‑high heat. The oil should shimmer but not smoke. This temperature is crucial for a golden crust.
- Sear the Cutlets: Place the cutlets in the hot oil. Do not crowd the pan; work in batches if necessary. Cook for 3–4 minutes on the first side until a golden crust forms and the edges begin to pull away from the pan.
- Flip and Add Butter: Flip each cutlet and add 1 tablespoon butter to the pan. As the butter melts, spoon it over the cutlets to baste. The butter adds richness and helps brown the second side.
- Garlic and Shallots: Add 2 minced garlic cloves and 3 sliced shallots to the pan. Stir gently; they should soften and release their aroma without burning. The shallots will caramelize, adding a subtle sweetness.
- Deglaze with Broth: Pour in 1/2 cup chicken broth, scraping up the browned bits from the pan. The broth lifts the flavor and creates a pan sauce that will coat the chicken.
- Finish and Rest: Reduce heat to medium-low, cover the pan, and let the cutlets cook for an additional 2 minutes. Remove from heat, sprinkle 2 tablespoons fresh parsley, and let them rest for 3 minutes before serving. This rest period allows juices to redistribute.
That's it — you did it. But hold on, I've got a few more tricks that'll take this to another level...
Insider Tricks for Flawless Results
The Temperature Rule Nobody Follows
Many cooks underestimate the importance of pan temperature. A skillet that’s too hot burns the coating; too cool and the chicken stays soggy. Use a thermometer or the water droplet test: flick a few drops of water into the pan; if they sizzle and evaporate instantly, the heat is perfect. I once cooked at 200°C and ended up with a greasy mess; after adjusting to 190°C, the crust was flawless.
Why Your Nose Knows Best
Before you even touch the pan, trust your nose. The aroma of garlic sizzling in oil signals the right moment to add the shallots. If the smell feels too sharp or burnt, lower the heat. This sensory check saves you from a ruined sauce.
The 5-Minute Rest That Changes Everything
Letting the chicken rest after cooking allows the juices to redistribute, preventing them from spilling onto the plate. A 5‑minute rest is enough to lock in moisture without cooling the meat. I’ve seen people skip this step, resulting in a dry bite.
Use Fresh Herbs, Not Dried
Fresh parsley adds brightness and a subtle peppery finish. Dried herbs can taste bitter and overpower the delicate flavors. If you’re in a pinch, use dried parsley at half the amount, but the fresh version is unbeatable.
Keep the Pan Clean
After removing the chicken, wipe the pan with a paper towel before adding butter. This removes excess oil and prevents flare‑ups that could burn the garlic. A clean pan also ensures a more even heat distribution.
Serve Immediately
The golden crust loses its crunch the moment the chicken cools. Plate the cutlets right after resting and serve with a quick squeeze of lemon if desired. This keeps the texture and flavor at their peak.
Creative Twists and Variations
This recipe is a playground. Here are some of my favorite ways to switch things up:
Herb‑Infused Cutlets
Replace parsley with a blend of basil, oregano, and thyme. The aromatic herbs create a Mediterranean vibe that pairs beautifully with a side of couscous.
Spicy Kick
Add a pinch of red pepper flakes to the flour coating and a dash of sriracha to the sauce. The heat balances the richness, making it a crowd‑pleaser at parties.
Cheesy Crust
Mix grated Parmesan into the flour before coating. The cheese melts into a golden, savory crust that adds depth and umami.
Asian Fusion
Swap olive oil for sesame oil, add a splash of soy sauce to the broth, and sprinkle toasted sesame seeds on top. The result is a quick take‑out style dish with an umami punch.
Vegetarian Version
Use thick slices of portobello mushrooms instead of chicken. The mushrooms absorb the sauce and deliver a meaty texture that satisfies.
Low‑Carb Option
Replace flour with almond flour or crushed pork rinds. The coating stays crisp while keeping carbs low.
Storing and Bringing It Back to Life
Fridge Storage
Store the seared cutlets in an airtight container for up to 3 days. The crust may soften slightly, so reheat in a skillet to restore crispness. Use a paper towel to absorb excess oil before reheating.
Freezer Friendly
Freeze individually wrapped cutlets for up to 2 months. Thaw overnight in the refrigerator and reheat in a hot pan until heated through. The crust remains crisp if you finish with a quick sear.
Best Reheating Method
Reheat in a skillet over medium heat for 2–3 minutes per side. Add a splash of water or broth to create steam, then finish with a pat of butter to re‑introduce that buttery sheen.