I still remember the night I almost burned down the kitchen while trying to make a “simple” dessert. A handful of eggs, a splash of milk, and a vague memory of a Filipino treat that everyone says is a must‑try. The result? A sticky mess that smelled like burnt sugar and left me with a half‑baked lump of confusion. That disaster was the spark that lit my curiosity for the ultimate Ube Cassava Cake. I’m not going to lie—my taste buds were on the edge of a cliff, and I was ready to leap into the unknown.
Fast forward to a quiet Sunday afternoon, I opened a jar of ube halaya, the bright purple goo that’s both sweet and silky. The aroma that hit me was like a warm blanket of tropical rain. I imagined the creamy cassava base, the buttery richness of coconut milk, and the subtle tang of evaporated milk all swirling together. I could already hear the crackle of the oven door opening, the gentle hiss of the cake settling, and the first slice sliding onto a plate with a satisfying, almost velvety snap.
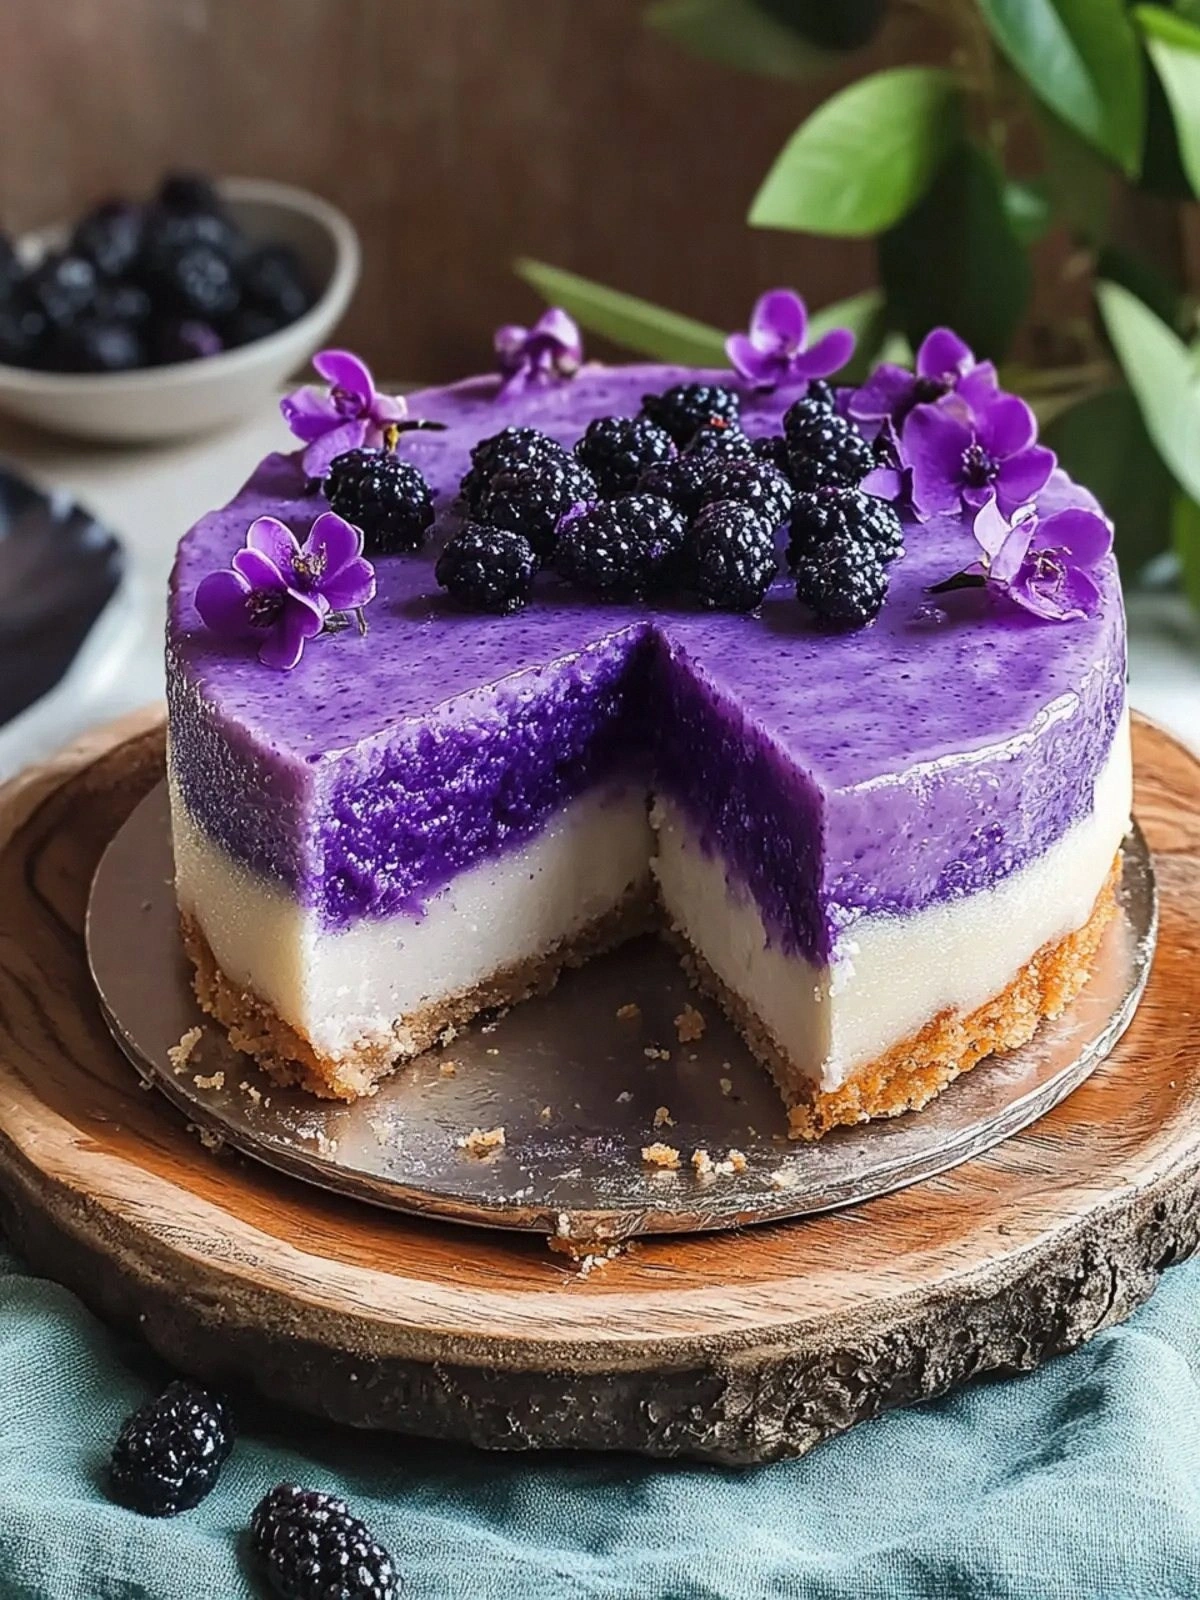
What makes this version stand out? It’s the blend of textures—soft, chewy cassava, silky ube, and a glossy, caramelized top that gives the whole thing a glossy sheen. The flavor profile is balanced; the ube provides a sweet, earthy depth while the coconut milk adds a tropical richness that’s almost like a hug. The inclusion of macapuno strings gives a chewy, jelly‑like contrast that makes each bite an adventure. I dare you to taste this and not go back for seconds; trust me, the first bite will have you craving more.
I’ve spent nights tweaking ratios, testing ovens, and reading countless recipes, and I finally cracked the code. This is hands down the best version you’ll ever make at home. The secret? A precise balance of moisture, the right amount of sweetness, and a finishing touch that makes the cake rise like a cloud. Picture yourself pulling this out of the oven, the whole kitchen smelling incredible, and seeing a golden crown that glistens like a sunrise over the Pacific. The moment your eyes meet that glossy top, you’ll know you’ve achieved something special.
Now, let’s walk through every single step—by the end, you’ll wonder how you ever made it any other way. I’ll keep the tone light, playful, and full of kitchen humor, but I’ll also give you the nitty‑gritty details you need to nail this cake every time. Ready? Let’s get baking.
What Makes This Version Stand Out
Flavor: The combination of ube halaya and cassava creates a unique, sweet, yet earthy taste that’s both comforting and exotic. The ube’s natural sweetness balances the cassava’s mild flavor, resulting in a harmonious palate.
Texture: This cake offers a moist, dense crumb with a slightly chewy center, thanks to the grated cassava, while the top achieves a caramelized, glossy finish that’s a delight to bite into.
Ingredient Quality: Using fresh, high‑quality ube halaya and fresh coconut milk ensures a richer, more authentic flavor profile. The condensed milk adds depth without overpowering the natural sweetness.
Simplicity: Despite its complex flavor profile, the recipe requires only a handful of ingredients, most of which you likely already have in your pantry or fridge.
Make‑Ahead Potential: The cake can be assembled a day ahead, refrigerated, and baked the next day, making it a perfect dessert for gatherings or holidays.
Visual Appeal: The vibrant purple hue of the ube base and the glossy, caramelized top create a dessert that looks as good as it tastes—ideal for Instagram-worthy moments.
Alright, let’s break down exactly what goes into this masterpiece…
Inside the Ingredient List
The Flavor Base
Ube halaya is the star that gives this cake its signature color and sweet, nutty flavor. Its natural sweetness cuts through the richness of the coconut milk and butter, creating a balanced, luscious base. If you can’t find ube halaya, you can use purple sweet potato puree, but the texture will be slightly denser.
The condensed milk acts as a sweetener and a binder. It introduces a subtle caramel note that pairs beautifully with the ube’s earthiness. If you’re lactose intolerant, a dairy‑free condensed milk will work; just watch the sweetness level as it can be slightly less sweet.
Coconut milk provides that tropical, buttery flavor that elevates the entire cake. The first cup is used in the batter, while the second cup is folded in at the end to keep the mixture moist and luscious. Fresh coconut milk yields the best flavor, but a high‑quality canned version is acceptable if fresh isn’t available.
The Texture Crew
Grated cassava is the backbone of the cake’s texture. It absorbs liquid, creating a dense, chewy crumb that’s reminiscent of a traditional Filipino cassava cake but with a modern twist. Be sure to grate the cassava finely so it blends seamlessly with the other ingredients.
The eggs bind everything together, providing structure and a slight lift. Three large eggs are perfect for this amount of batter—too many and the cake will be overly airy; too few and it will collapse.
Butter or vegetable oil adds richness and helps the batter stay moist. A half cup of either is sufficient, but using butter gives a more buttery flavor, while oil keeps the cake lighter.
The Unexpected Star
Macapuno strings are the chewy, jelly‑like surprise that adds a playful texture contrast. They’re a type of coconut jelly that melts slightly when baked, leaving a sweet, chewy center in every bite. If you can’t find macapuno, coconut gel or even small pieces of chewy candied coconut can work as a substitute.
The small amount of all‑purpose flour (¼ cup) helps stabilize the batter, preventing it from becoming too runny. It’s a subtle touch that keeps the cake’s structure intact.
The Final Flourish
The second cup of coconut milk, folded in at the end, gives the cake a glossy sheen and keeps the interior moist. This step is crucial—skipping it will result in a drier, less decadent cake.
The extra half cup of sugar is used to sweeten the batter to the right level. If you prefer a less sweet cake, reduce this amount by a quarter cup. The sugar also helps in caramelizing the top, giving that beautiful golden crust.
Everything’s prepped? Good. Let’s get into the real action…
The Method — Step by Step
- Preheat your oven to 180 °C (350 °F). Grease a 9‑inch round cake pan with butter or line it with parchment paper. The heat will be gentle but steady, ensuring the cake rises evenly without burning the top.
- In a large mixing bowl, combine the grated cassava, ube halaya, and 1 cup of coconut milk. Use a hand mixer or whisk until the mixture is smooth and the ube is fully incorporated. The batter should be thick but pourable.
- Add the evaporated milk, condensed milk, and the ½ cup butter (or vegetable oil). Whisk until the fats are fully blended and the batter becomes silky. This step is crucial for a moist crumb.
- In a separate bowl, beat the eggs until slightly frothy. Fold the eggs into the batter gently, being careful not to overmix. Overmixing can make the cake tough.
- Stir in the ½ cup sugar, the ¼ cup all‑purpose flour, and the ¼ cup butter. The flour helps stabilize the batter, while the extra butter adds richness. Mix until everything is evenly distributed.
- Fold in the macapuno strings, ensuring they’re evenly distributed. The strings should be slightly submerged in the batter, giving each slice a chewy surprise.
- Pour the batter into the prepared pan, smoothing the top with a spatula. Tap the pan gently on the counter to release any air bubbles, which will prevent uneven rising.
- Bake for 35–40 minutes, or until a toothpick inserted into the center comes out clean and the top has a golden‑brown hue. The cake should smell toasty, and the edges will start pulling away from the pan.
- Remove the cake from the oven and let it cool in the pan for 10 minutes. Then transfer it to a wire rack to cool completely. This resting period allows the flavors to meld and the cake to set properly.
- Once cooled, fold in the final cup of coconut milk. This step ensures a glossy finish and keeps the interior moist. The batter should look shiny and slightly thicker.
That’s it—you did it. But hold on, I’ve got a few more tricks that’ll take this to another level.
Insider Tricks for Flawless Results
The Temperature Rule Nobody Follows
Most bakers bake at 350 °F, but that’s not ideal for this cake. Lower the oven to 180 °C (350 °F) and bake slowly. This gentle heat allows the cake to rise evenly, ensuring the center stays moist while the top caramelizes beautifully. I once baked at 400 °F and the top charred before the center cooked, ruining the experience.
Why Your Nose Knows Best
Trust your nose. When the cake is baking, a warm, sweet aroma that’s slightly caramelized indicates that the sugar is caramelizing just right. If the scent leans too much toward raw sugar, the cake might be underbaked. If it smells burnt, you’re overbaking—time to pull it out.
The 5‑Minute Rest That Changes Everything
After you remove the cake, let it rest in the pan for exactly five minutes. During this rest, the cake continues to cook slightly and the juices redistribute. This step prevents a dry crumb and gives the cake a silky finish. I used to skip this step and ended up with a cake that felt like it was missing moisture.
The Sweetness Balance
If you find the cake too sweet, reduce the sugar by a quarter cup. If you’re a sugar‑loving person, you can add an extra tablespoon of condensed milk for extra richness. The key is to taste the batter before baking; a little sweetness goes a long way.
The Final Fold
Folding in the final cup of coconut milk after baking is a game‑changer. It gives the cake a glossy finish that looks as good as it tastes. If you forget this step, the cake will still be delicious but will lack that glossy sheen that makes it Instagram‑ready.
The Cooling Trick
Cool the cake on a wire rack, but keep the rack in a warm area for the first 10 minutes. This prevents a sudden temperature change that can cause the cake to crack or become dense. I’ve seen cakes that cracked on the top after cooling too quickly—definitely avoid that.
Creative Twists and Variations
This recipe is a playground. Here are some of my favorite ways to switch things up:
Chocolate Ube Layer
Add a thin layer of melted dark chocolate between the batter and the macapuno strings. The chocolate adds depth and pairs well with the ube’s earthy sweetness.
Nutty Crunch
Fold in a handful of toasted almond or cashew pieces before baking. The nuts add a pleasant crunch and a savory note that balances the sweetness.
Citrus Twist
Add a tablespoon of lemon zest to the batter. The citrus brightens the flavor profile and cuts through the richness, giving a fresh finish.
Spiced Variation
Sprinkle a pinch of ground cardamom or cinnamon into the batter. The spices add warmth and complexity, turning the cake into a cozy fall dessert.
Gluten‑Free Version
Replace the all‑purpose flour with a gluten‑free flour blend. The cake will maintain its structure while being suitable for gluten‑sensitive diners.
Mini Cake Pops
Once baked and cooled, cut the cake into bite‑sized cubes, dip them in melted chocolate, and roll in coconut flakes. These cake pops are perfect for parties and bring a fun, portable twist.
Storing and Bringing It Back to Life
Fridge Storage
Wrap the cake tightly in plastic wrap and store in the refrigerator for up to 4 days. The moisture from the coconut milk keeps it fresh, but the wrap prevents it from drying out. When ready to serve, let it sit at room temperature for about 30 minutes to soften.
Freezer Friendly
Slice the cake into portions before freezing. Wrap each slice individually in foil and place in a freezer bag. Freeze for up to 3 months. Thaw overnight in the refrigerator, then let sit at room temperature for 20 minutes before serving.
Best Reheating Method
Reheat slices in the microwave on medium power for 20–30 seconds, or warm them in a preheated oven at 150 °C (300 °F) for 5 minutes. Add a tiny splash of water before reheating—it steams the cake back to perfection and keeps it moist.