
A hearty, smoky stew that brings warmth to any table, perfect for cozy evenings or lively gatherings.
When I was a teenager, my family would gather around the kitchen every Sunday night, the air thick with the scent of simmering tomatoes, cumin, and slow‑cooked beef. I remember my grandmother ladling a steaming bowl of chili into mismatched mugs while we laughed about the week’s mishaps. That memory has become a cornerstone of my cooking philosophy: food is a conduit for stories, comfort, and community.
Chili, in its many forms, has traveled from the dusty streets of Mexico to the bustling diners of the American Southwest. Its roots lie in a blend of indigenous chilies, beans, and the hearty meats introduced by Spanish colonists. The version I’m sharing today honors that heritage while adding a modern twist—plump kidney beans, juicy tomatoes, and a balanced spice profile that sings without overwhelming.
In this guide, you’ll learn how to layer flavors, achieve the perfect texture, and customize the heat level to suit any palate. I’ll walk you through each step, from browning the beef to the final garnish, ensuring you end up with a bowl that’s both deeply satisfying and visually stunning.
So tie on your apron, preheat your pot, and let’s dive into a chili that will become a staple in your kitchen for years to come.
🌟 Why This Recipe Will Win Your Heart
This chili isn’t just a meal; it’s an experience that brings warmth, depth, and a touch of celebration to every bite.
- ✨ Perfect Balance of Spice and Sweet: The combination of smoked paprika, cumin, and a splash of dark chocolate creates a nuanced heat that mellows into a subtle sweetness as the stew simmers.
- ✨ Robust, Tender Beef: By searing the beef first, you lock in juices, ensuring each bite is succulent and full‑bodied.
- ✨ Bean‑Powered Protein: Kidney beans add a creamy texture while boosting the dish’s protein and fiber content.
- ✨ Versatile Serving Options: Serve it over rice, with cornbread, or simply in a bowl—each variation feels fresh.
- ✨ Easy to Scale: Whether feeding a family of six or a crowd of twenty, the recipe scales effortlessly with the portion adjuster.
- ✨ Crowd‑Pleaser: Its bold flavors and comforting consistency make it a favorite at potlucks, game nights, and family gatherings.
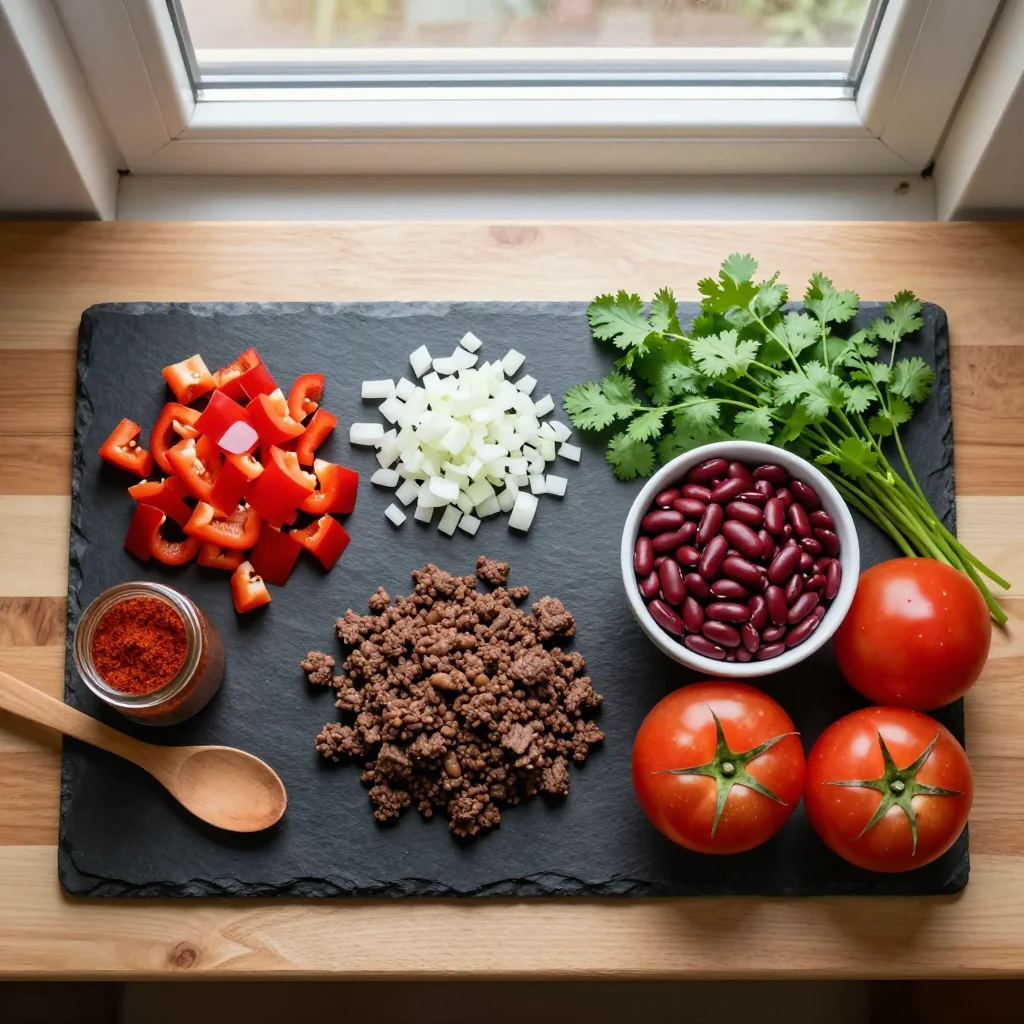
🥗 Ingredients
📝 Complete Ingredient List
For the Chili Base:
For the Beans & Tomatoes:
For Garnish:
🔍 Focus on Key Ingredients
Ground Beef (80 % lean)
Choosing beef with a little fat ensures a juicy, flavorful base. The fat renders during browning, creating a rich fond that forms the foundation of the sauce. Opt for grass‑fed beef when possible for a slightly sweeter, more complex profile.
Kidney Beans
Kidney beans are not only hearty but also absorb the spices beautifully. Rinsing them removes excess sodium and any metallic after‑taste from the can. If you prefer a firmer texture, give them a quick boil before adding to the stew.
Dark Chocolate (optional)
A small piece of high‑quality dark chocolate (about 20 g) adds depth without making the dish taste like dessert. The bitterness balances the acidity of the tomatoes and the heat of the chilies, creating a harmonious flavor.
🔄 Quick Substitutions
| If you don’t have… | Use instead… |
|---|---|
| Ground beef | Ground turkey or pork |
| Kidney beans | Black beans or pinto beans |
| Beef broth | Vegetable broth or water with bouillon cube |
👨🍳 Step‑by‑Step Instructions
Follow these detailed steps to create a chili that’s layered, aromatic, and perfectly balanced.
📋 Phase 1: Prep & Mise en Place
Gather your tools, measure ingredients, and set the stage for a smooth cooking process.
Dice the onion and mince the garlic
Finely dice the onion so it melts into the sauce, and mince the garlic to release its pungent aroma. A sharp knife will give you clean cuts, which helps the onion soften evenly during sautéing.
Measure out spices and broth
Place cumin, smoked paprika, and optional chili powder into a small bowl. Having them ready prevents over‑seasoning and ensures even distribution.
🔥 Phase 2: Cooking & Assembly
Build the flavor base, then simmer to meld everything together.
Brown the ground beef
Heat a large Dutch oven over medium‑high heat. Add the olive oil, then the beef, breaking it apart with a wooden spoon. Cook until the meat loses its pink color and starts to develop a deep brown crust, about 6‑8 minutes. This Maillard reaction adds a savory depth that’s essential for a great chili.
Sauté onion and garlic
Push the browned beef to one side, add the diced onion, and sauté until translucent, about 3‑4 minutes. Add the minced garlic and cook for another 30 seconds, being careful not to burn the garlic.
Incorporate spices and tomatoes
Stir in the smoked paprika, cumin, and optional chili powder, letting the spices toast for 1 minute. Then add the canned diced tomatoes, tomato paste, and a pinch of brown sugar. Scrape the bottom of the pot to release any browned bits.
Add beans and broth
Stir in the kidney beans and beef broth, bringing the mixture to a gentle boil. Reduce the heat to low, cover, and let it simmer for 45‑60 minutes, stirring occasionally. The long simmer allows flavors to meld and the sauce to thicken naturally.
✨ Phase 3: Finishing Touches & Plating
Finalize the dish, adjust seasoning, and serve with style.
Season to taste
Taste the chili and add more salt, pepper, or a dash of hot sauce if desired. If you used dark chocolate, melt it into the sauce now for a glossy finish.
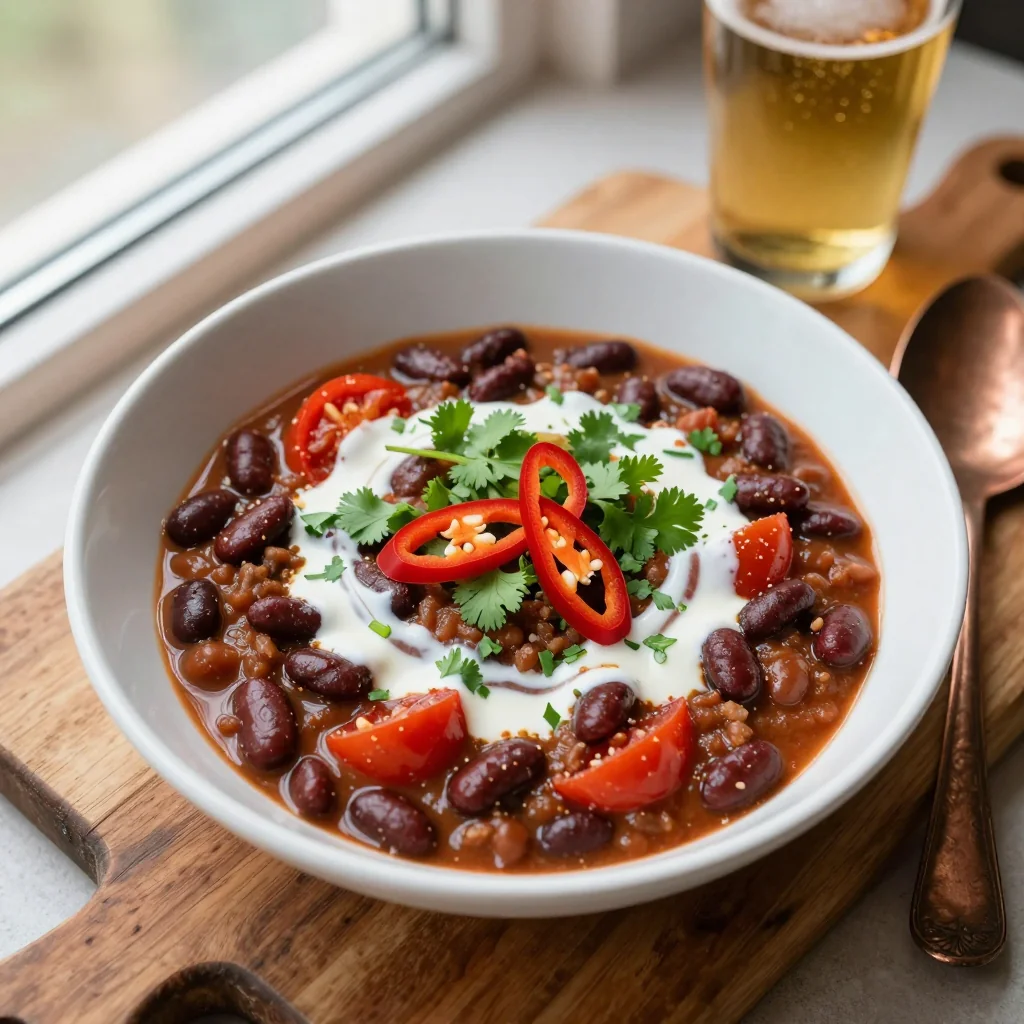
Garnish and serve
Ladle the hot chili into bowls, then top each with a dollop of sour cream, shredded cheddar, fresh cilantro, avocado slices, and a wedge of lime. The bright acidity from the lime cuts through the richness, while the avocado adds buttery creaminess.
Accompany with sides
Serve alongside warm cornbread, fluffy rice, or a simple green salad. The side will soak up the sauce and balance the heat.
💡 Expert Tips & Tricks
🛒 Choosing the Right Ingredients
Start with high‑quality ground beef; 80 % lean gives enough fat for flavor without being greasy. Look for beans that are firm to the bite—those that have been sitting on the shelf too long can become mushy when cooked. Fresh cilantro adds a bright, citrusy note that dried herbs simply can’t match.
🔪 Preparation Techniques
When browning meat, avoid moving it too much. Let it develop a crust, then flip. This creates caramelized bits that enrich the sauce. For the onion, a quick flash in hot oil before adding the garlic prevents the garlic from burning and turning bitter.
🌡️ Mastering the Cooking Process
Simmering low and slow is the secret to a thick, flavorful chili. High heat can cause the sauce to evaporate too quickly, leaving a thin broth. Keep the pot partially covered to retain moisture while still allowing steam to escape.
🍽️ Presentation & Service
Serve the chili in a wide, shallow bowl to showcase its deep color. Add a contrasting garnish—bright green cilantro, creamy avocado, and a swirl of sour cream—to create visual interest and layers of texture.
🏆 Pro Tips
Elevate your chili from good to unforgettable with these professional insights.
- 🎯 Build a Flavor Base with a Mirepoix: Adding a carrot and celery along with the onion creates a classic French mirepoix that deepens the aromatic foundation.
- 🎯 Use a Dutch Oven: The heavy cast‑iron walls distribute heat evenly, preventing hot spots that can scorch the bottom.
- 🎯 Finish with a Touch of Espresso: A teaspoon of finely brewed espresso adds a subtle earthiness that complements the chocolate and spices.
- 🎯 Deglaze with Red Wine: After browning the meat, pour a splash of dry red wine to dissolve the caramelized bits; this adds acidity and depth.
- 🎯 Add a Pinch of Cinnamon: A whisper of cinnamon balances the heat and adds warmth without being overtly spicy.
- 🎯 Rest Before Serving: Let the chili sit for 10‑15 minutes off the heat; this allows flavors to marry and the sauce to thicken further.
"A great chili is a conversation between heat, sweet, and savory—listen, and it will tell you its story." — Chef Gabriela Hernández
🔄 Variations & Adaptations
Explore creative twists that let you tailor the chili to different dietary needs and flavor preferences.
🥬 Vegetarian/Vegan Version
Swap ground beef for textured vegetable protein (TVP) or crumbled tempeh. Use vegetable broth instead of beef broth, and add a tablespoon of soy sauce for umami. Replace sour cream with a plant‑based yogurt and use vegan cheese or nutritional yeast for the topping.
- TVP (reconstituted) – provides a meaty texture.
- Tempeh, cubed – adds a nutty flavor and firm bite.
🌶️ Flavor Variations
Adjust the chili’s character by playing with regional spices and additional ingredients.
Spicy Version
Increase the amount of fresh jalapeños or add a diced habanero for a fiery kick. Finish with a splash of hot sauce and a pinch of cayenne.
Mediterranean Version
Introduce olives, sun‑dried tomatoes, and a pinch of oregano. Serve over couscous and garnish with feta cheese.
Asian‑Inspired Version
Add a tablespoon of soy sauce, a splash of sesame oil, and a handful of chopped bok choy. Finish with toasted sesame seeds and a drizzle of sriracha.
⚠️ Dietary Adaptations
Gluten‑Free
All ingredients are naturally gluten‑free; just ensure the broth and any added sauces are certified gluten‑free.
Lactose‑Free
Use dairy‑free sour cream and omit the cheese, or replace with a lactose‑free alternative.
Low‑Calorie
Swap ground beef for lean ground turkey and reduce the amount of oil. Increase the proportion of beans and vegetables to keep the dish filling while cutting calories.
👶 Family/Kids Version
Reduce the heat by omitting the optional chili powder and using mild paprika only. Add a handful of sweet corn kernels for a pop of sweetness that kids love. Serve with a side of cheesy quesadillas for extra appeal.
📦 Storage & Reheating
🧊 Conservation
Refrigerator
- Duration: 4 days
- Recommended container: airtight glass or BPA‑free plastic
- Tip: Store in a shallow container for faster cooling.
Freezer
- Duration: 3 months
- Method: Portion into freezer‑safe bags, remove air, label with date.
- Defrosting: Transfer to fridge overnight or use the defrost setting on your microwave.
💡 For best texture, reheat frozen chili directly from frozen using the stovetop method.
♨️ Reheating
Oven (Recommended)
- Preheat to 180 °C (350 °F).
- Cover the dish with aluminum foil.
- Heat for 20‑25 minutes, stirring halfway.
- Remove foil, stir, and continue for 5‑7 minutes to develop a slight crust on the edges.
Microwave (Quick)
- Place a serving in a microwave‑safe bowl.
- Cover with a microwave‑safe lid.
- Heat on medium power for 2‑3 minutes, stir, then heat another 1‑2 minutes if needed.
Stovetop
Combine the leftover chili with a splash of broth or water, and simmer over low heat, stirring frequently, until heated through.
🍷 Perfect Pairings
🥗 Side Dishes
- Homemade Cornbread: Its buttery crumb balances the chili’s heat and adds a comforting texture.
- Mexican Rice: Fluffy rice soaks up the sauce, making each bite satisfying.
- Simple Green Salad: A crisp lettuce mix with a citrus vinaigrette cuts through the richness.
🍷 Wine & Drink Pairings
- Zinfandel: Its bold fruit notes complement the smoky spices.
- Malbec: Offers a smooth tannic structure that pairs well with beef.
- Non‑Alcoholic: Sparkling water with a splash of lime or a ginger‑ale mocktail.
🍰 Dessert Suggestions
Finish the meal with a light, citrus‑infused dessert like key‑lime pie or a refreshing mango sorbet. The acidity will cleanse the palate after the hearty chili.
❓ Frequently Asked Questions
Q: Can I make this chili in a slow cooker?
A: Absolutely! After browning the beef and sautéing the aromatics, transfer everything to a slow cooker, add the beans, tomatoes, and broth, then cook on low for 6‑8 hours. The slow cooker will develop a deep, melded flavor similar to stovetop simmering.
Q: How do I adjust the heat level?
A: For milder chili, reduce or omit the optional chili powder and use only sweet paprika. For extra heat, increase the amount of fresh chilies, add a diced jalapeño, or incorporate a teaspoon of cayenne pepper. Taste as you go.
Q: What if I don’t have canned tomatoes?
A: Fresh tomatoes work beautifully—blanch, peel, and chop them. Use about 4‑5 medium tomatoes, simmered a bit longer to break down the flesh.
Q: My chili turned out too watery. What can I do?
A: Simmer uncovered for the last 15‑20 minutes to reduce excess liquid. You can also stir in a tablespoon of masa harina (corn flour) dissolved in water to thicken without altering flavor.
Q: Can I freeze the chili with the beans already added?
A: Yes, you can. Beans hold up well in the freezer, but they may become slightly softer. Thaw and reheat gently, adding a splash of broth if needed.
Q: How far in advance can I prepare the chili?
A: The flavors improve after a day in the refrigerator. Prepare up to 24 hours ahead, store in an airtight container, and reheat before serving.
🎉 Let’s Get Cooking!
This Beef Chili with Kidney Beans and Tomatoes is more than a recipe—it’s a celebration of bold flavors, comforting textures, and the joy of sharing a hearty meal with loved ones. By mastering the balance of spices, the technique of browning meat, and the art of slow simmering, you’ll create a dish that feels both familiar and exciting. Whether you serve it at a family dinner or a festive gathering, it’s sure to become a beloved staple in your culinary repertoire.
Don’t forget to share your results! Snap a photo, leave a comment, and let us know how you customized the recipe. Your feedback helps the community grow, and we love seeing your creative twists.
Have you tried this recipe?
Leave a comment and rating below! Share your photos on Instagram with #FiestaChili for a chance to be featured.
Beef Chili with Kidney Beans and Tomatoes
A bold, smoky stew that warms the soul and satisfies every craving.
📝 Ingredients
Chili Base
Beans & Tomatoes
Garnish
👨🍳 Instructions
- 1 Brown the ground beef in a large pot until fully browned.
- 2 Sauté onion and garlic until fragrant.
- 3 Add spices, tomato paste, and canned tomatoes; stir well.
- 4 Stir in kidney beans and beef broth; bring to a simmer.
- 5 Simmer uncovered for 45‑60 minutes, stirring occasionally.
- 6 Adjust seasoning, add dark chocolate if using.
- 7 Serve hot, garnished with sour cream, cheese, cilantro, avocado, and lime.
- 8 Pair with cornbread or rice, and enjoy with friends.
- 9 Store leftovers in airtight containers for up to 4 days.
- 10 Reheat using the oven or stovetop method for best results.
🥗 Nutrition Facts (per serving)
*Nutritional values are estimates based on typical ingredient quantities.
📚 You Might Also Like
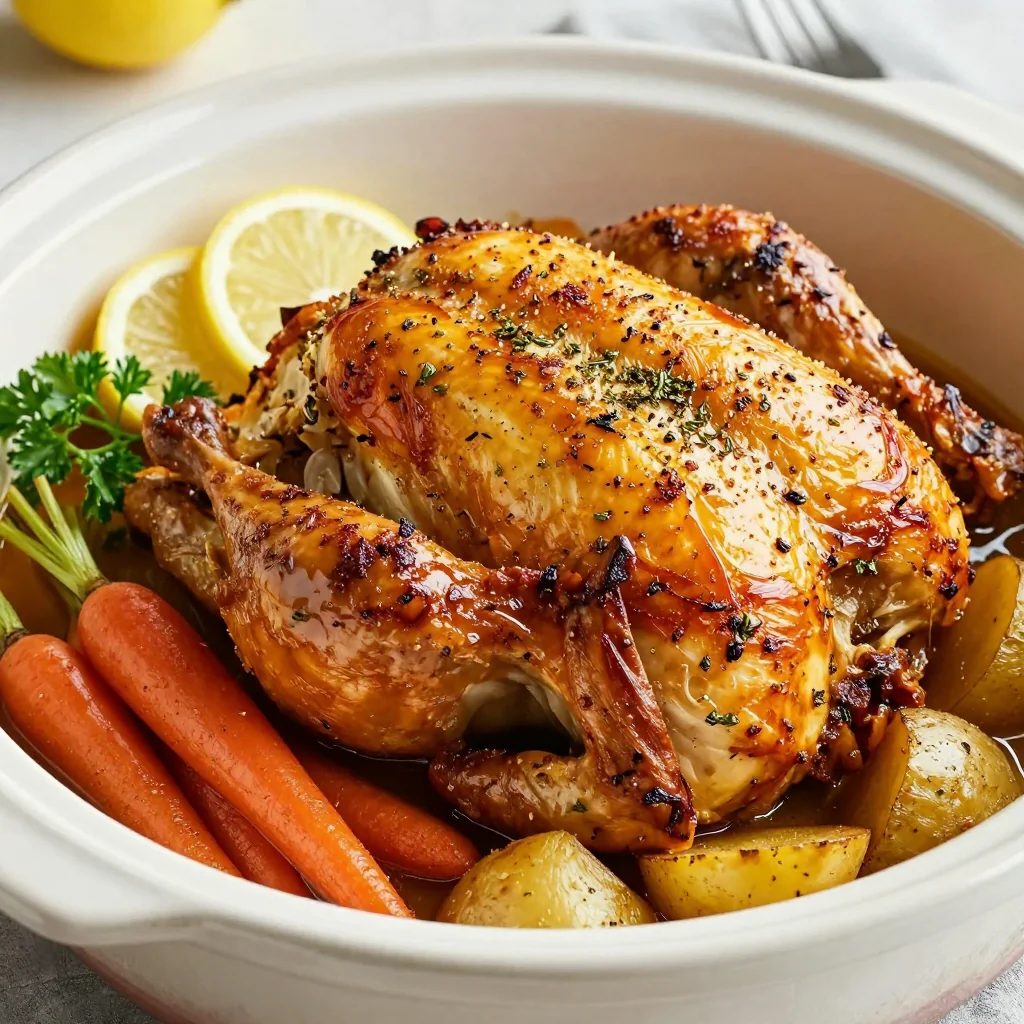
Spicy Chicken Enchiladas
Classic Beef Stew
Spicy Black Bean Soup
Spicy Chicken Tacos
💬 Comments & Reviews
[Space for reader comments]


Leave a Comment